Three Capes Track
I’m down in Tasmania and I’m waiting at a wharf where a boat will pick us up and drop us off at the trailhead.

Day 1 - Leave it all behind
Port Arthur to Surveyors, 4 km
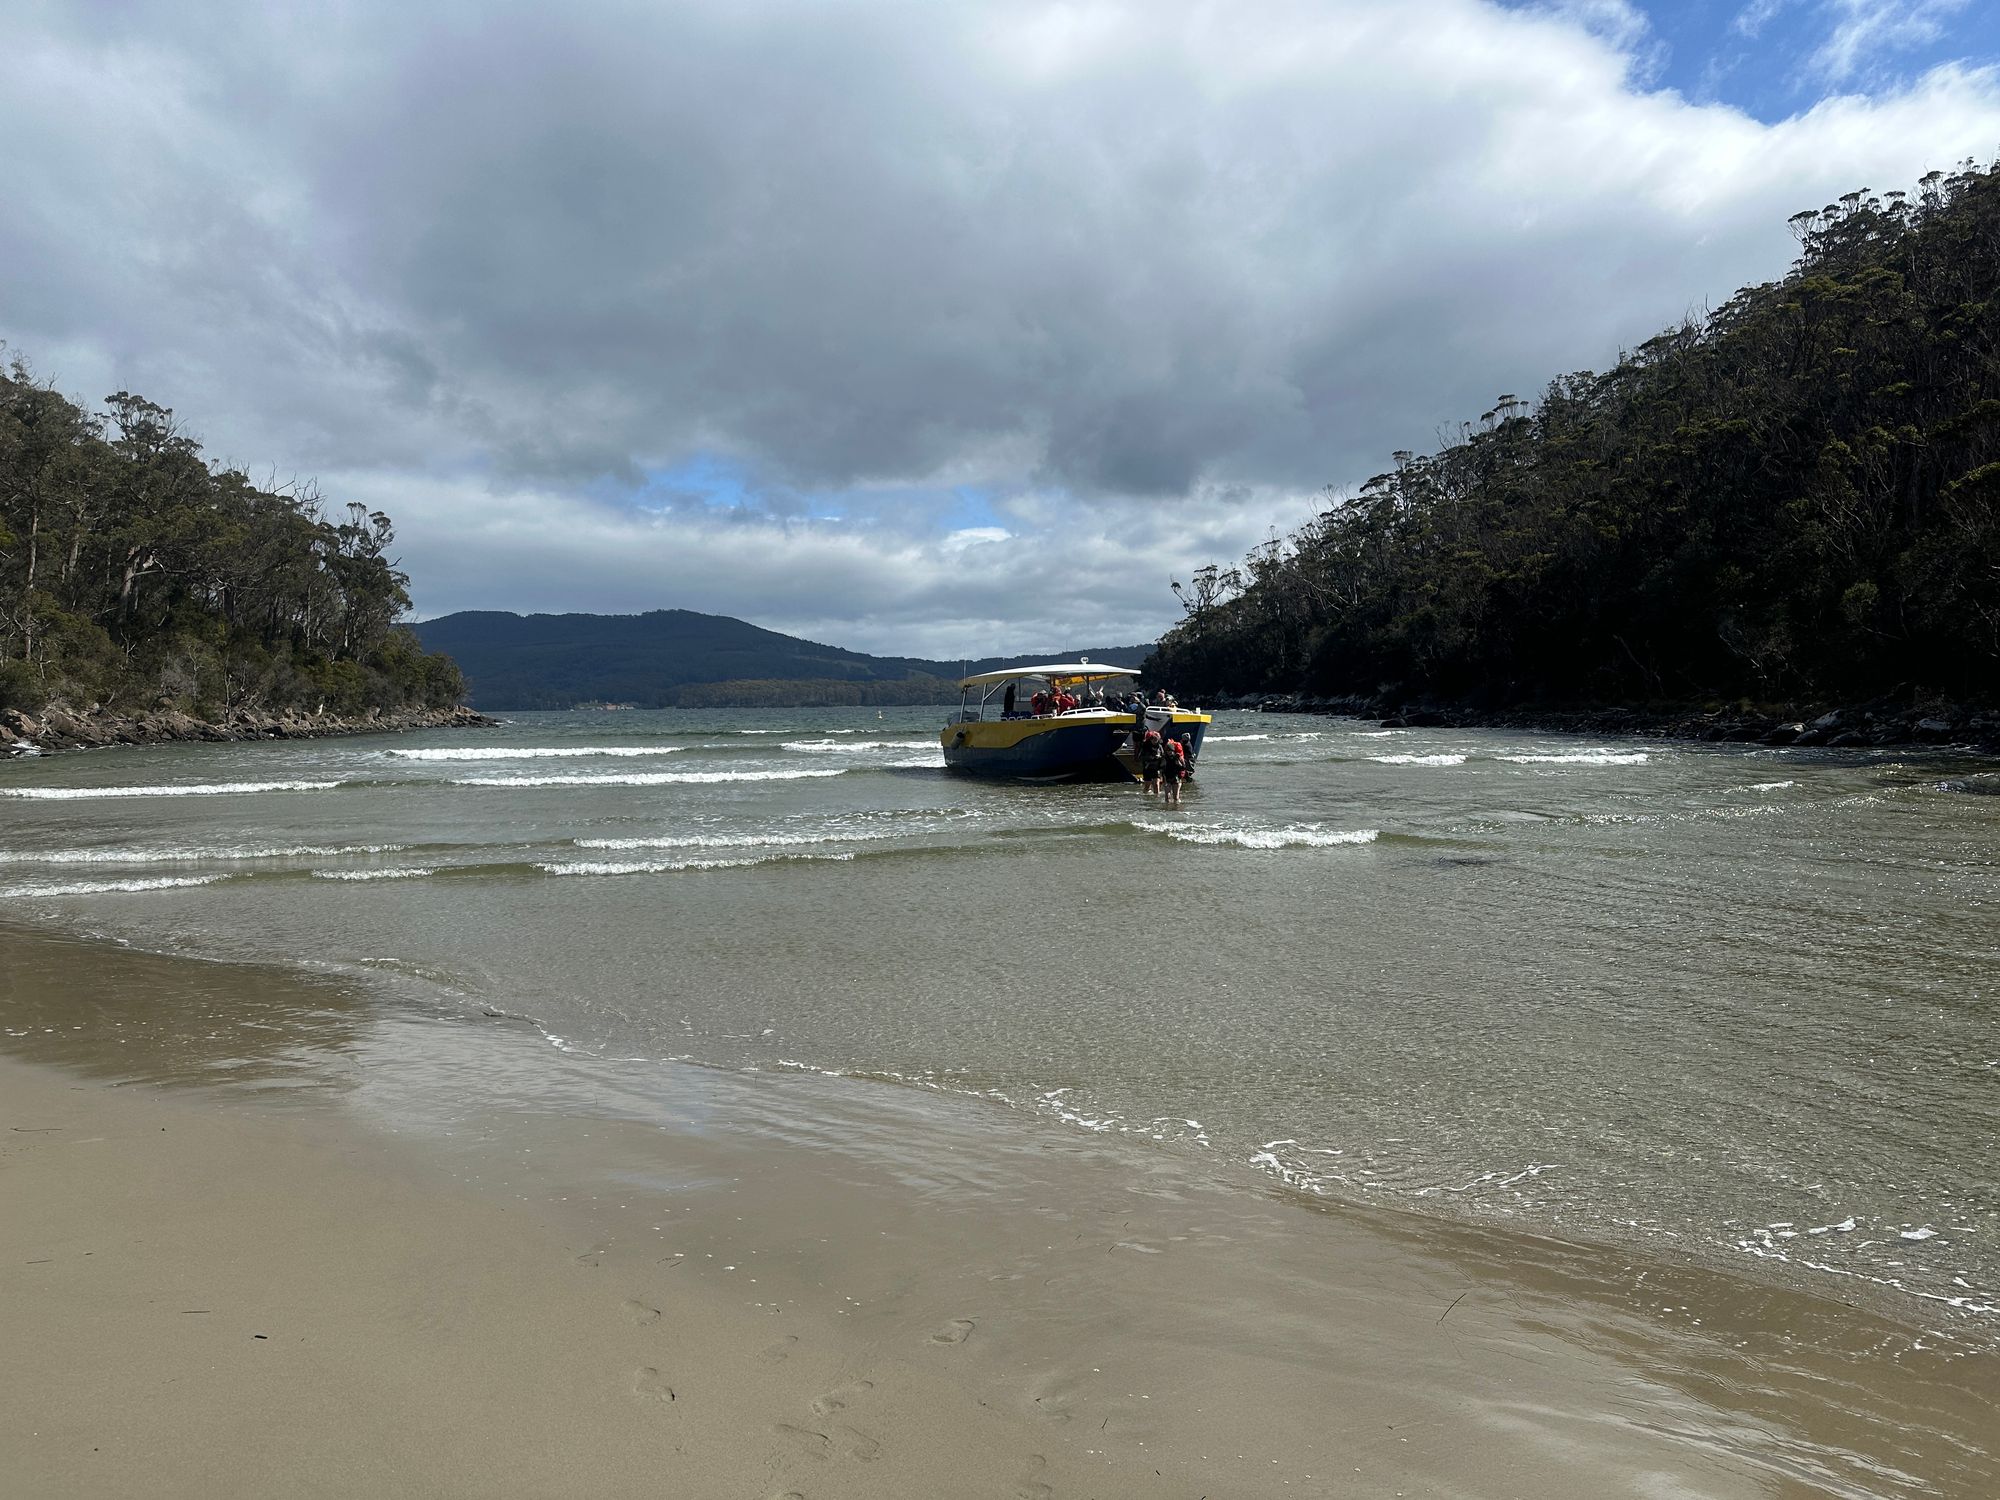
I’m down in Tasmania and about to embark on the three capes track. I’m waiting at a wharf where a boat will pick us up and drop us off at the trailhead which is a remote beach. It’s one hell of a start for such an epic hike.
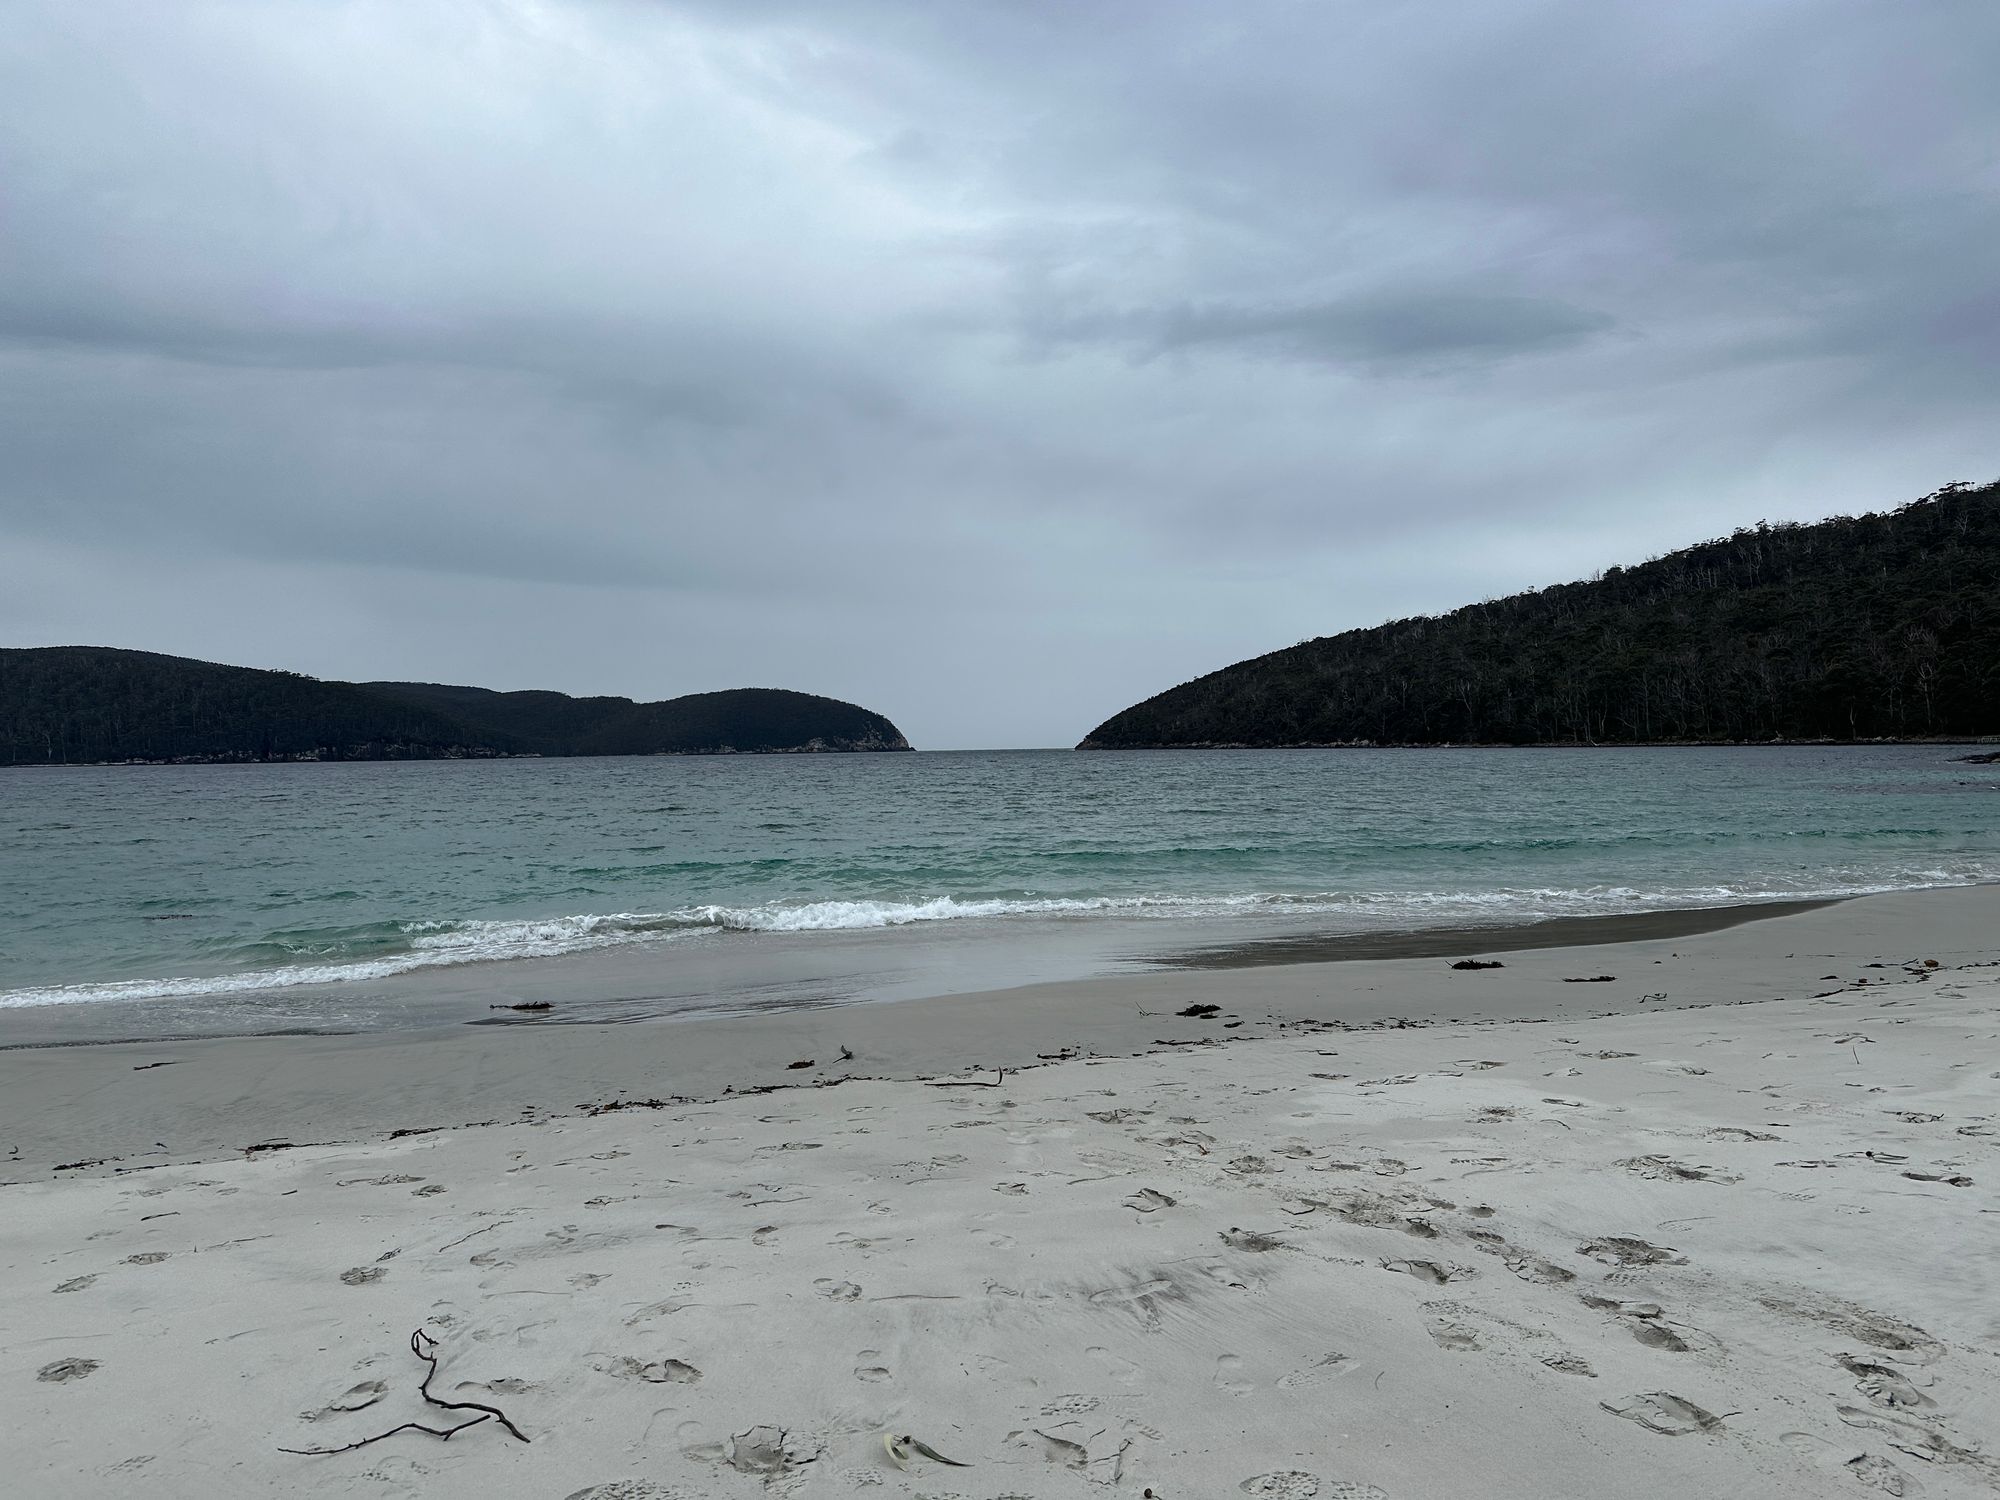
As the boat pulls up to Denmans Cove, everybody steps into the knee-high water and walks towards the beach, carrying all their gear for the next four days on their backs.
I’m quite excited because this is my first bush walk in Tasmania. After drying off our feet and putting our shoes back on, I start walking up the hill, as the track rises in elevation I get these sweeping views of Port Arthur.

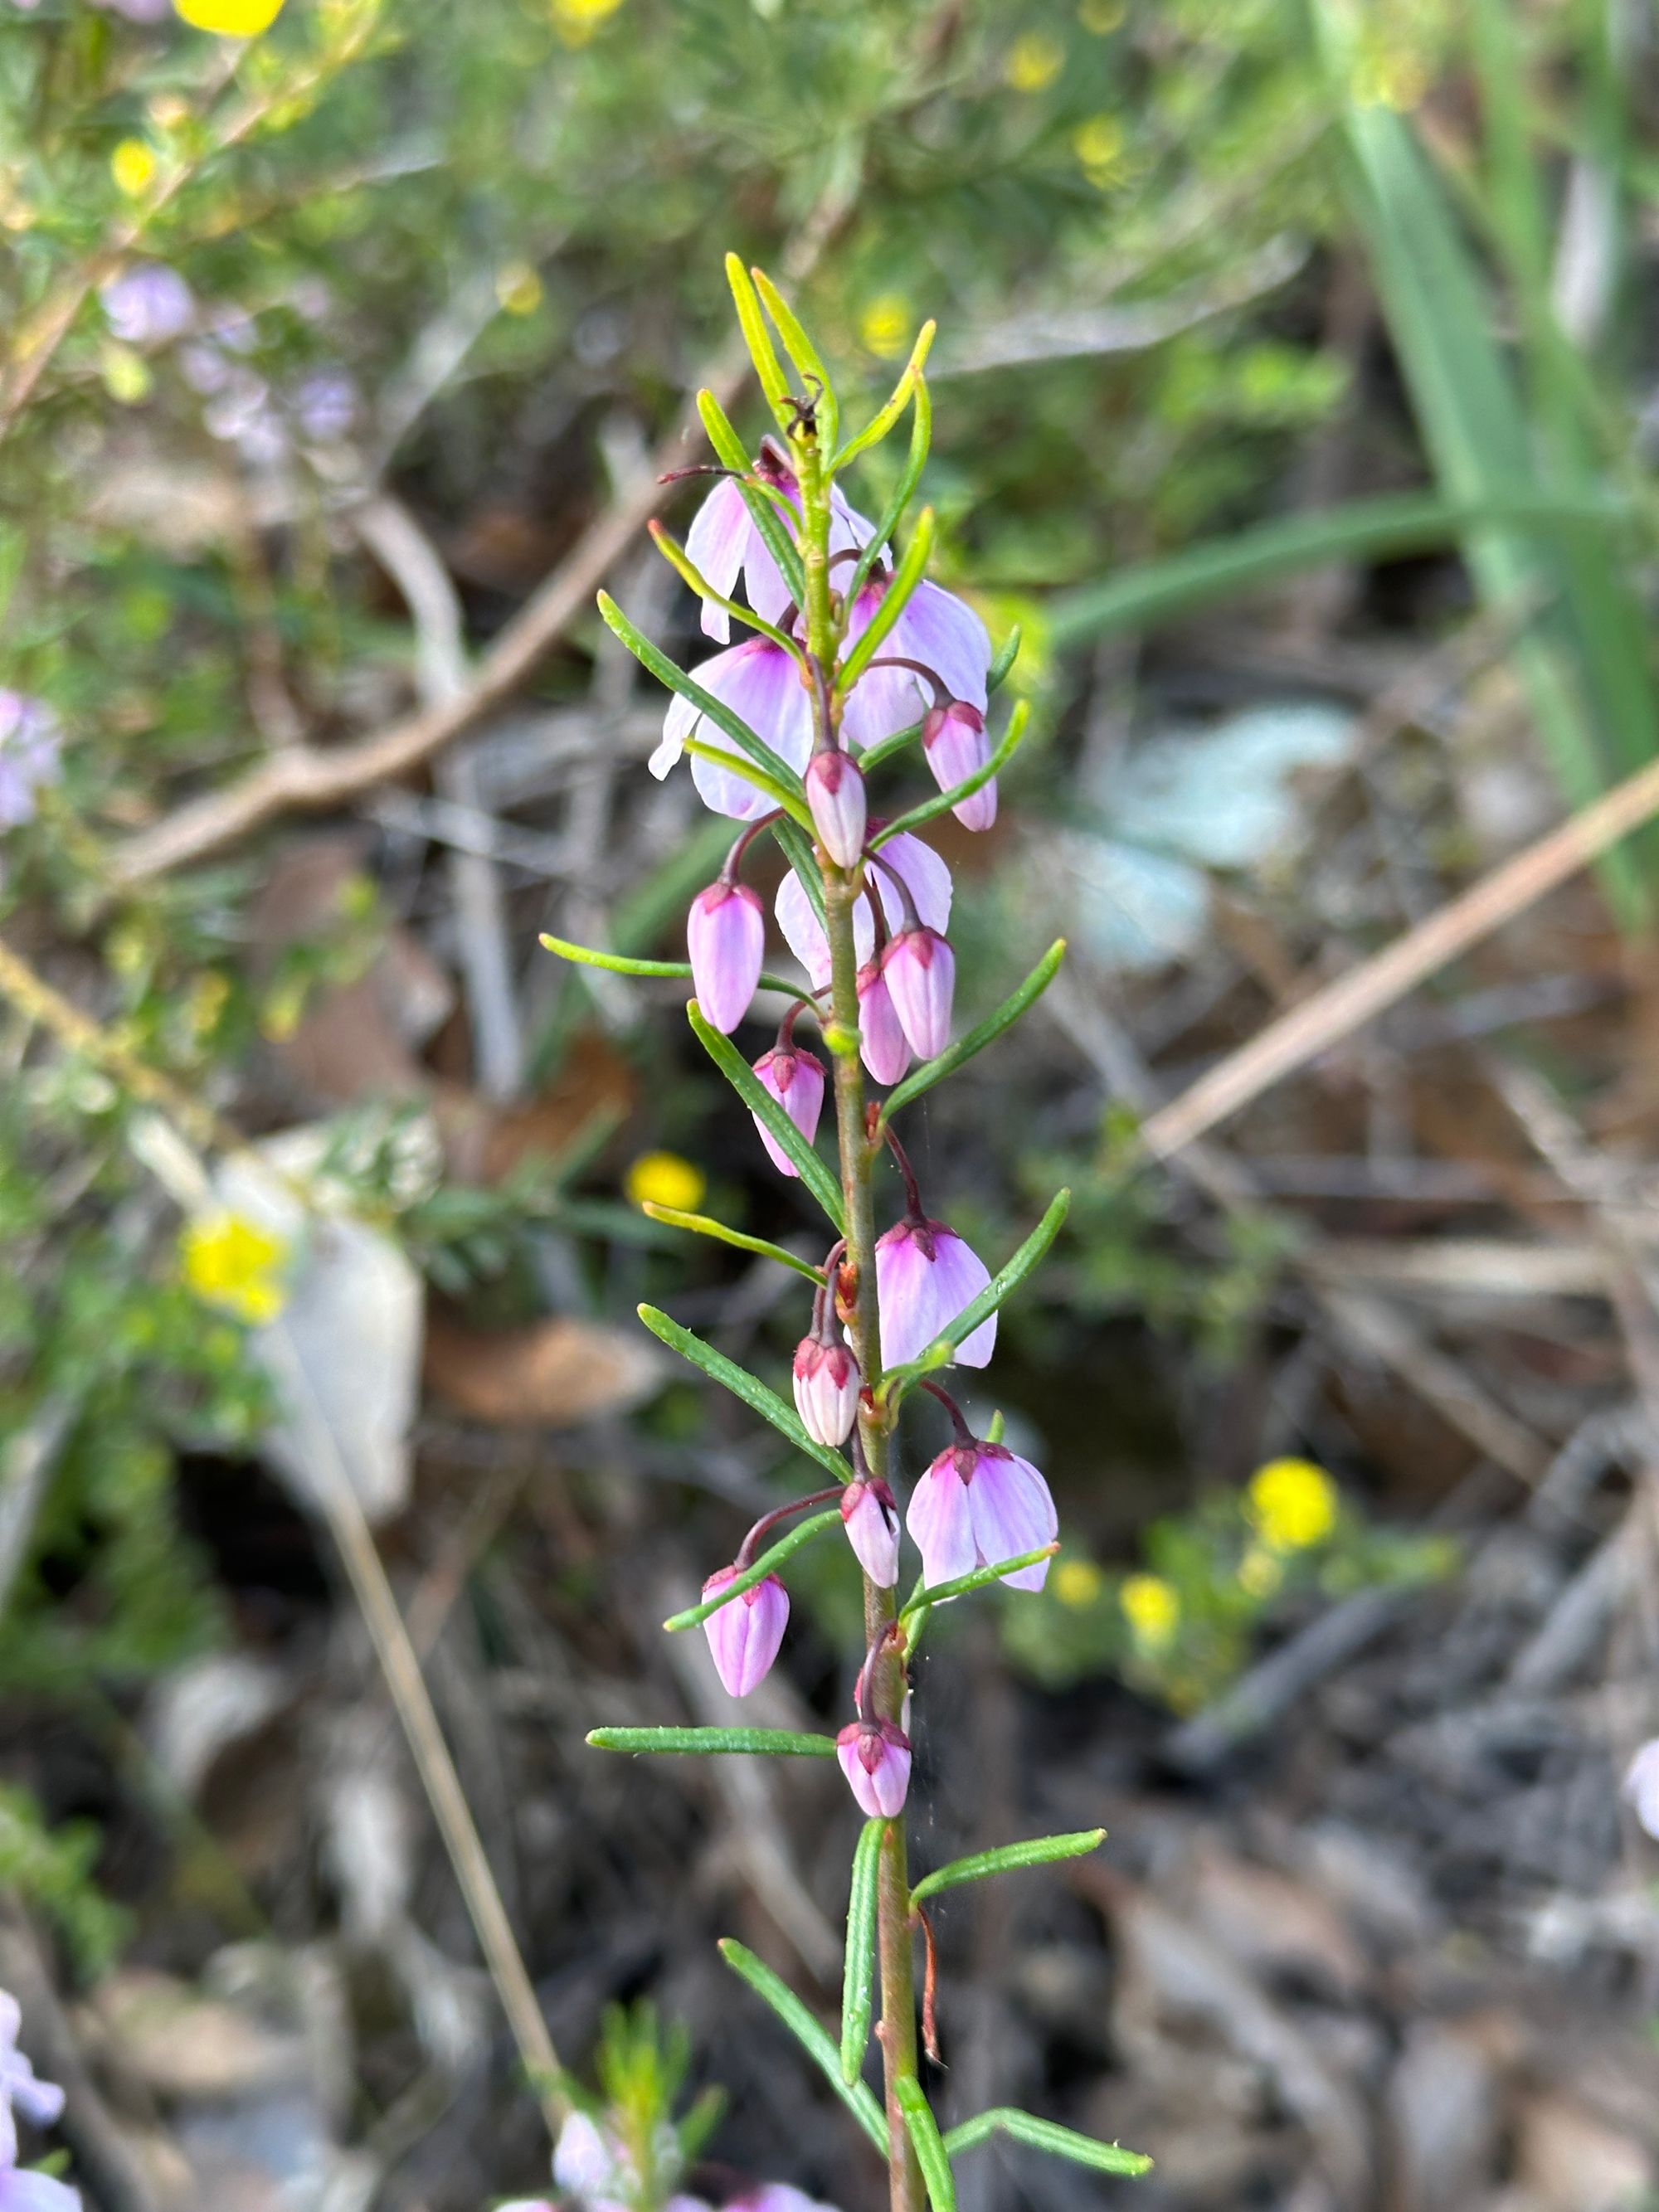
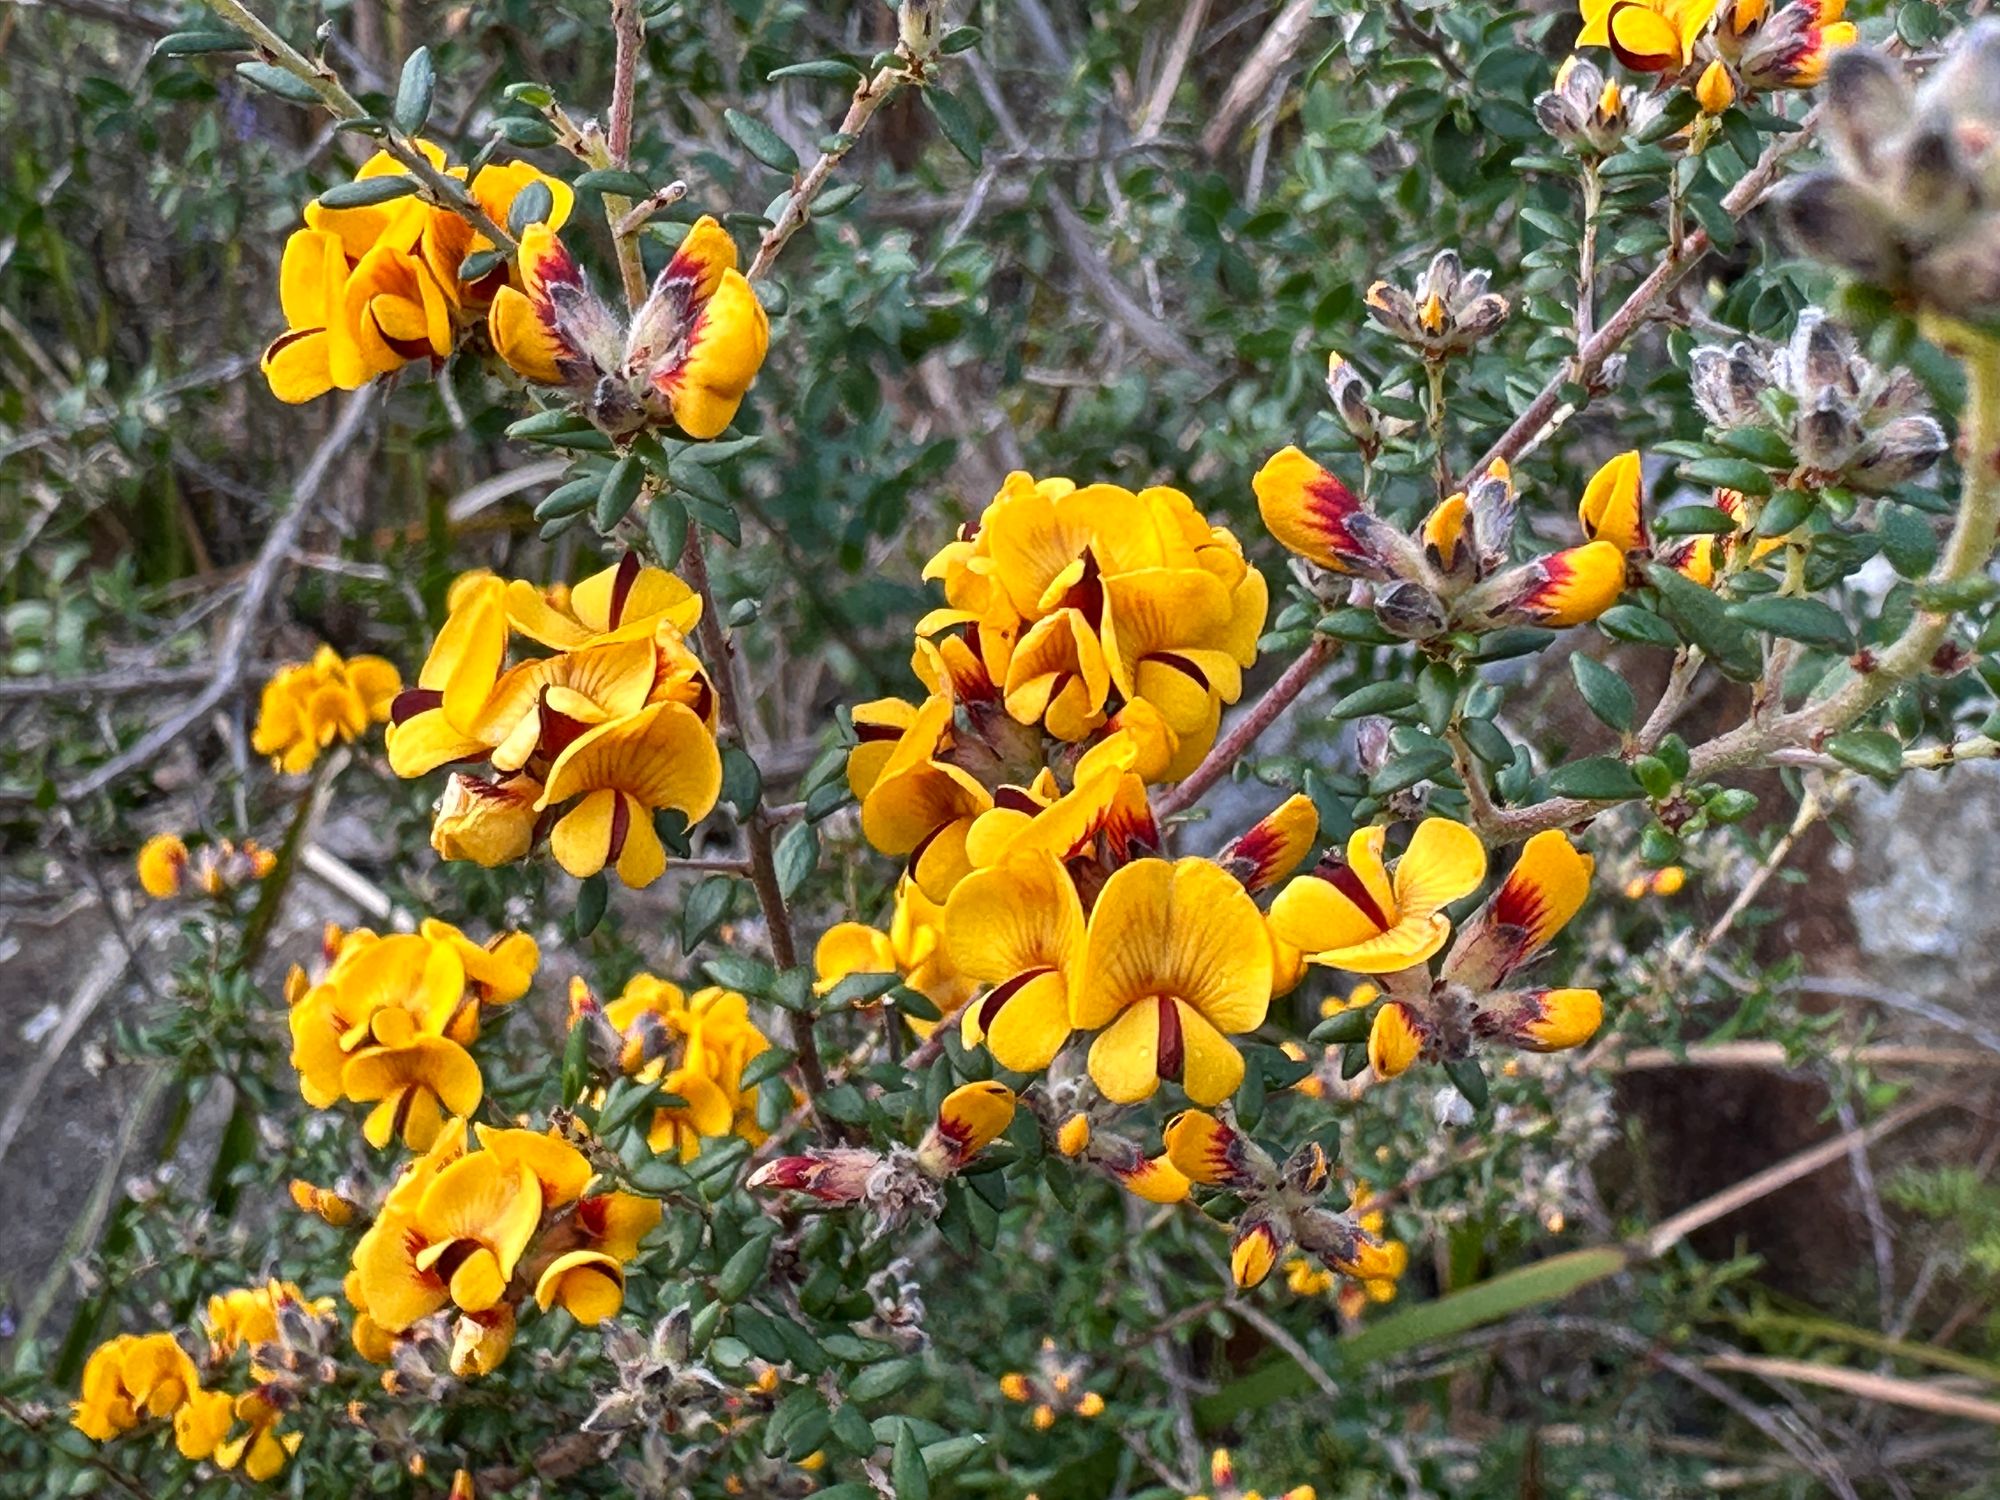
The day-one walk isn’t exactly hard. It’s quite short being only 4 km however they provide you with a book that has short stories and pieces of information that match up to marked seats along the trail. They call these encounters. These encounters really add to the whole experience of the walk. Stopping and reading these pages that are tailored for the exact location is really great. An example would be flowers in the vicinity of the seat or a story from a lighthouse keeper.
Along the way I stop at Surveyors Cove which is a lovely Cove with small round rocks. I spot a yellow-tailed black cockatoo in the trees. This will be the last time until the end of the trip that we are at sea level.
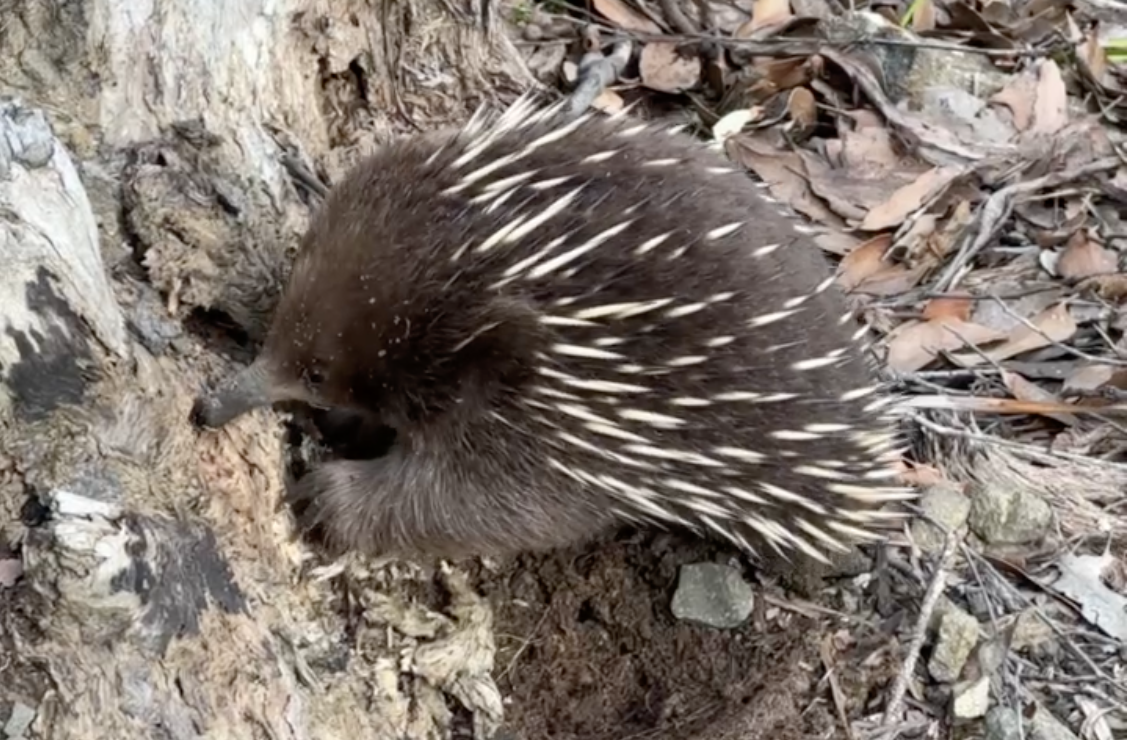
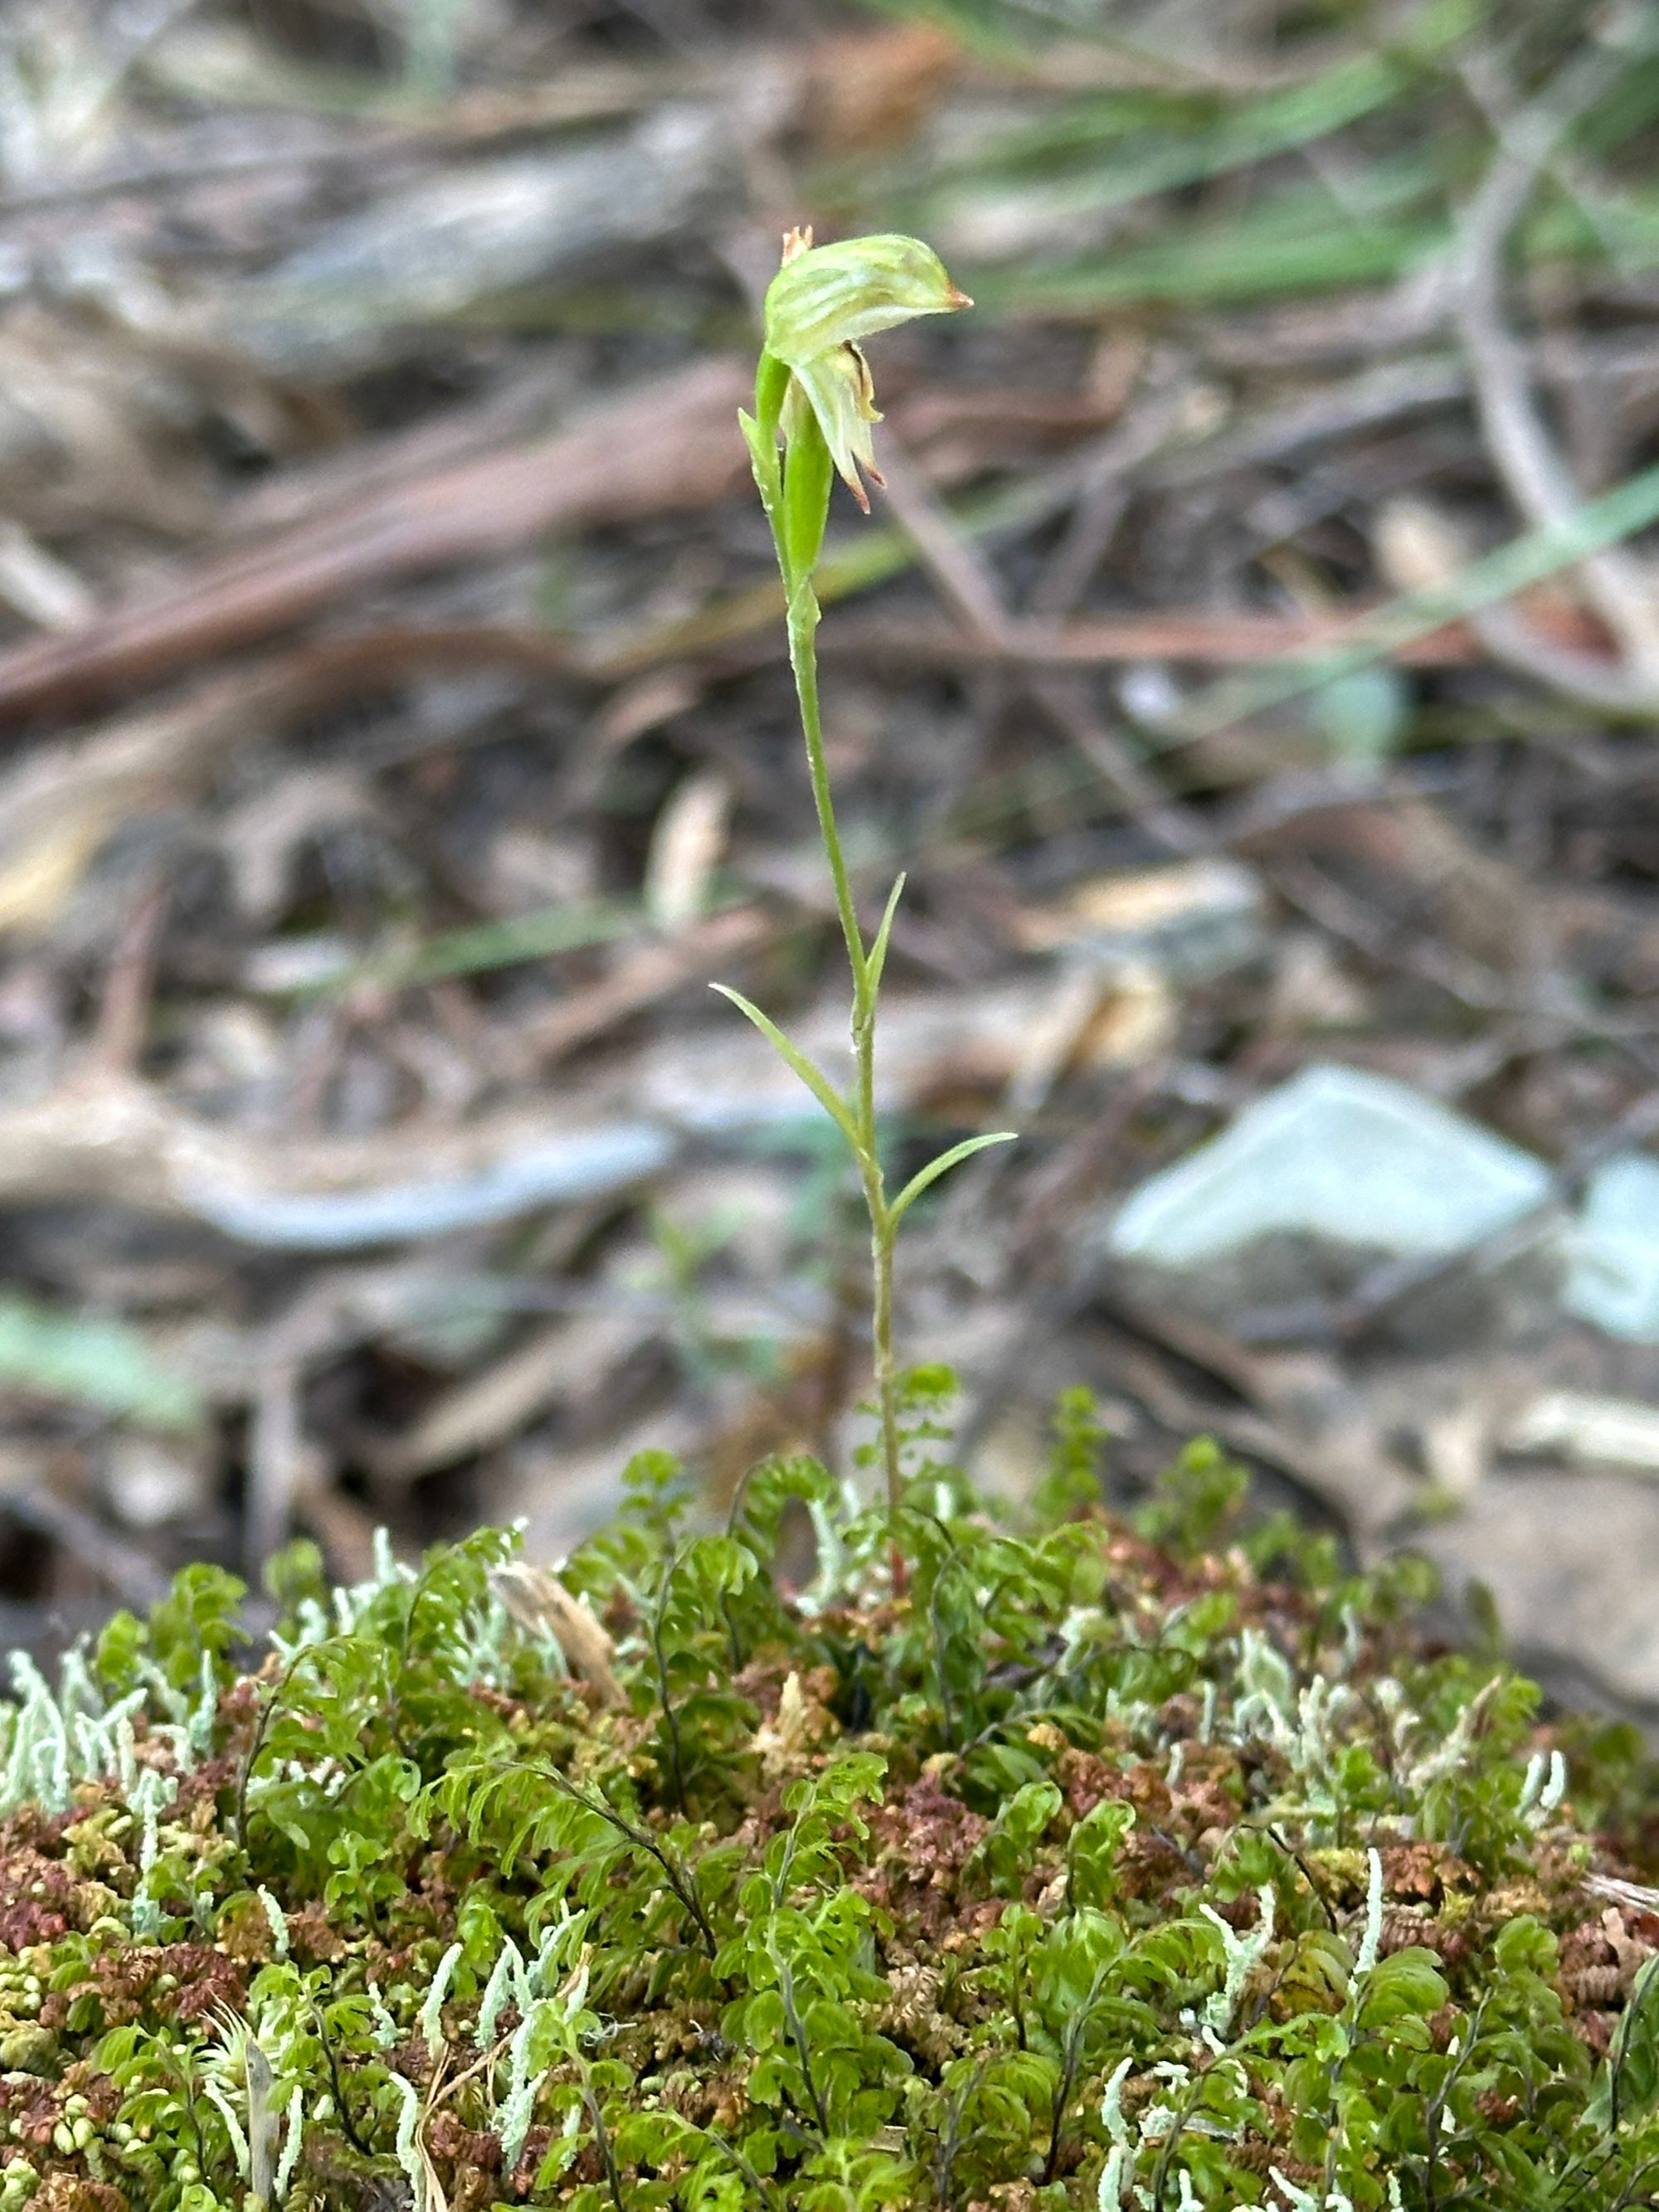
On the way to the first hut, I see a very tame echidna and an entirely new set of flora that I’ve never seen before.
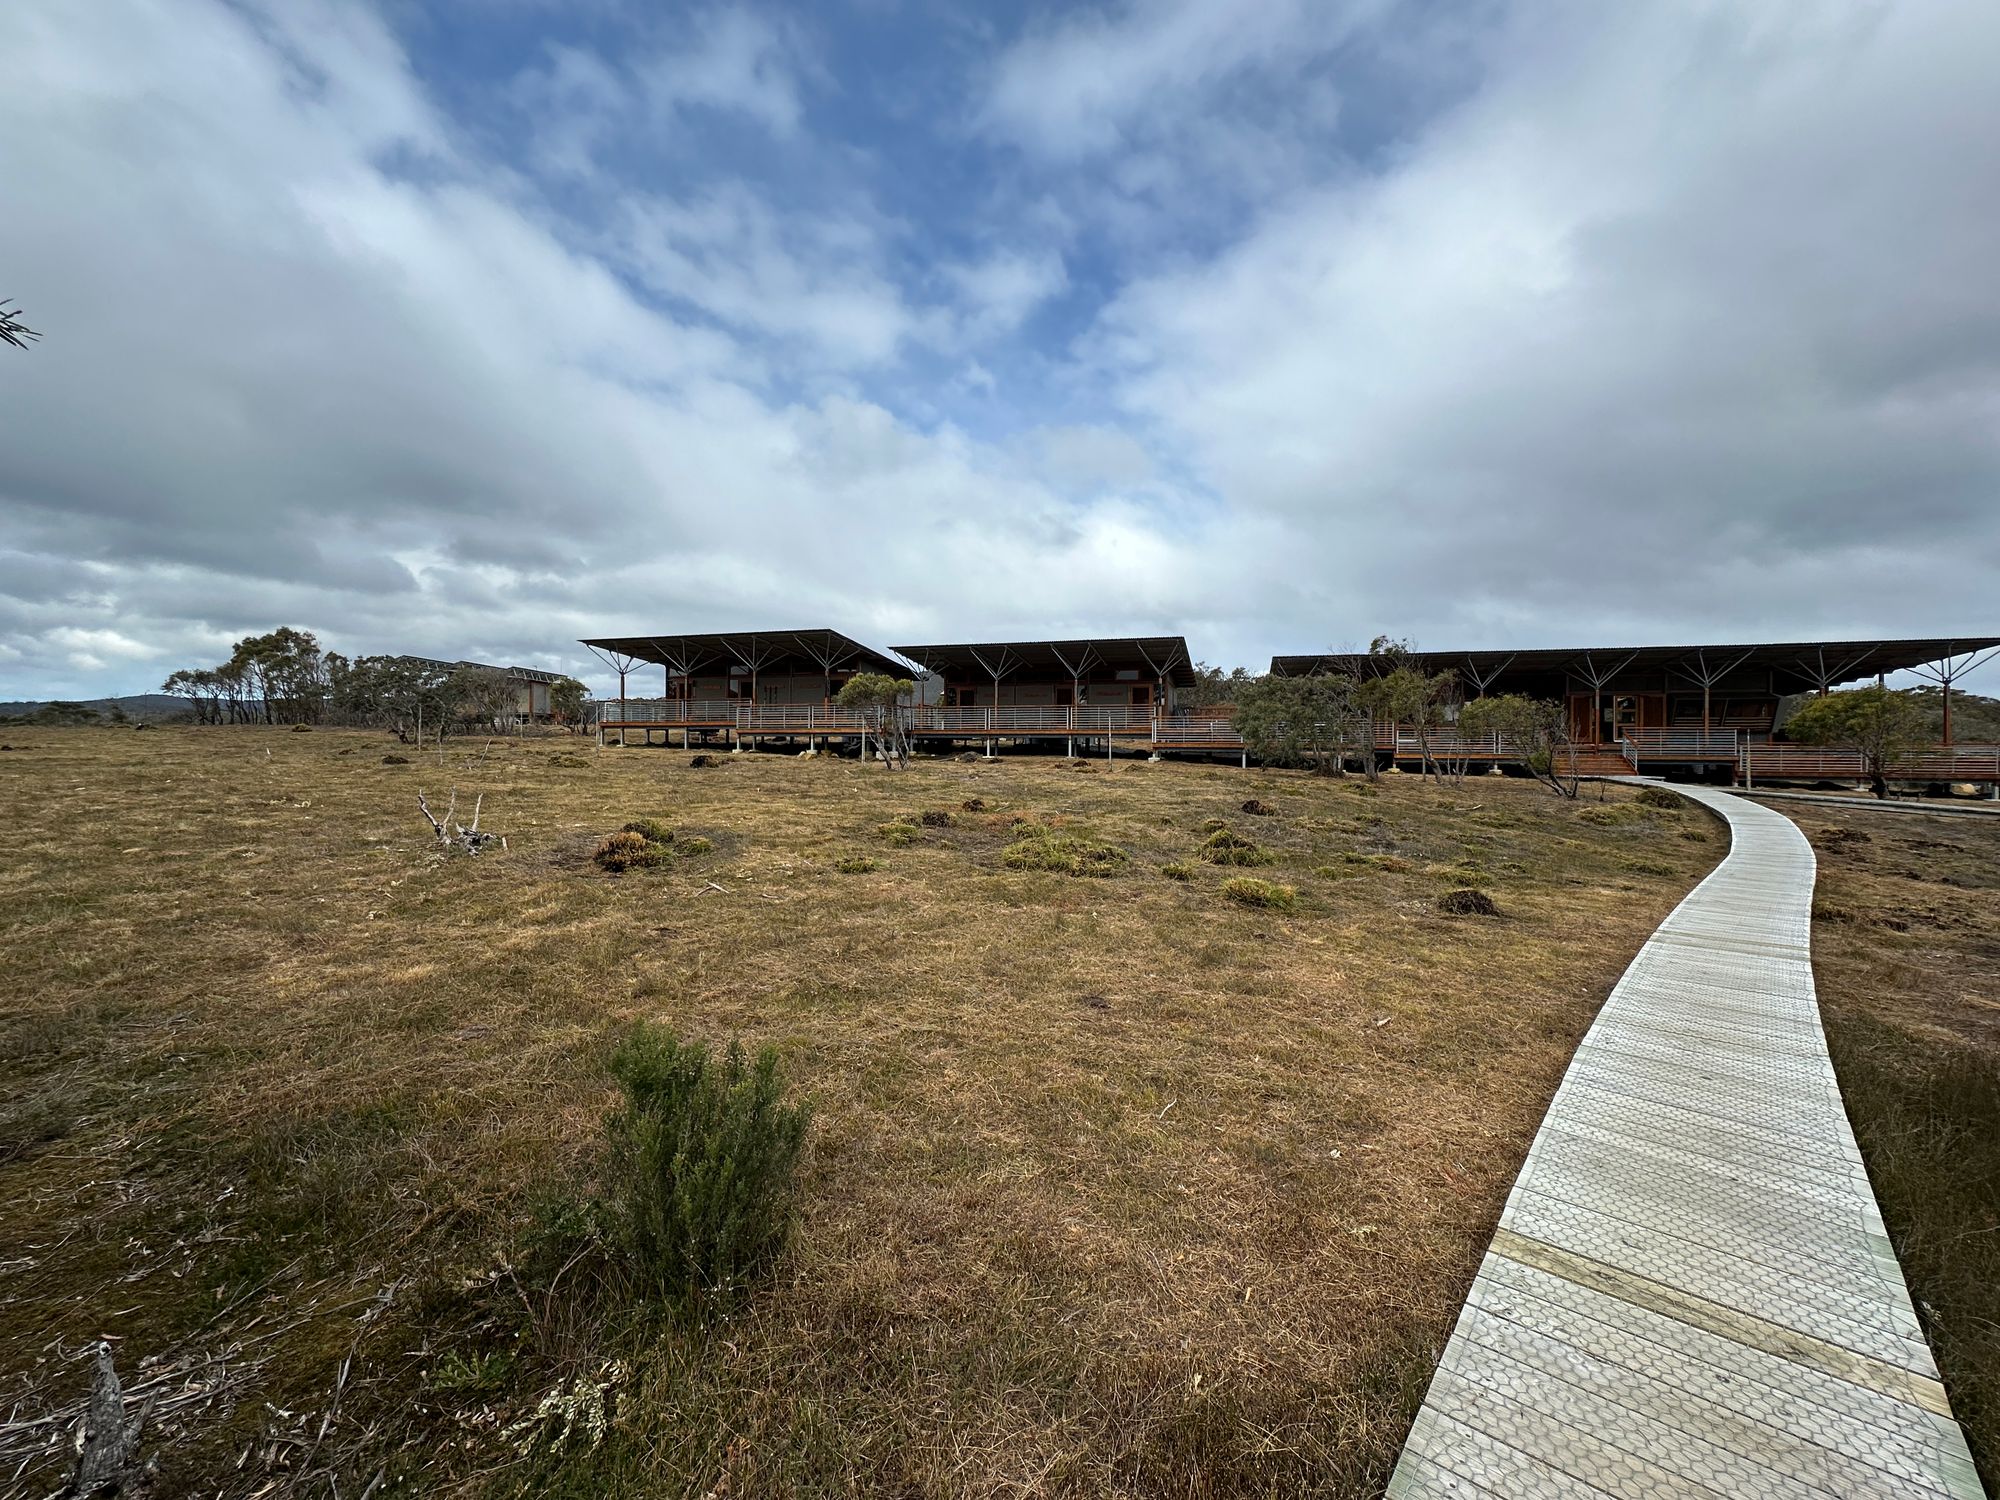
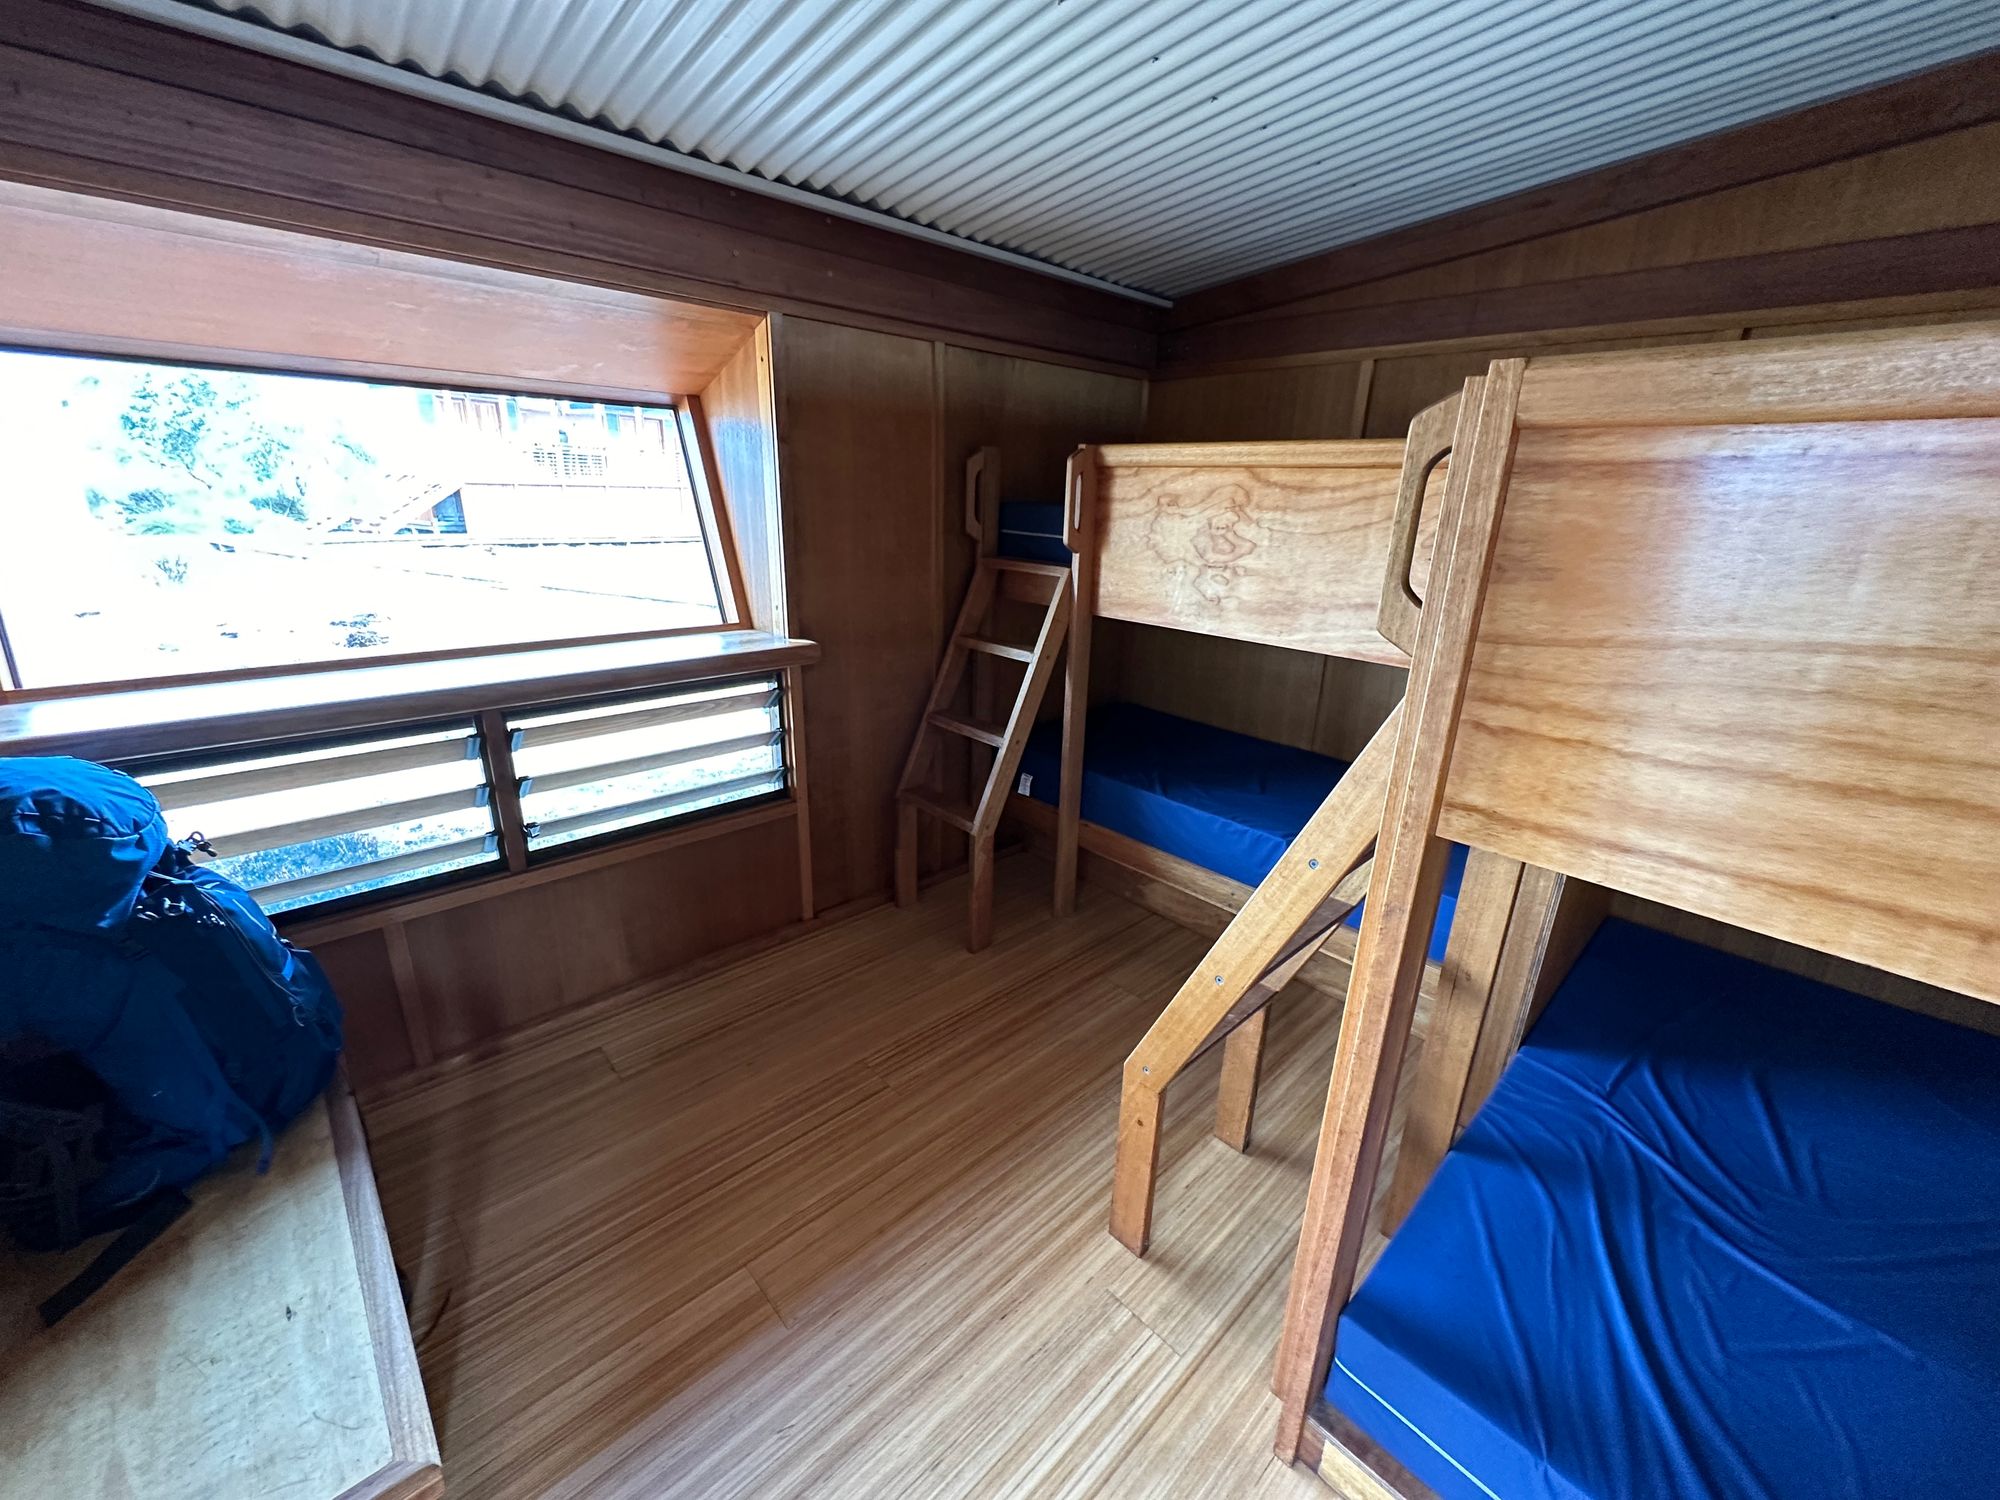
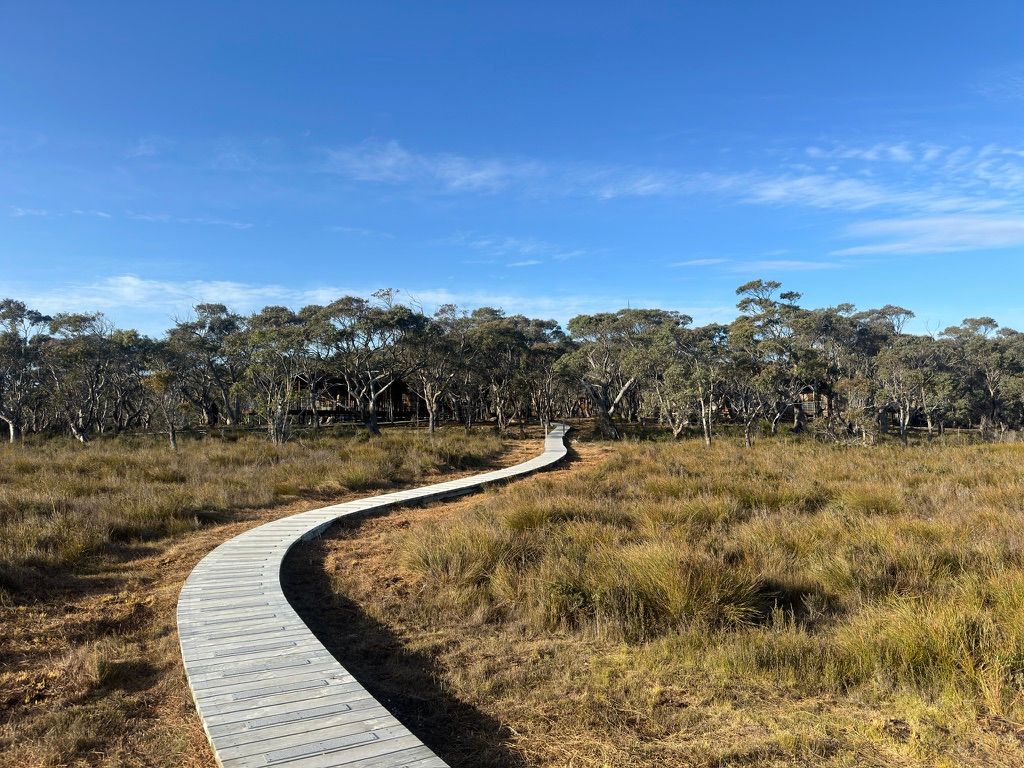
Each night the walk provides a shared hut to sleep in. These huts have gas and all the kitchen utensils you would need to cook an amazing meal however they don’t have any food or refrigeration. The first hut on this walk is called the Surveyors hut. I reached it pretty quickly and I was blown away by the quality of the hut. There is a communal area with a kitchen and a small library and games. There are individual rooms with bunk beds for sleeping. You are assigned a room with others and you keep that room number for the entire walk and at all the future huts.
After cooking dinner and getting to know everyone I retire to bed.
Day 2 - Colour and contrast
Surveyors to Munro, 11 km
Refreshed and ready for day two, the start of the day is met with a small obstacle. I managed to break my front main hip buckle on my backpack by stepping on it. After finding a small carabiner in my bag I use that as the main way of connecting the two hip straps. After a little bit of adjustment, I’m happy with my fix and I start the day's walk.
Sleeping at the trailhead allows you to get on the trail early in the morning. The trail starts off really quiet before the wind picks up, it’s like walking through a stillness. Then, slowly, you get the birds chirping and the sun rises and the bush comes alive.

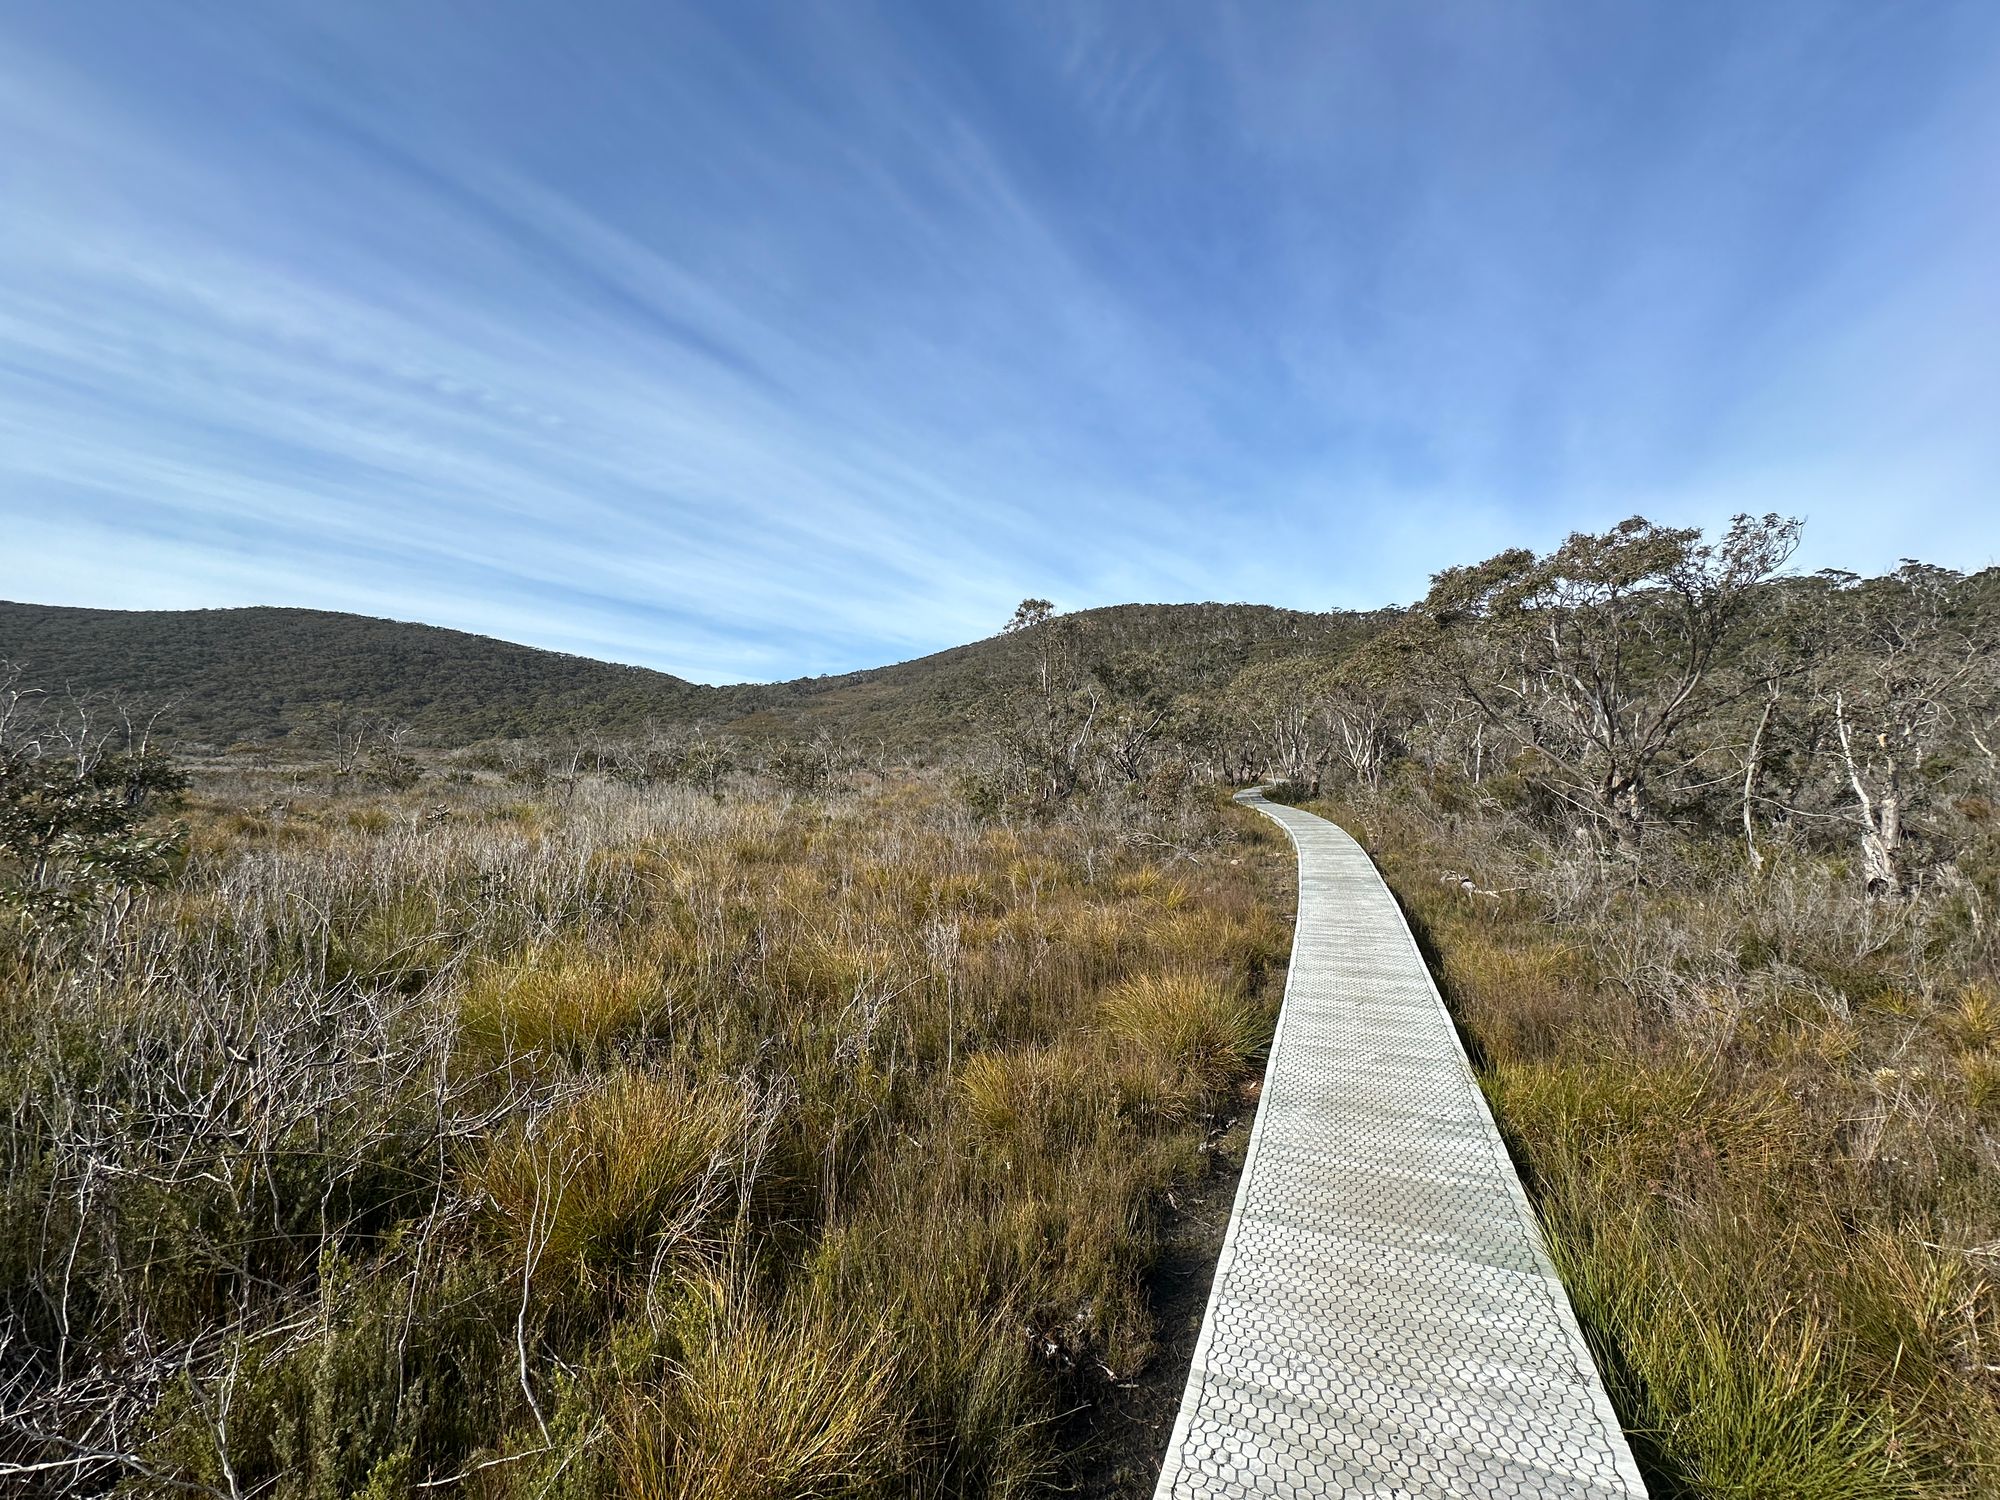
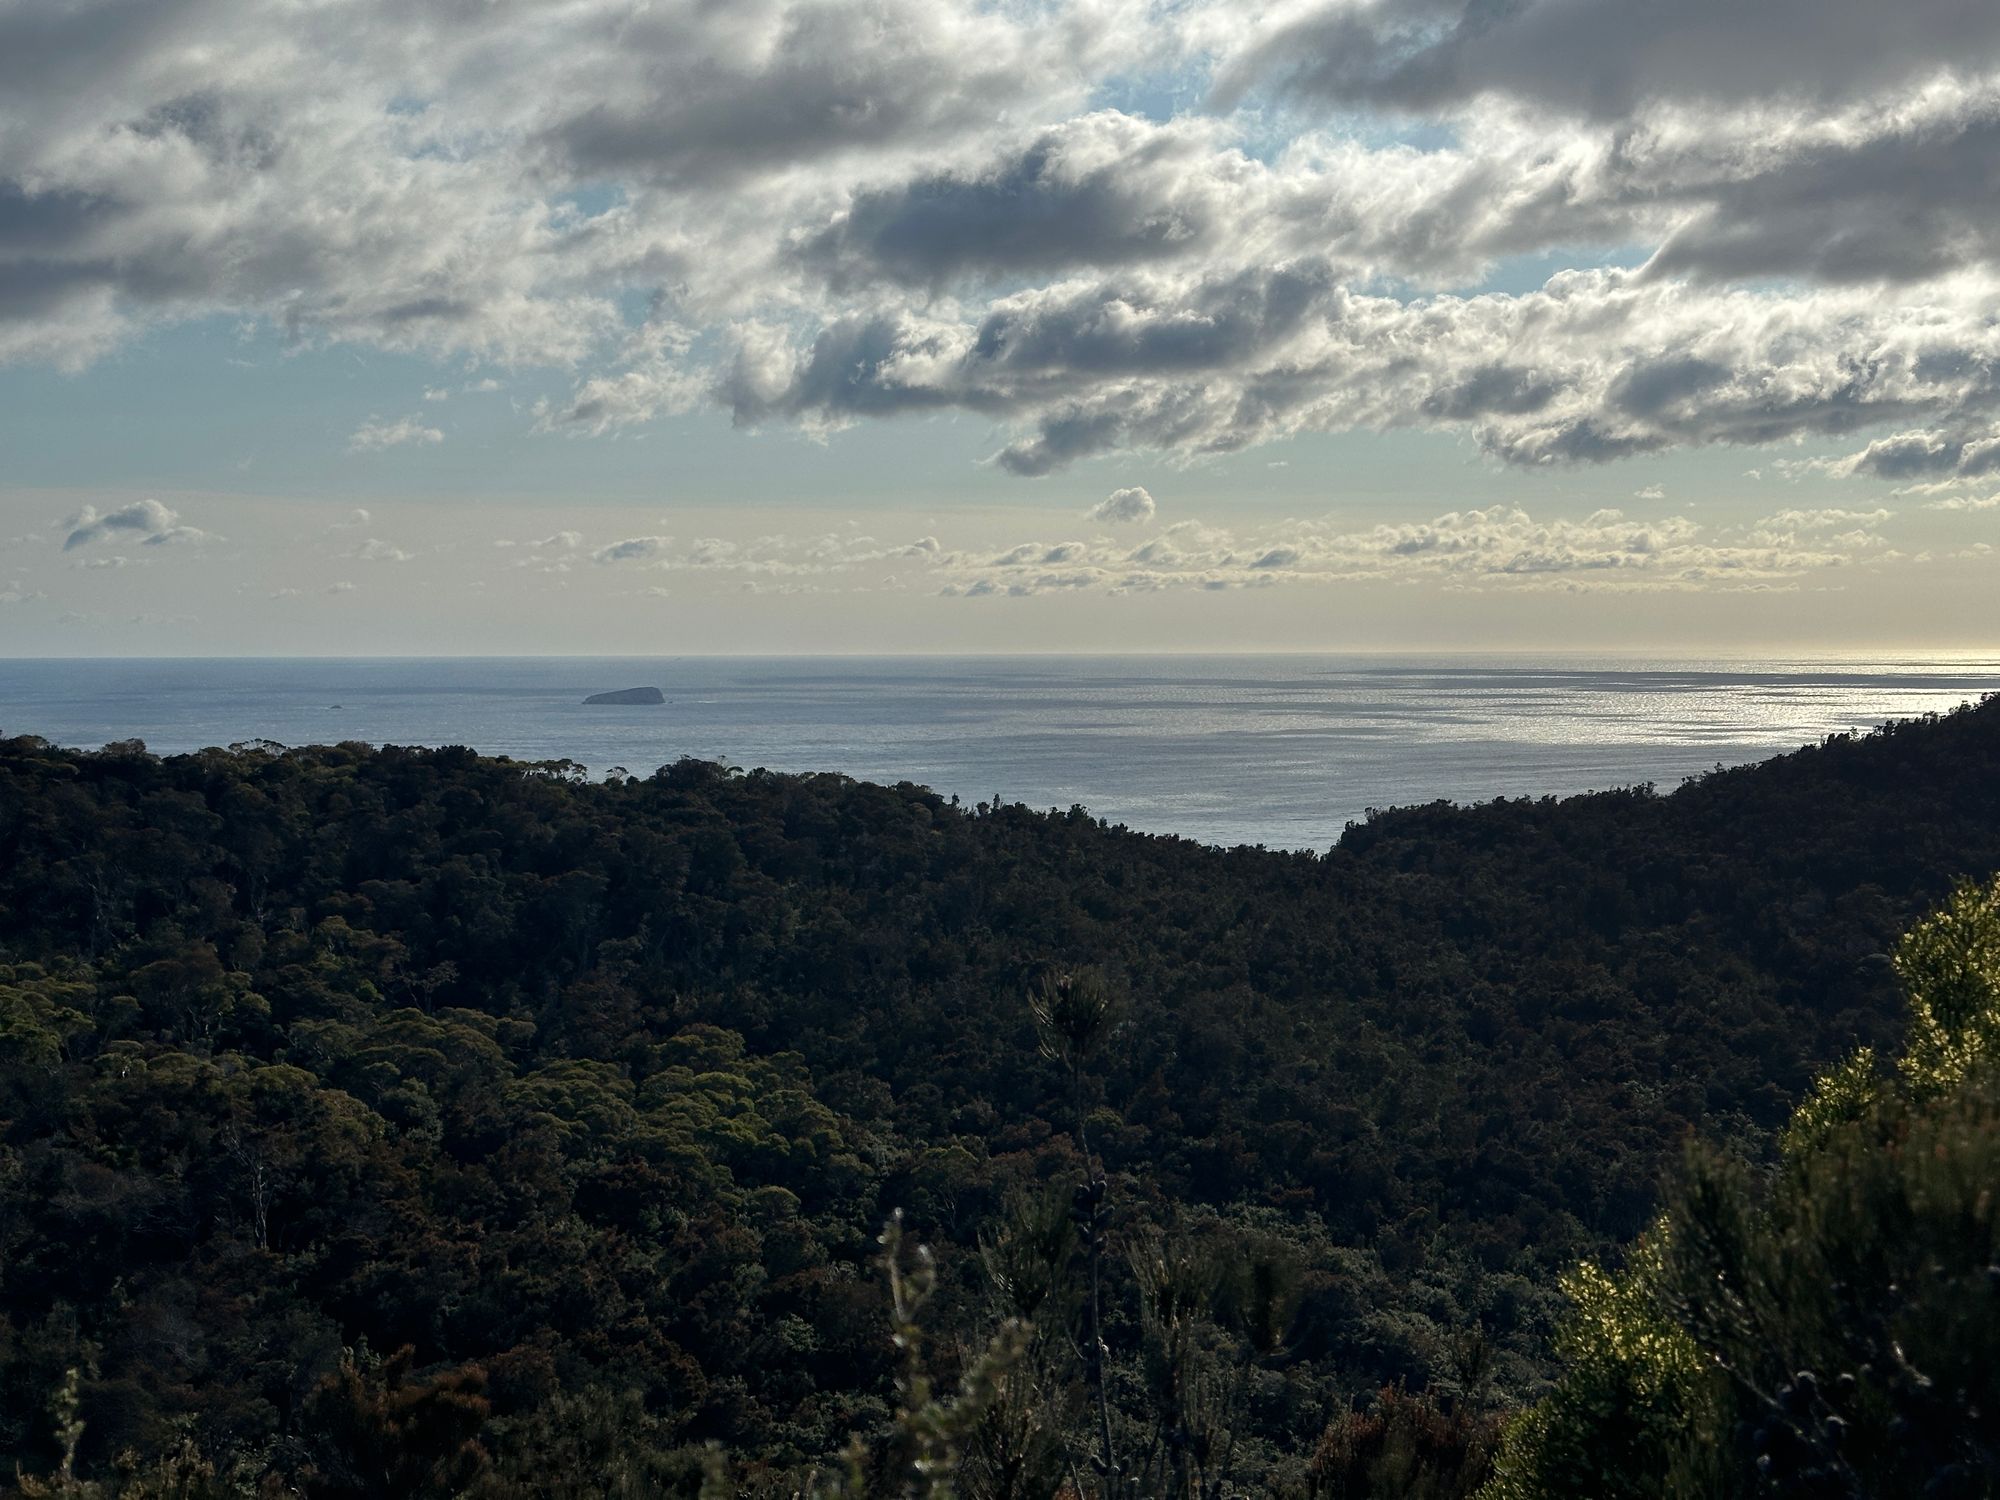
Today’s walk is only 11 km so I take it slow and take it all in. After walking through a heath. I start to climb Arthurs Peak which is 312 m. The views from the top are amazing and hint at what’s to come.
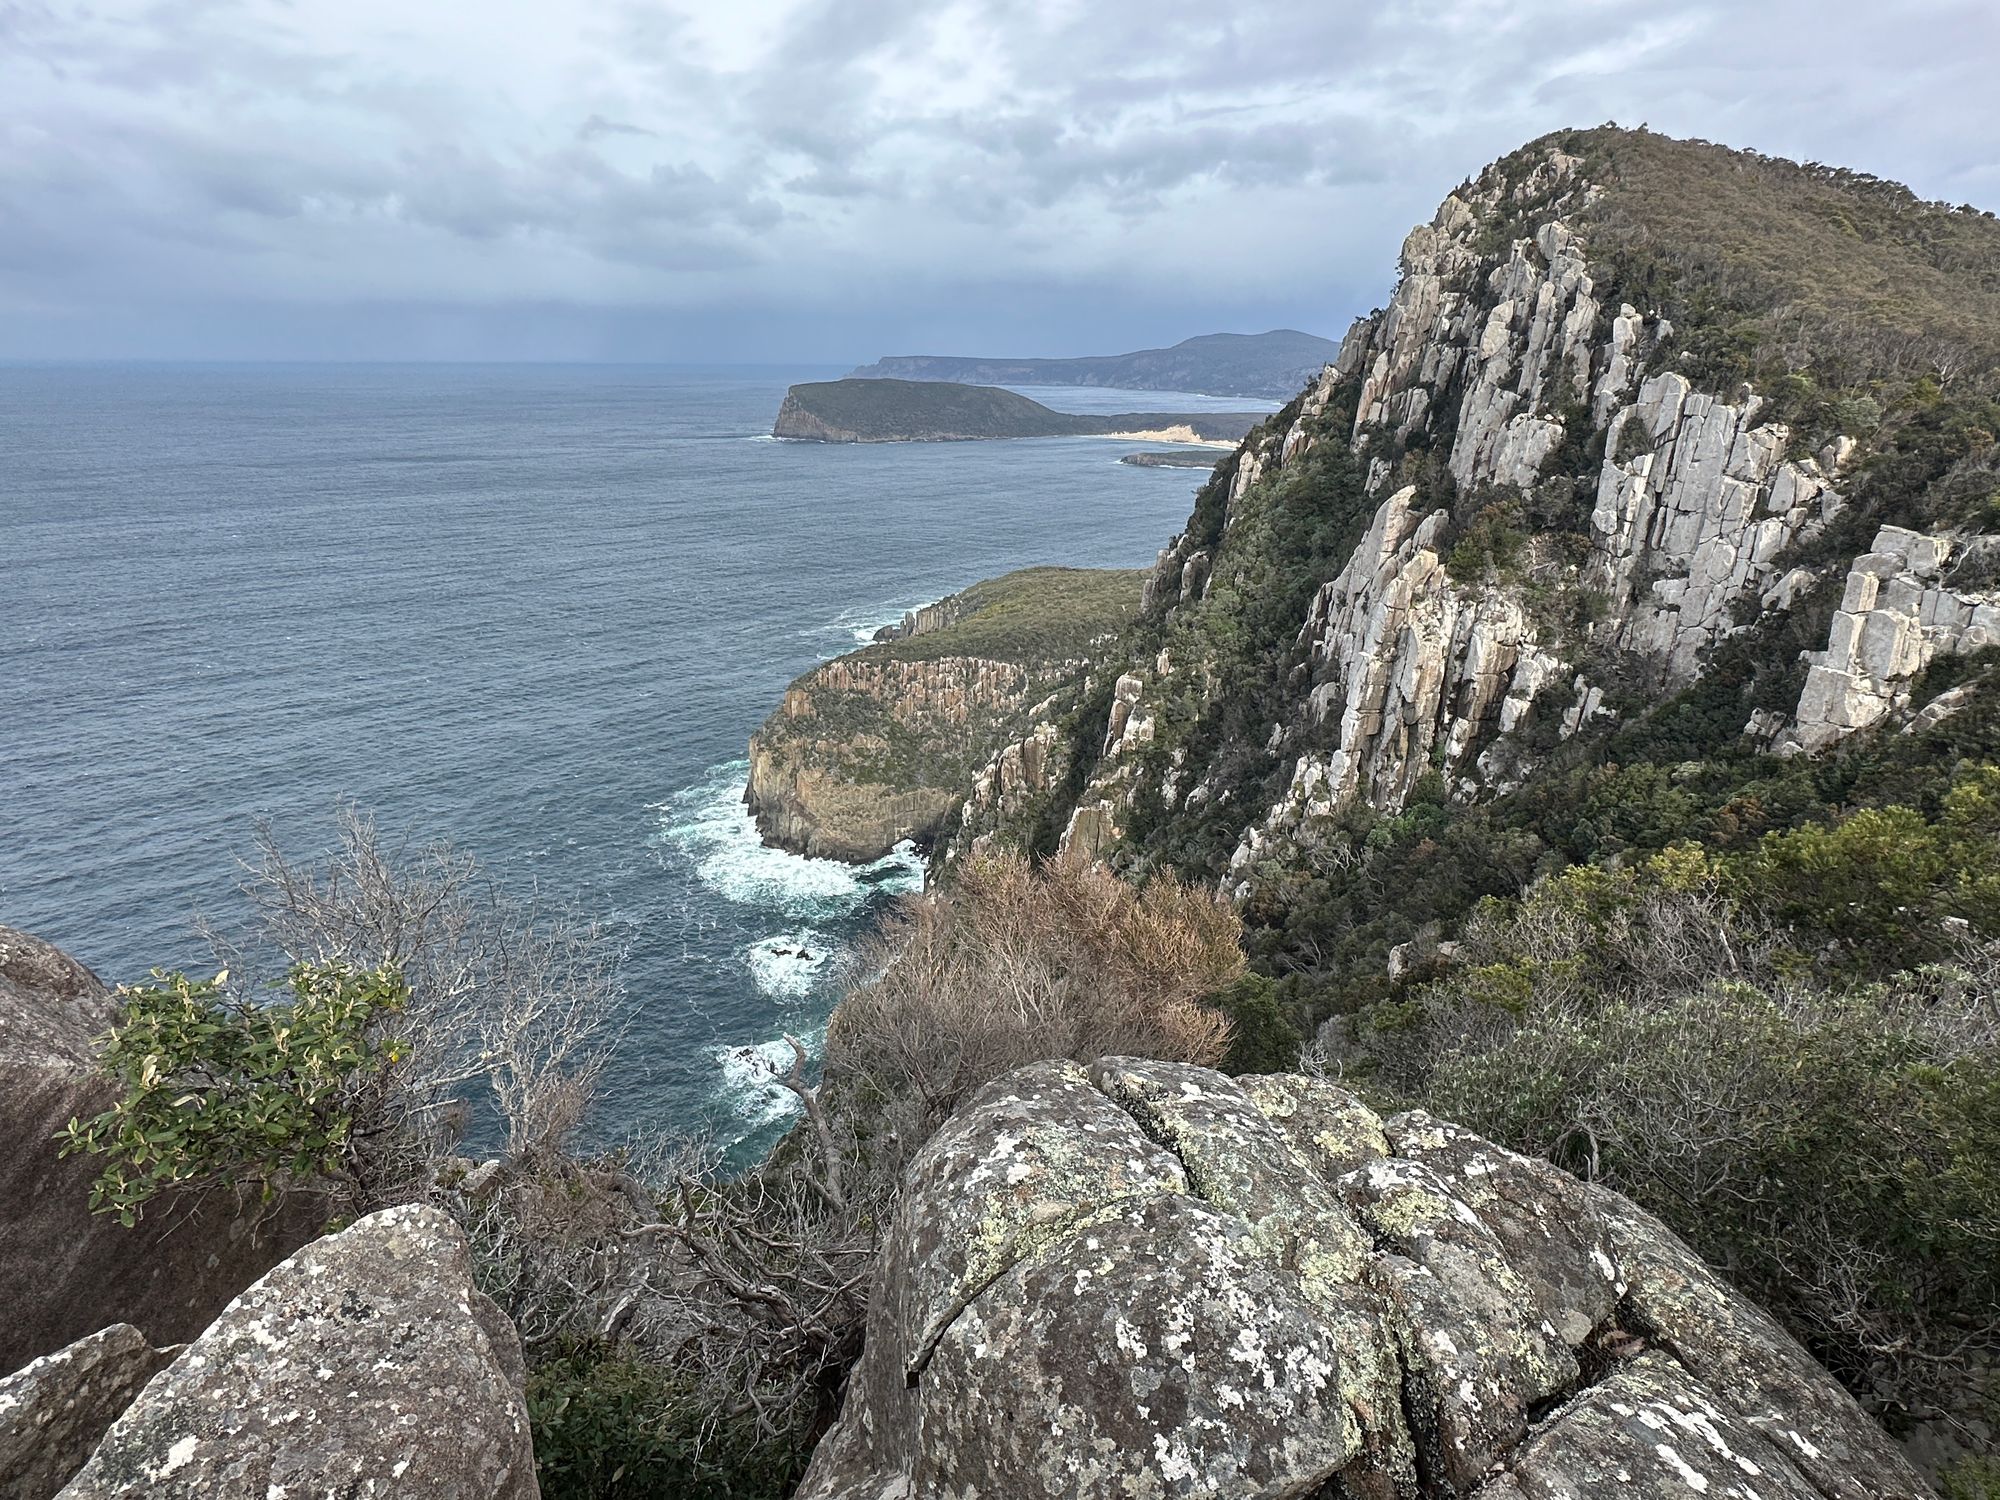
After a very light shower, the wind starts to pick up. More on the wind later. I stop with a few others on the walk and have lunch with views of the Tasman Sea. There’s a great sense of community on this walk something that I’ve never had on other multi-day walks.
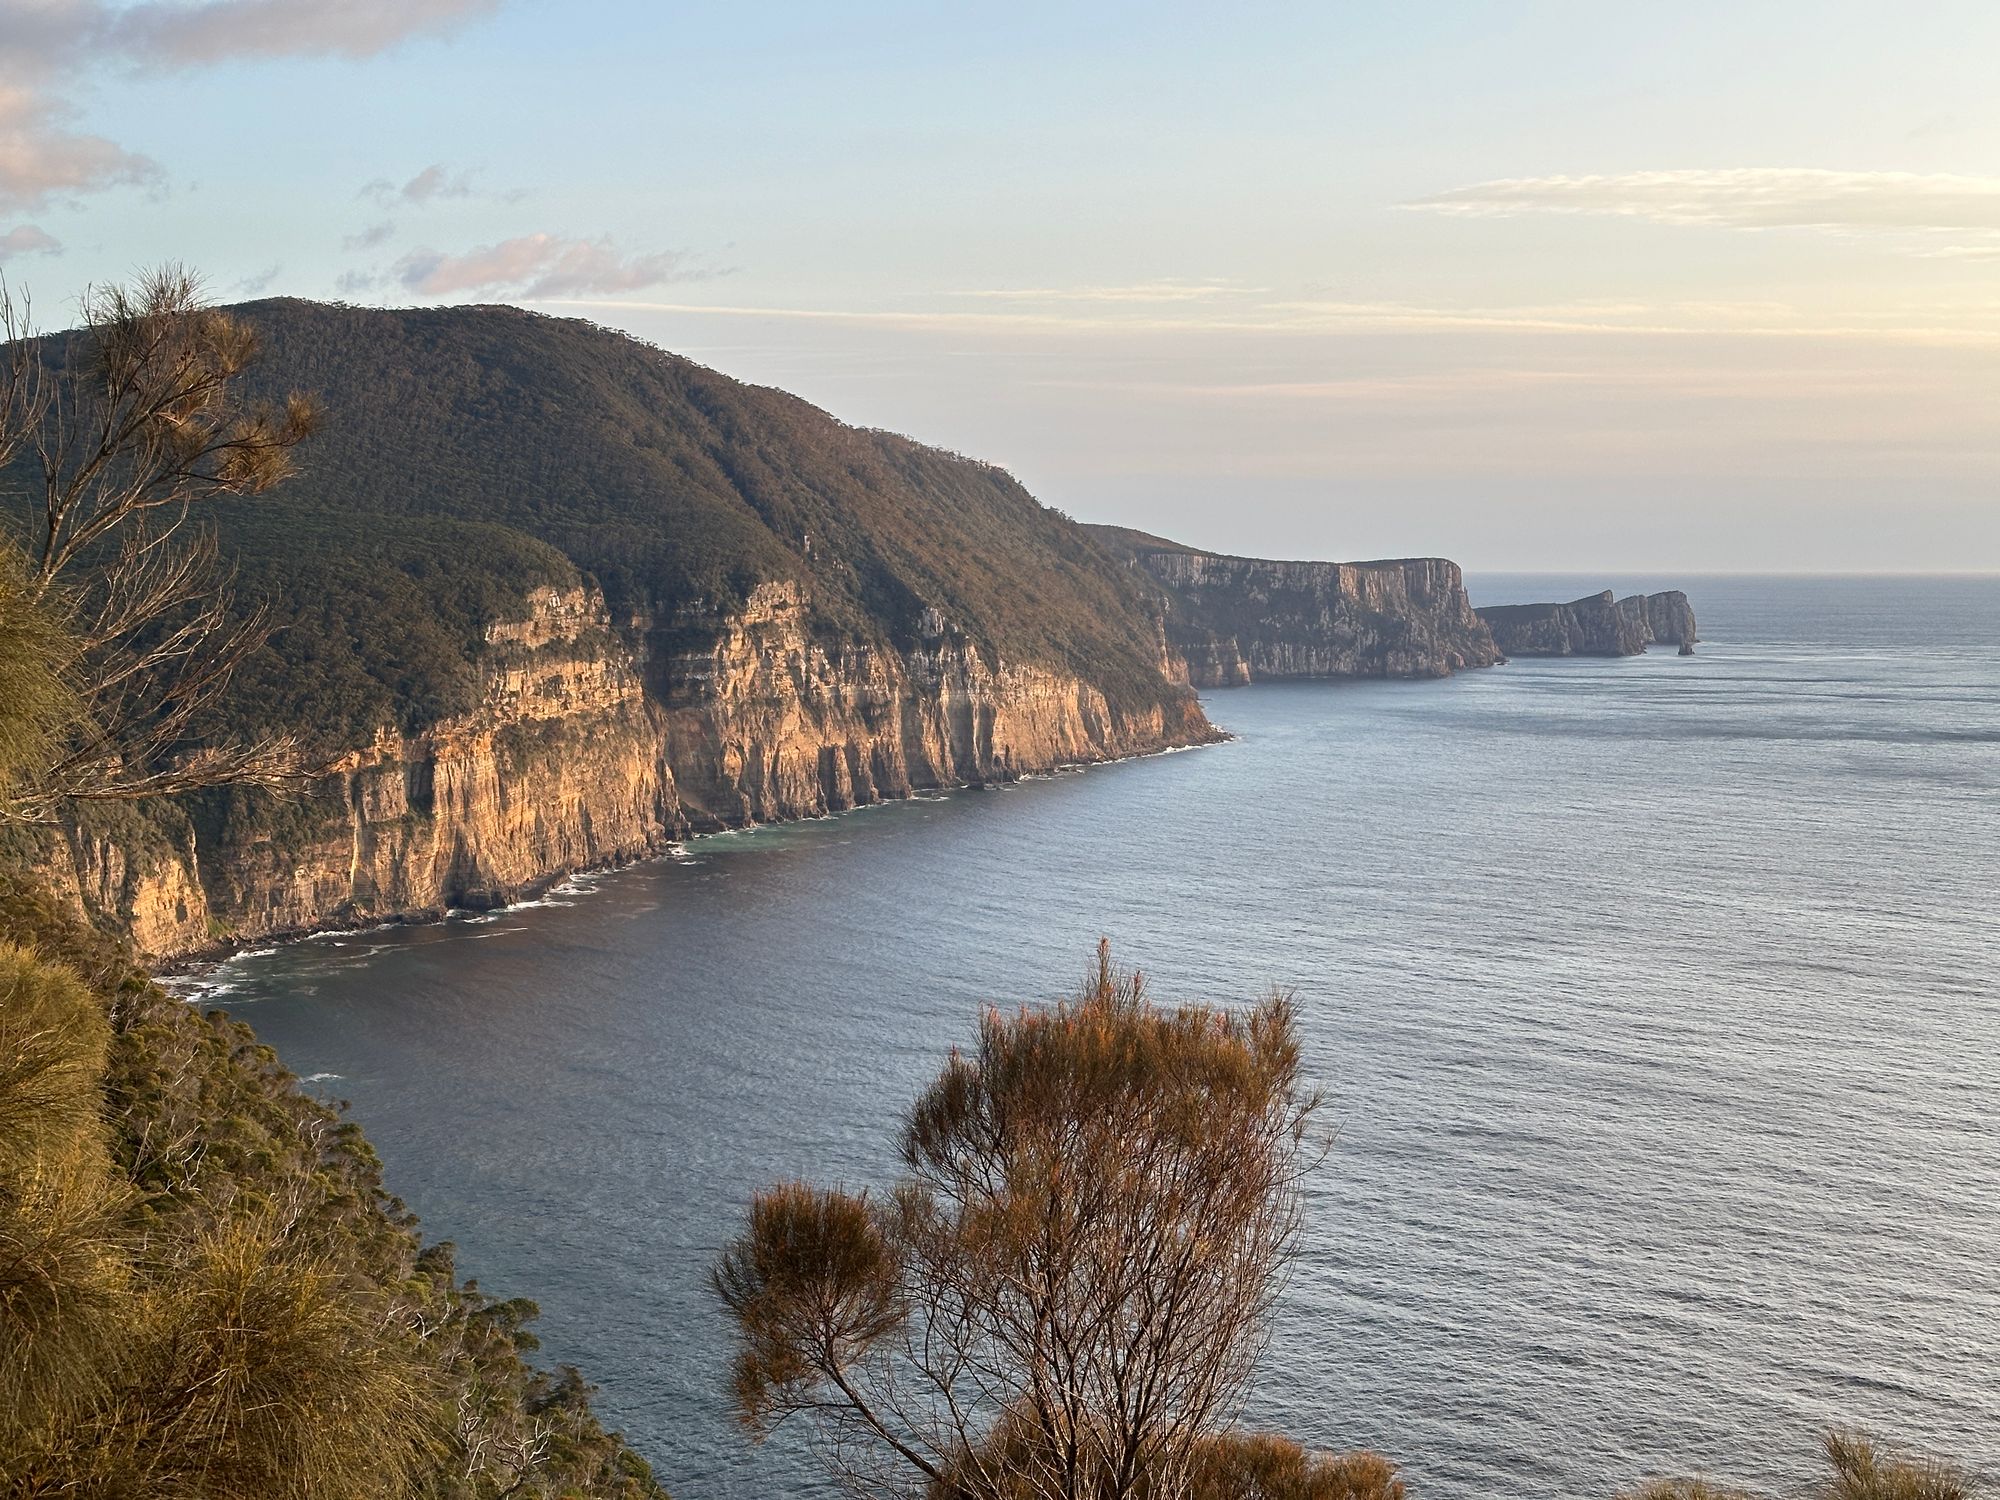
I stop at some seats that overlook Haines Bight. The Tasman Sea is ferocious and non-forgiving. I sit here for just under an hour watching the waves crash against the cliffs. With the wind picking up the the sea is turbulent and spotting whales is tricky.
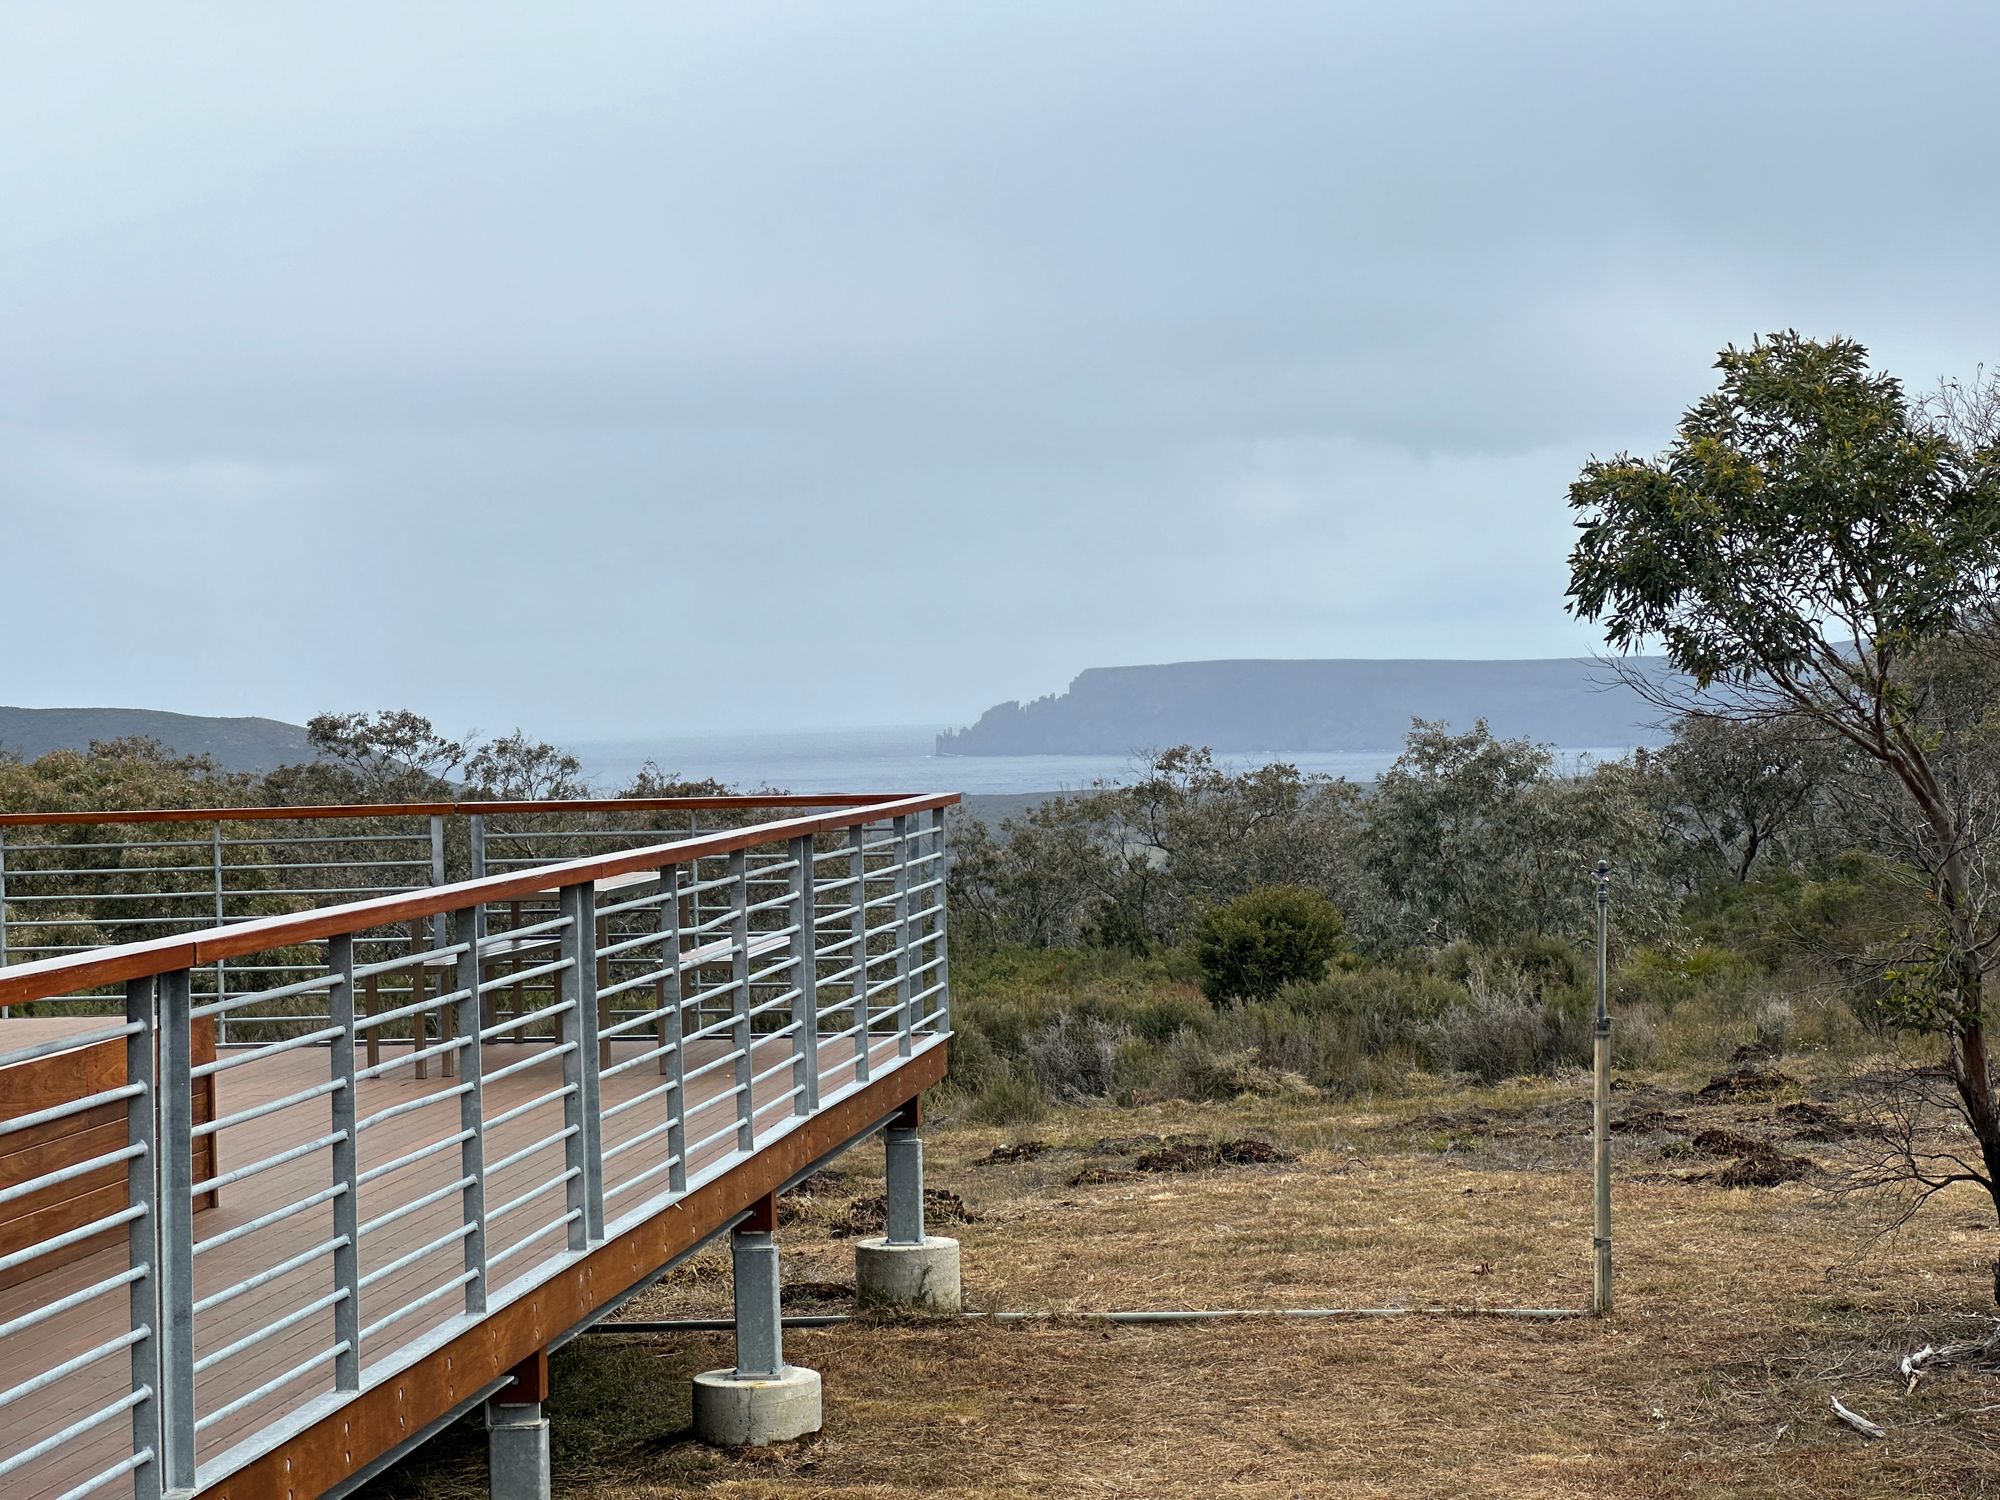
The rest of the day's walk is pretty uneventful. I visited a free campsite with another walker which is well equipped with a toilet, water and platforms for tents. As I arrive at Munro hut, I noticed that there is a hot shower next to my cabin. With the sun poking out I decide to quickly take advantage of it before the other walkers arrive. The open-air shower was amazing.
The view from the lookout platform looks up Munro Bight. You can see Cape Hauy, the 3rd cape, in the distance. It’s an amazing view and over the next two days, I revisit the platform multiple times.
Day 3 - Drama and adrenalin
Munro to Retakunna - via Cape Pillar, 19 km
Today’s walk is the longest of all four days. The night before we had a briefing from the hut caretaker of high winds and gusts 80 km an hour. Something you don’t want on the top of a cliff. A few of us were chatting about it and had collectively decided to leave early to try and beat the wind. Others were trying to aim for the afternoon when the wind was predicted to die down.
Starting early on the trail, the wind had not picked up yet. Before we leave for the day we drop our packs in a storage hut and do the day walk with a day pack. The walk today is out to Cape Pillar and back to another hut, so I’ll be able to pick up my bag later on in the day.
The start of the day is pretty nice. It’s a pretty good walk. I’m enjoying the heathland environment and the valleys with ocean views. It’s pretty telling when all the plants are so short because the winds won’t let the plants grow any taller.
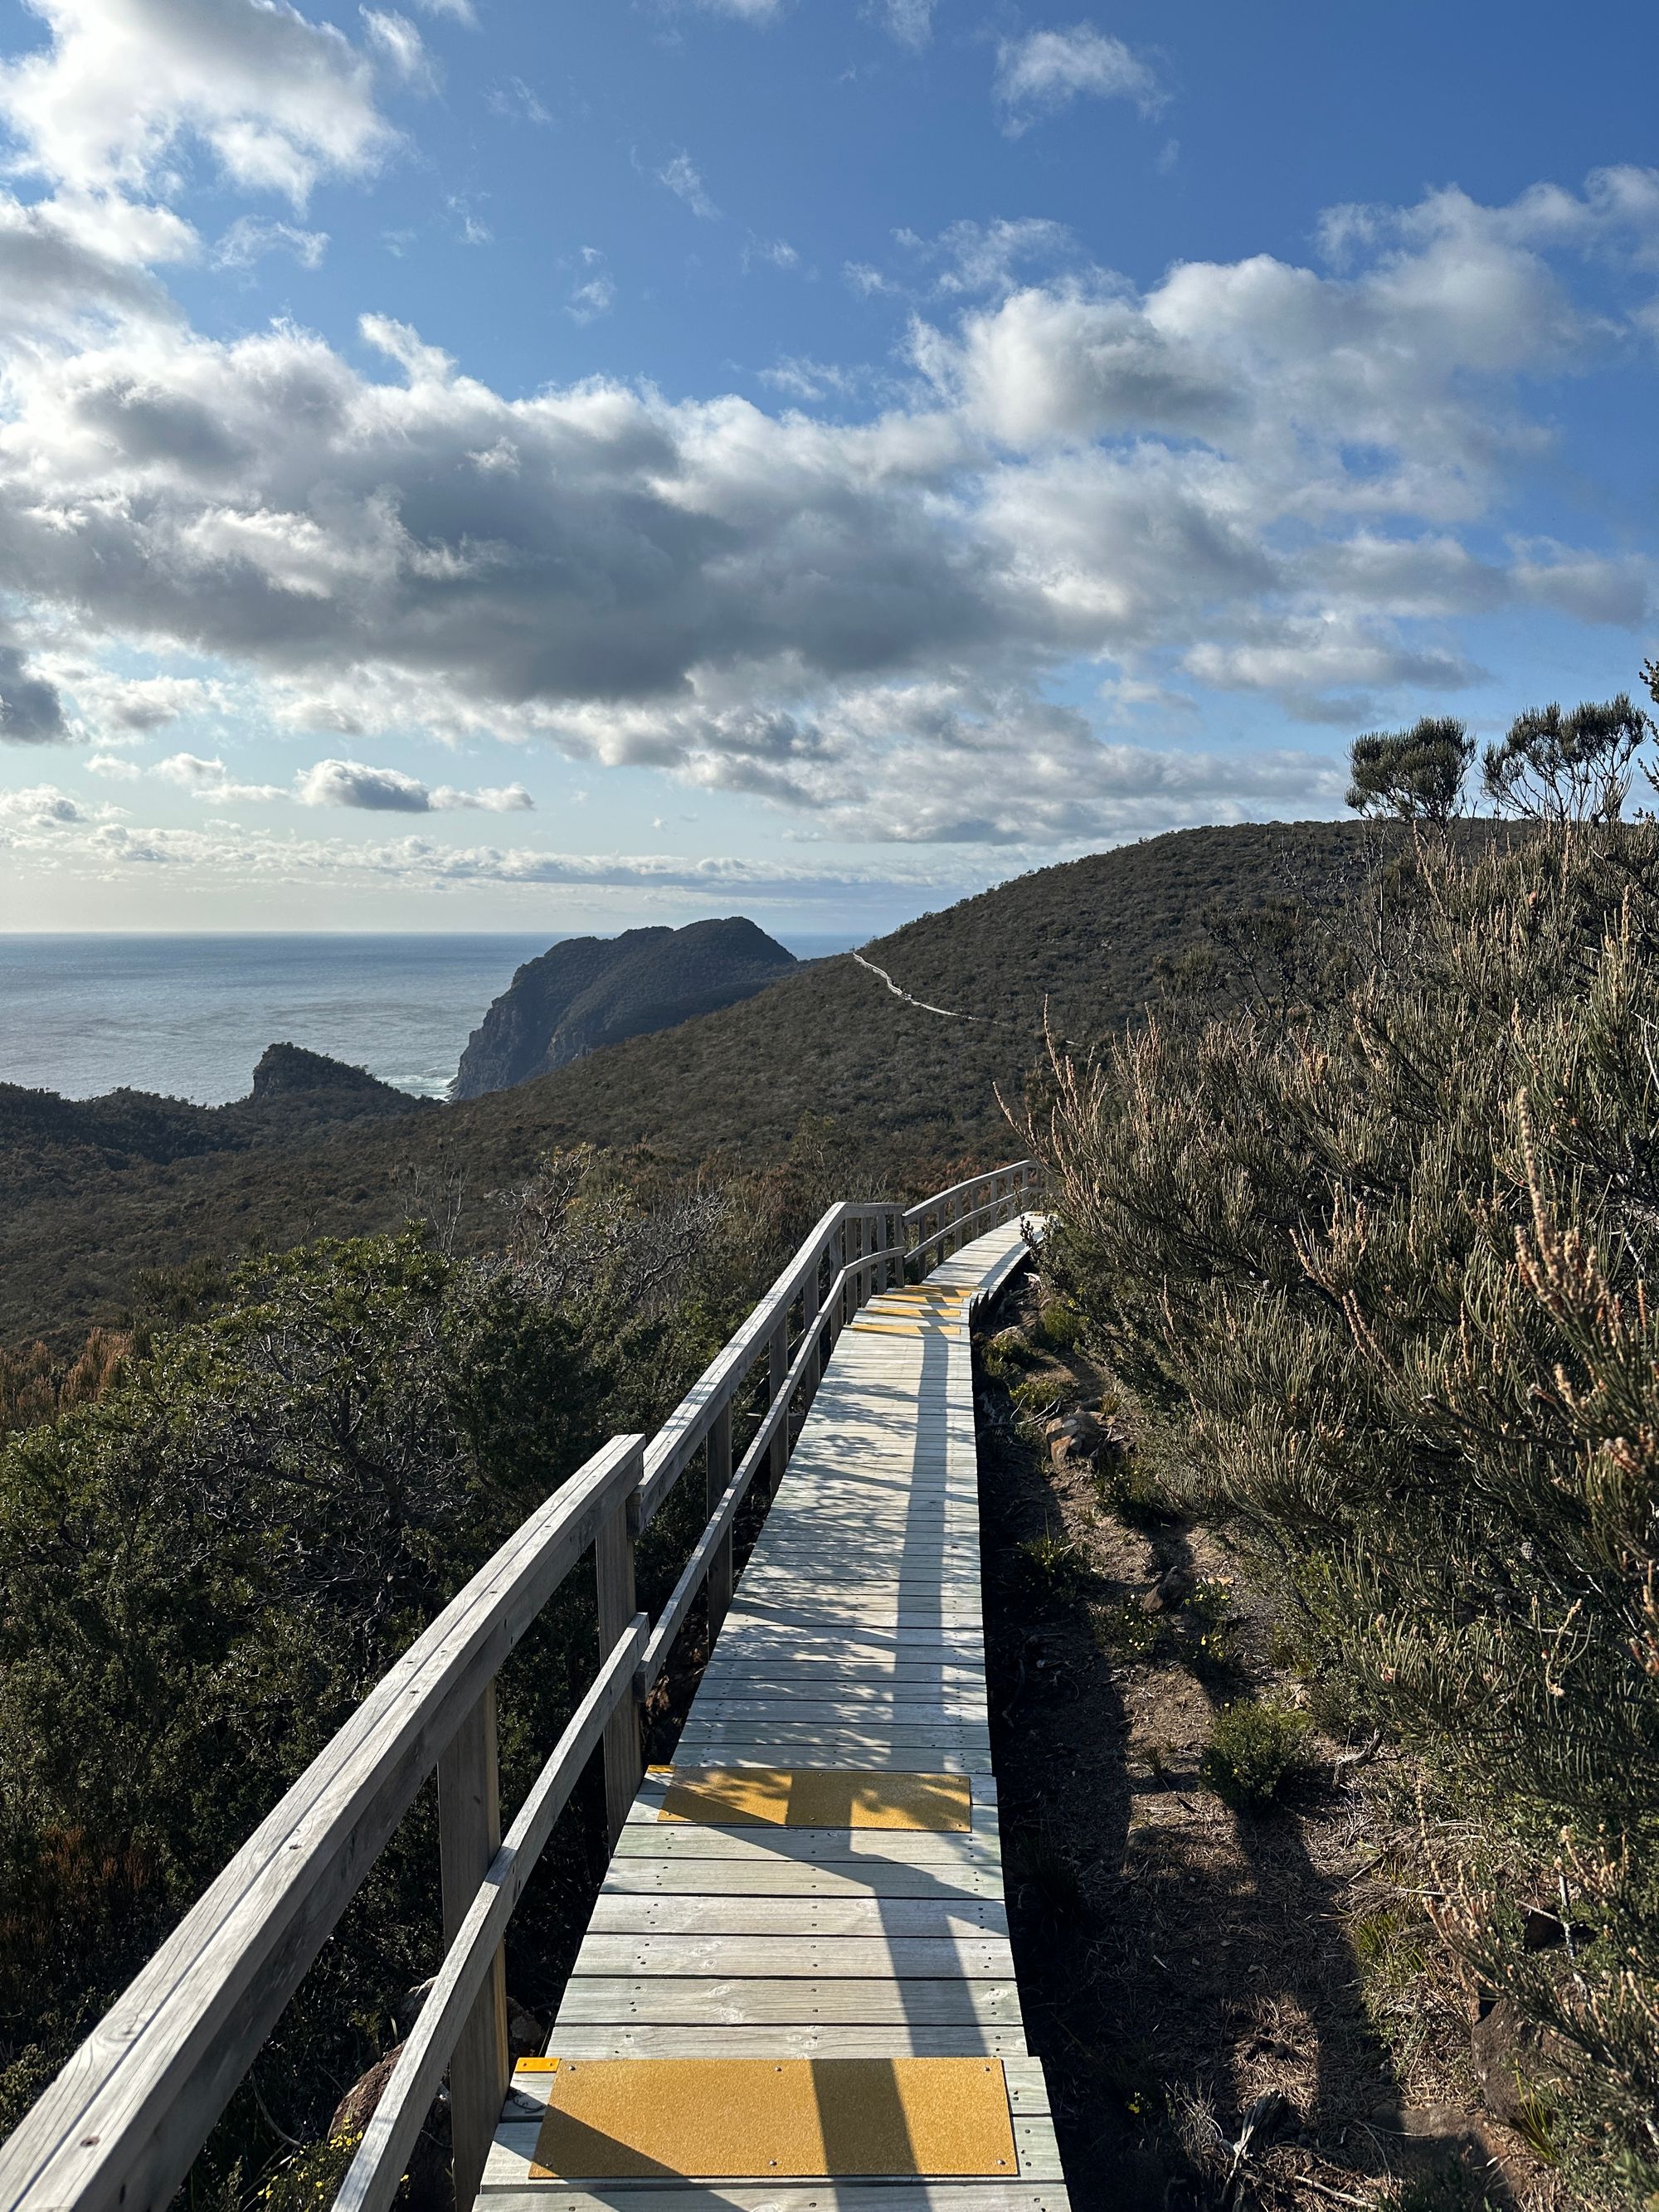
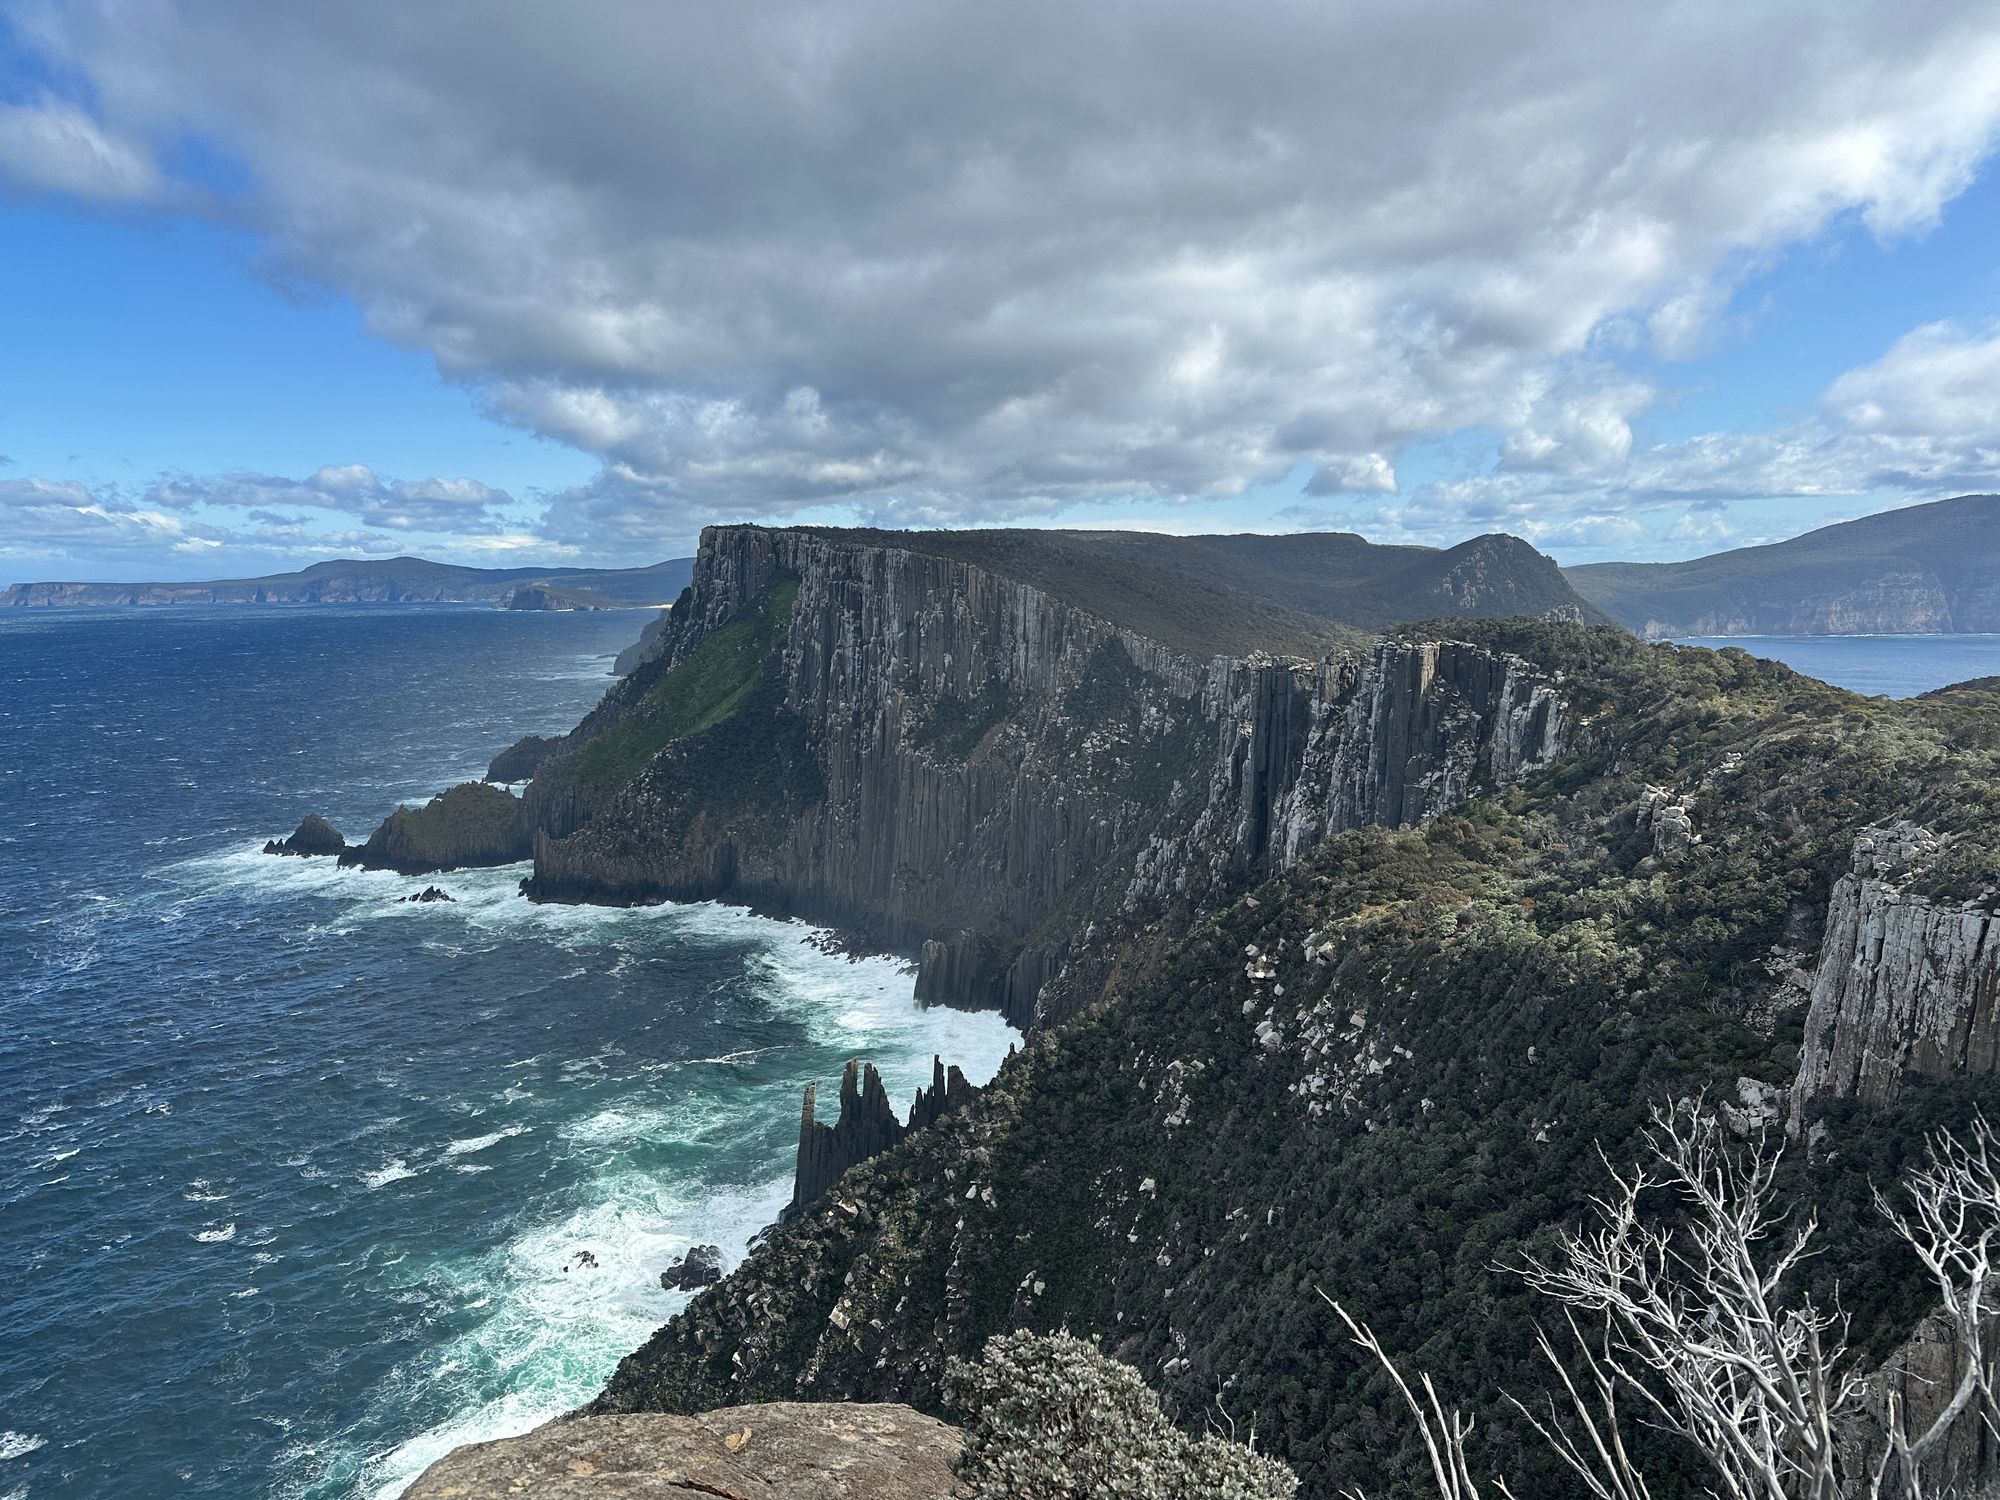
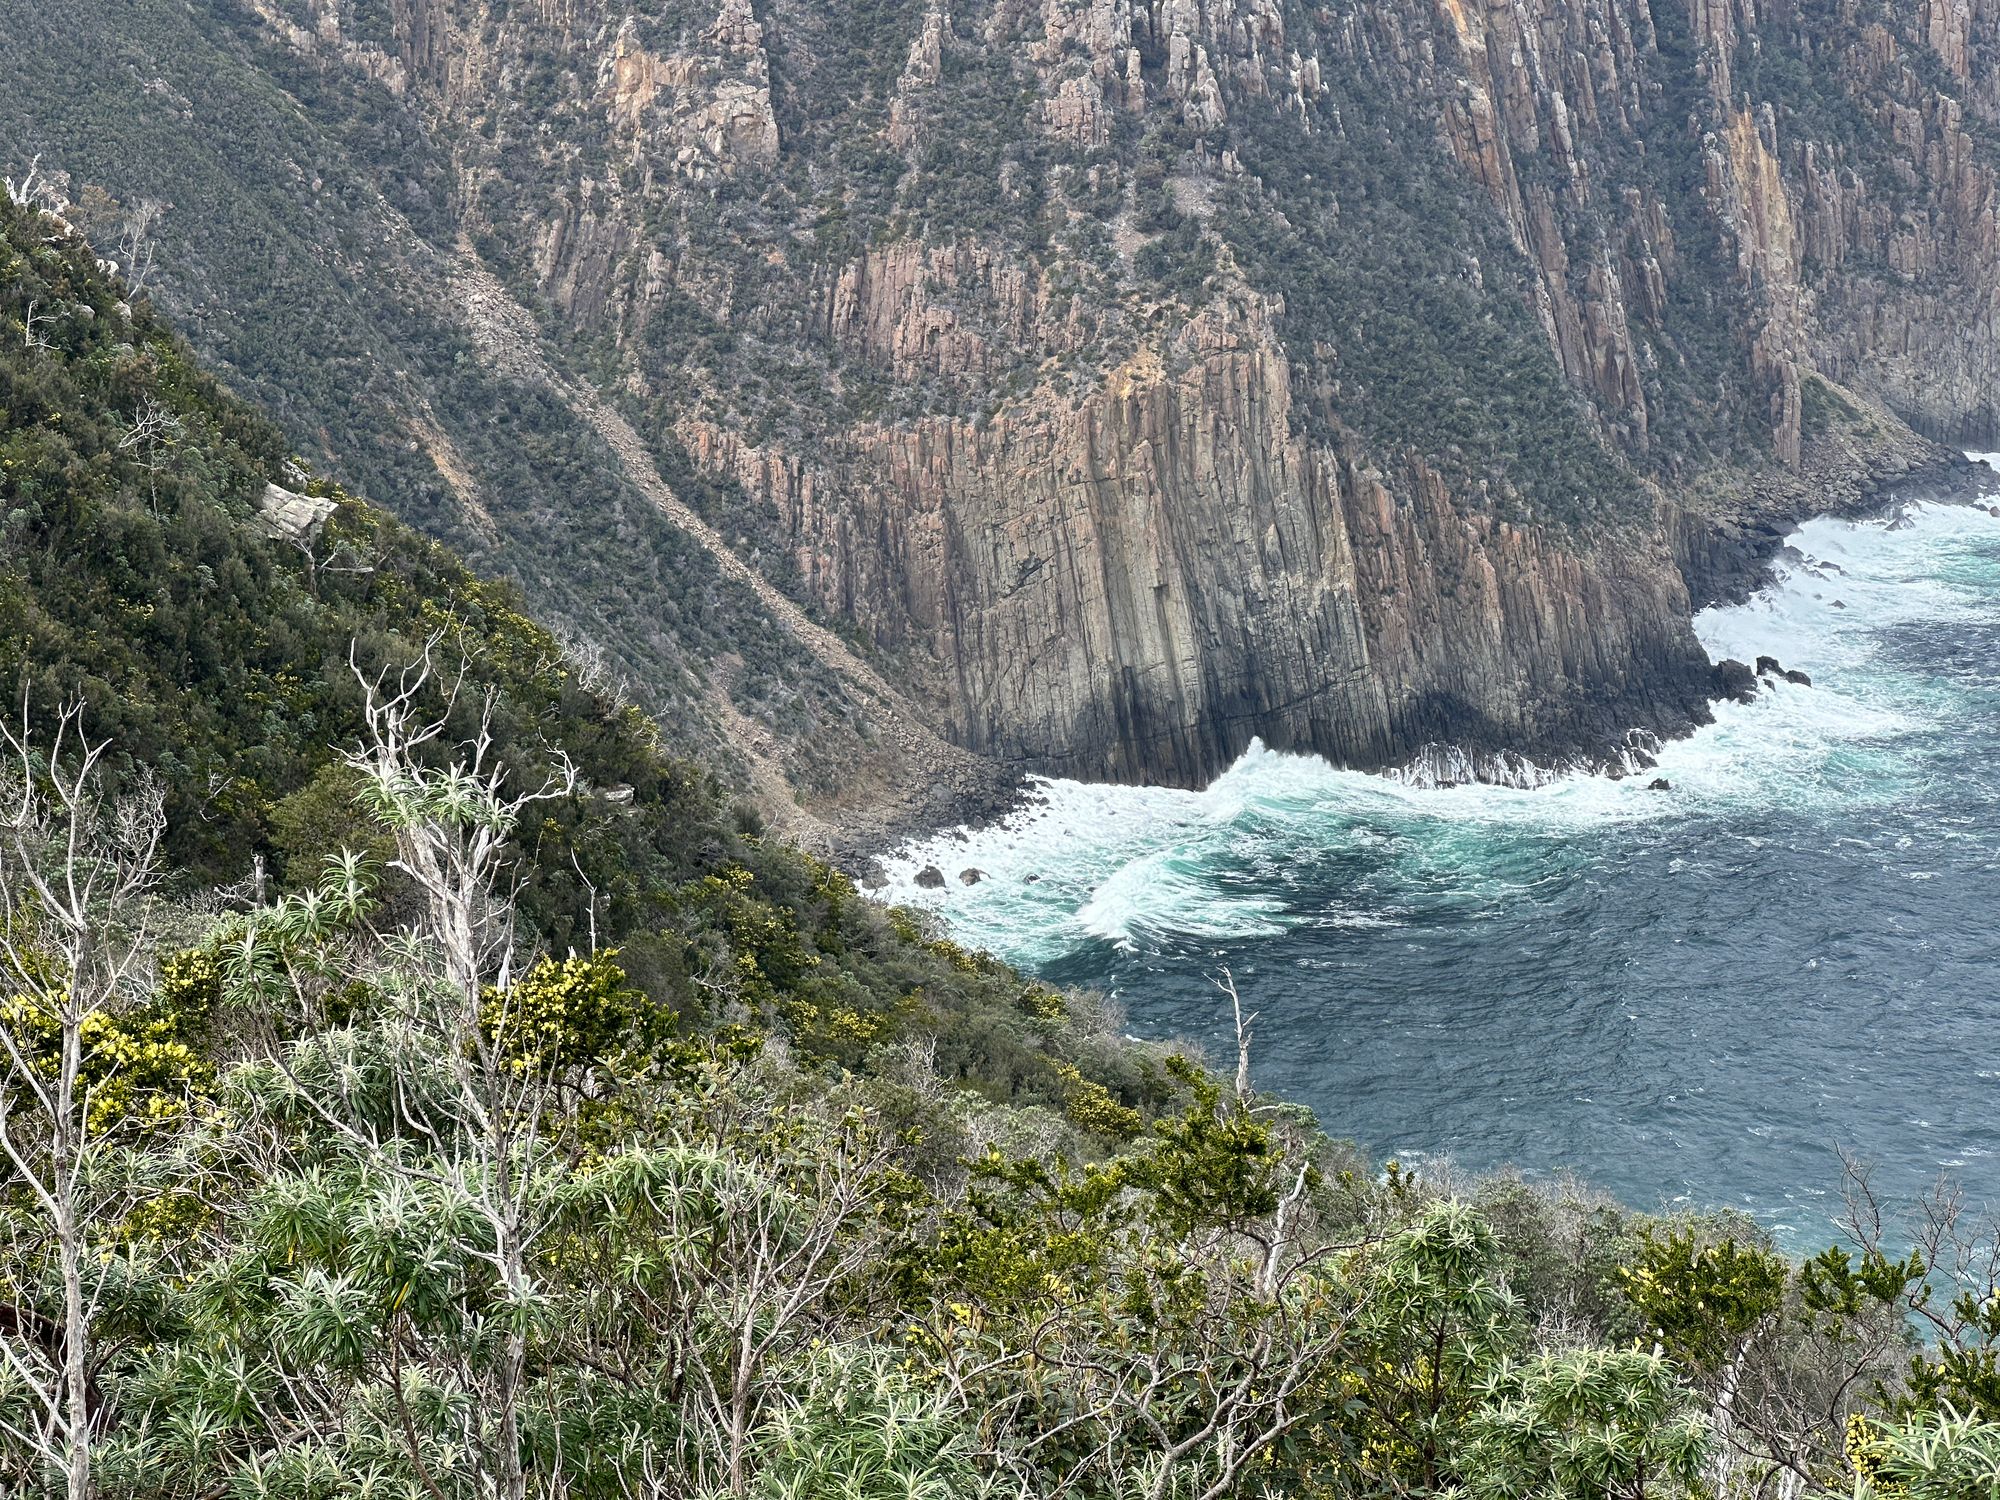
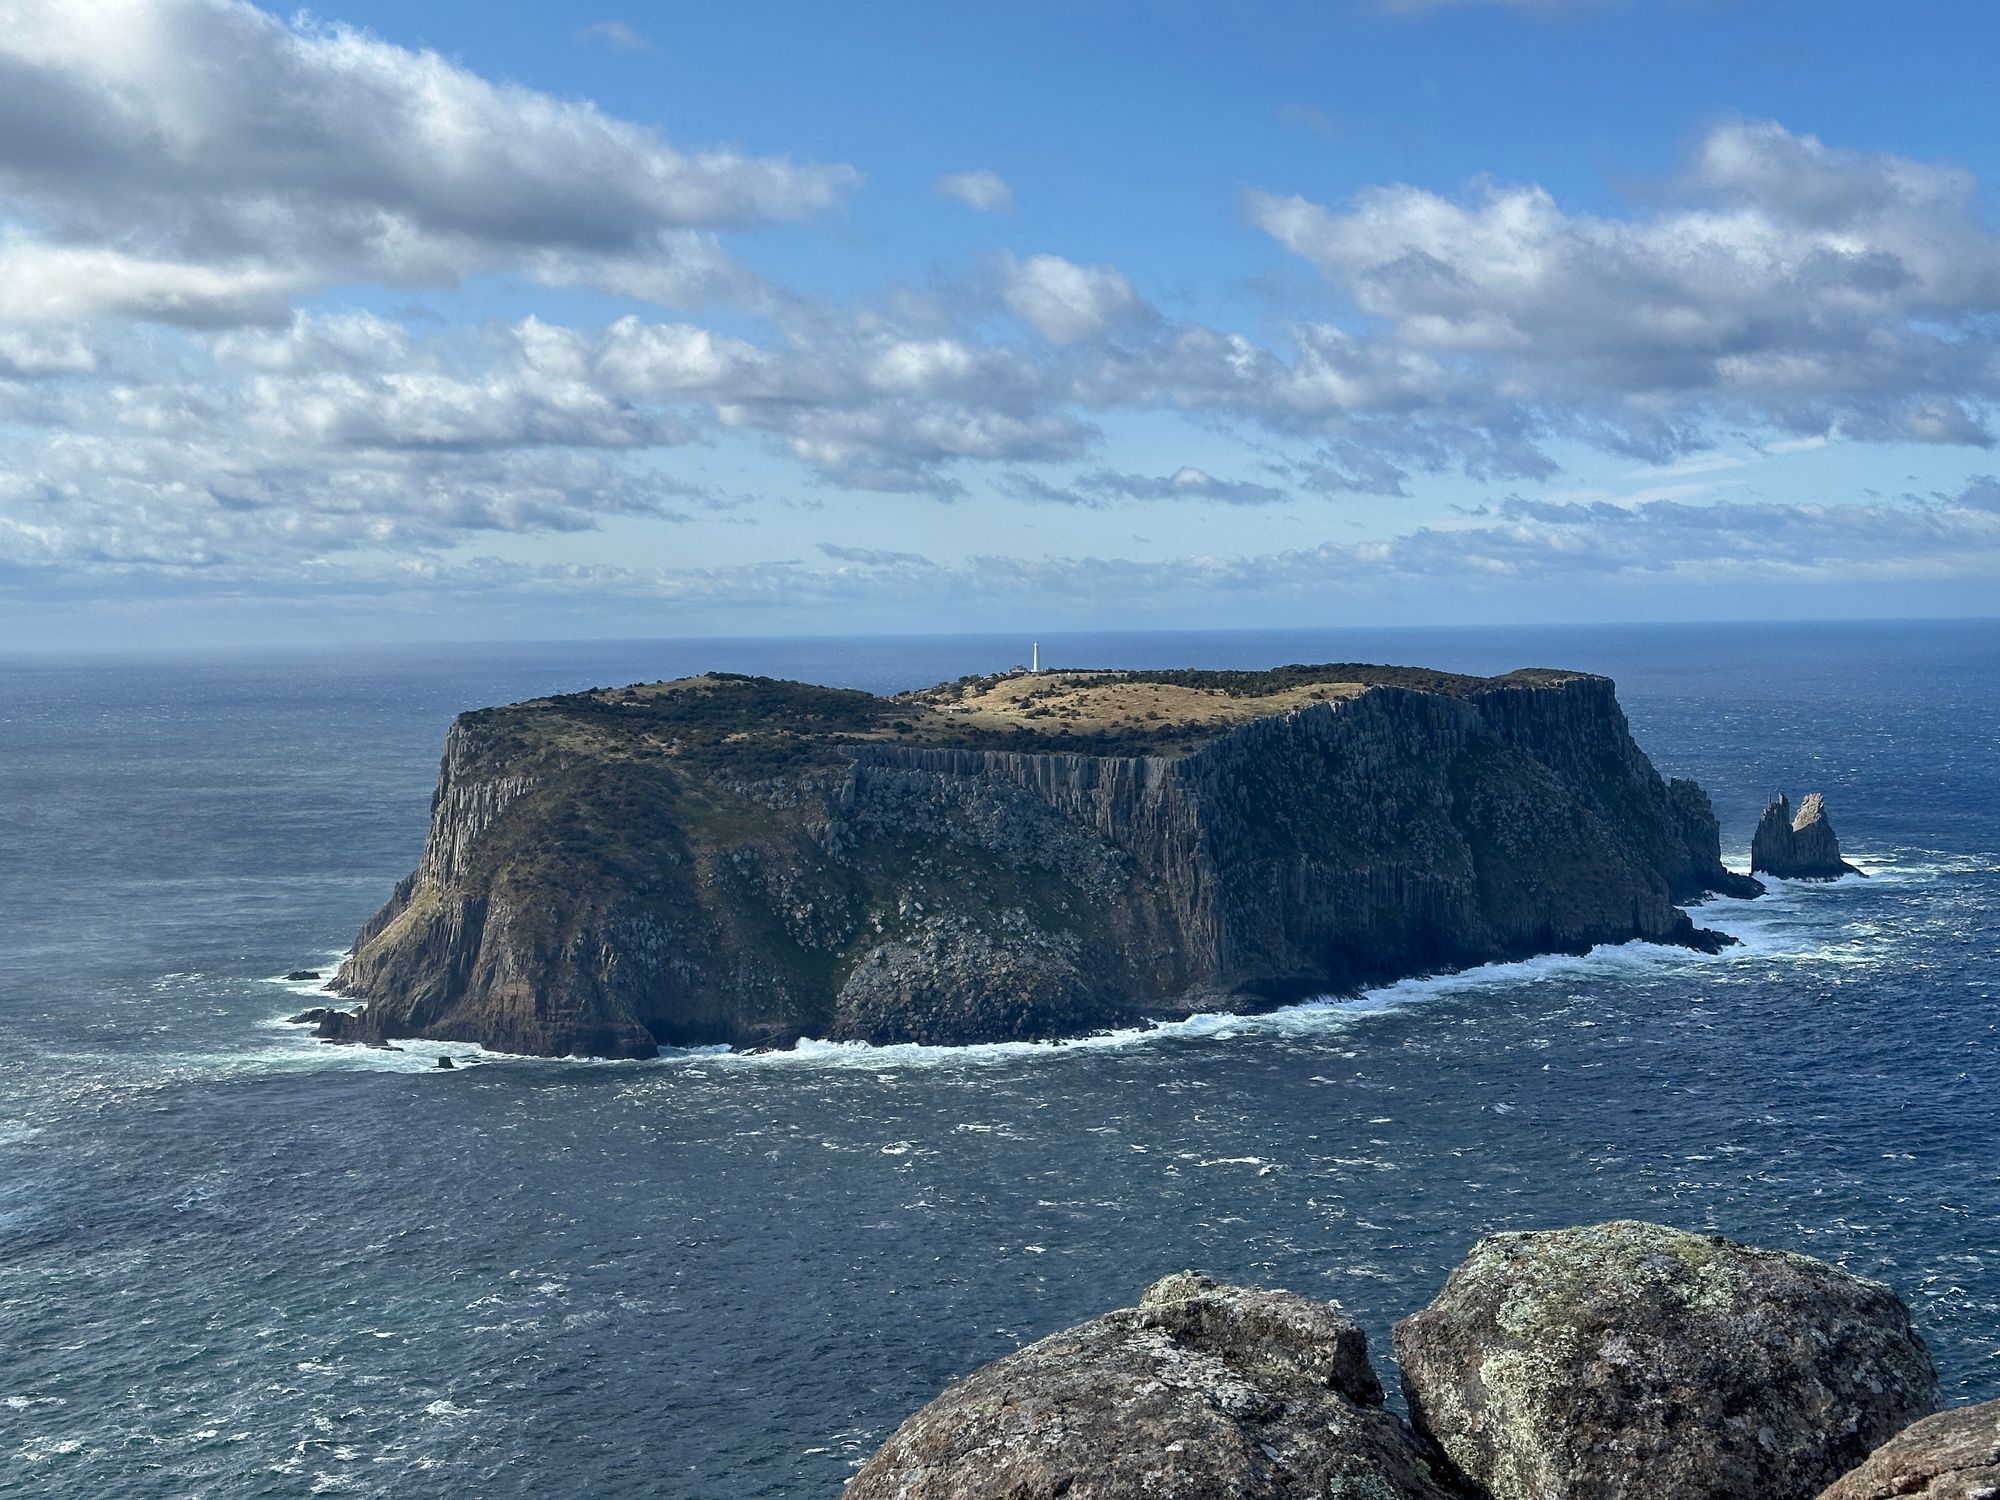
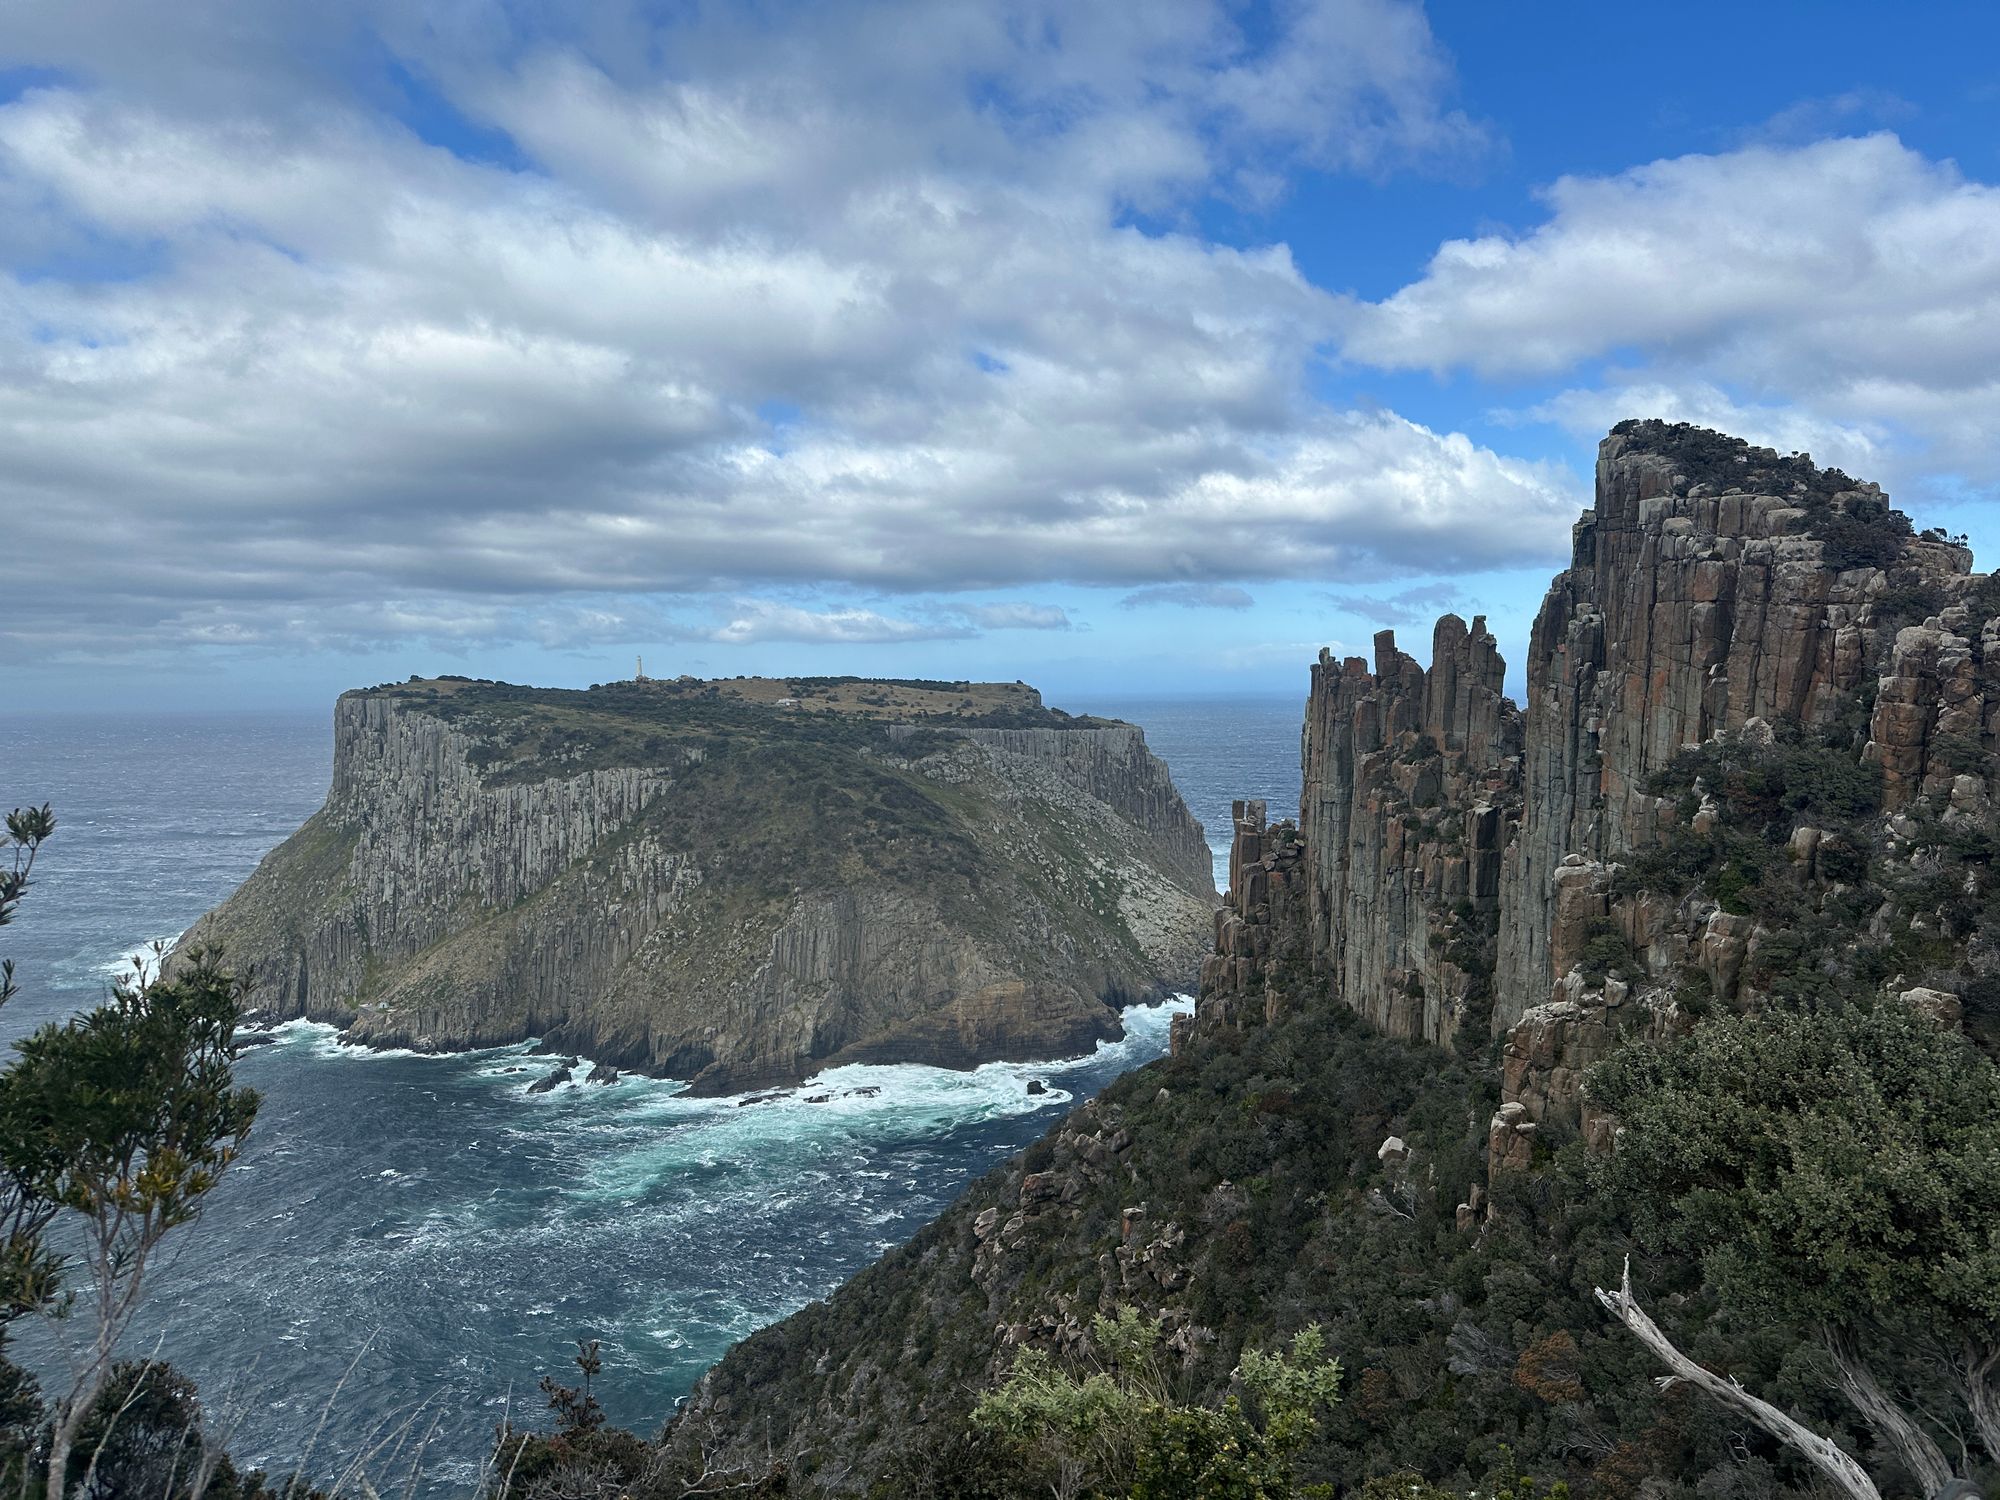
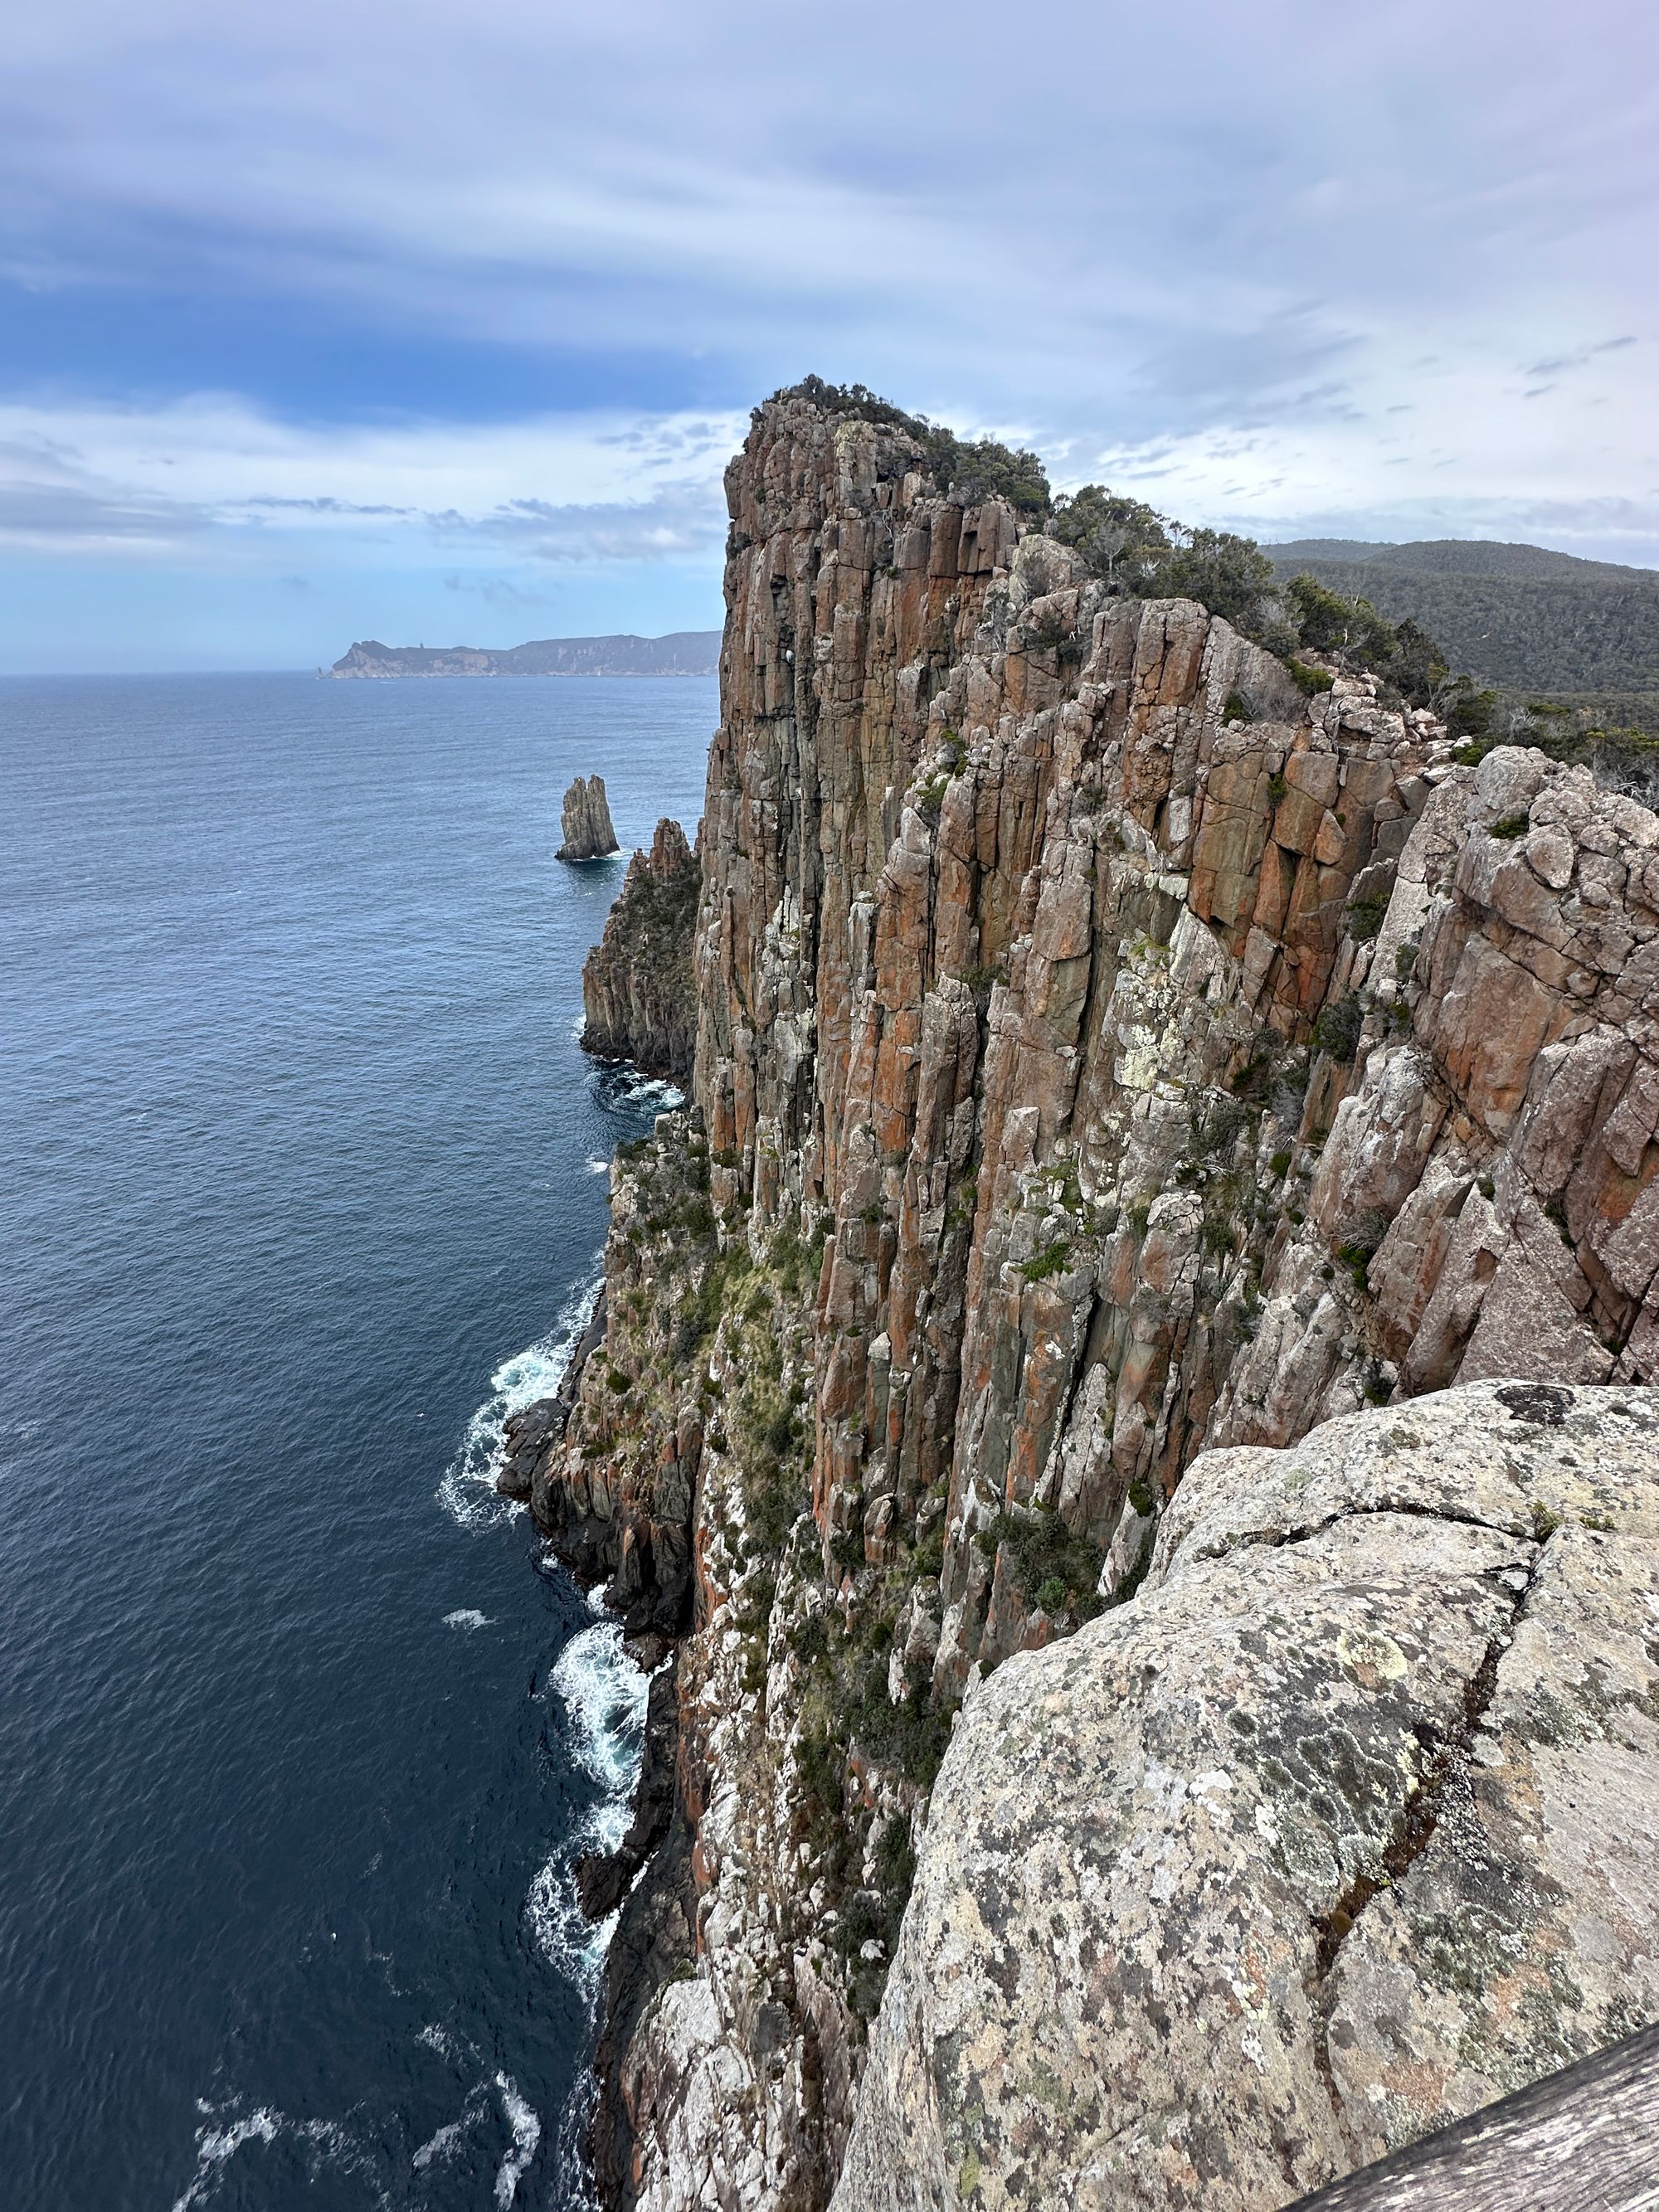
After a while, a sign warns of cliffs and sure enough, there were cliffs. From this part on there are many vantage points from the trail. They are all spectacular. I passed multiple vantage points and had a look around. Every spot is a little different. Eventually, I get my first view of Tasman Island and its Lighthouse.
Tasman Island is a fairly round Island with a bit of elevation. It has steep cliffs on its sides and has a Lighthouse and three buildings. It also has a mechanical lift to bring passengers up from boats. It looks like an extremely remote place to live, to say the least. The Lighthouse is fully automated today and no one lives there anymore. The only way to get onto the island these days is via a helicopter.
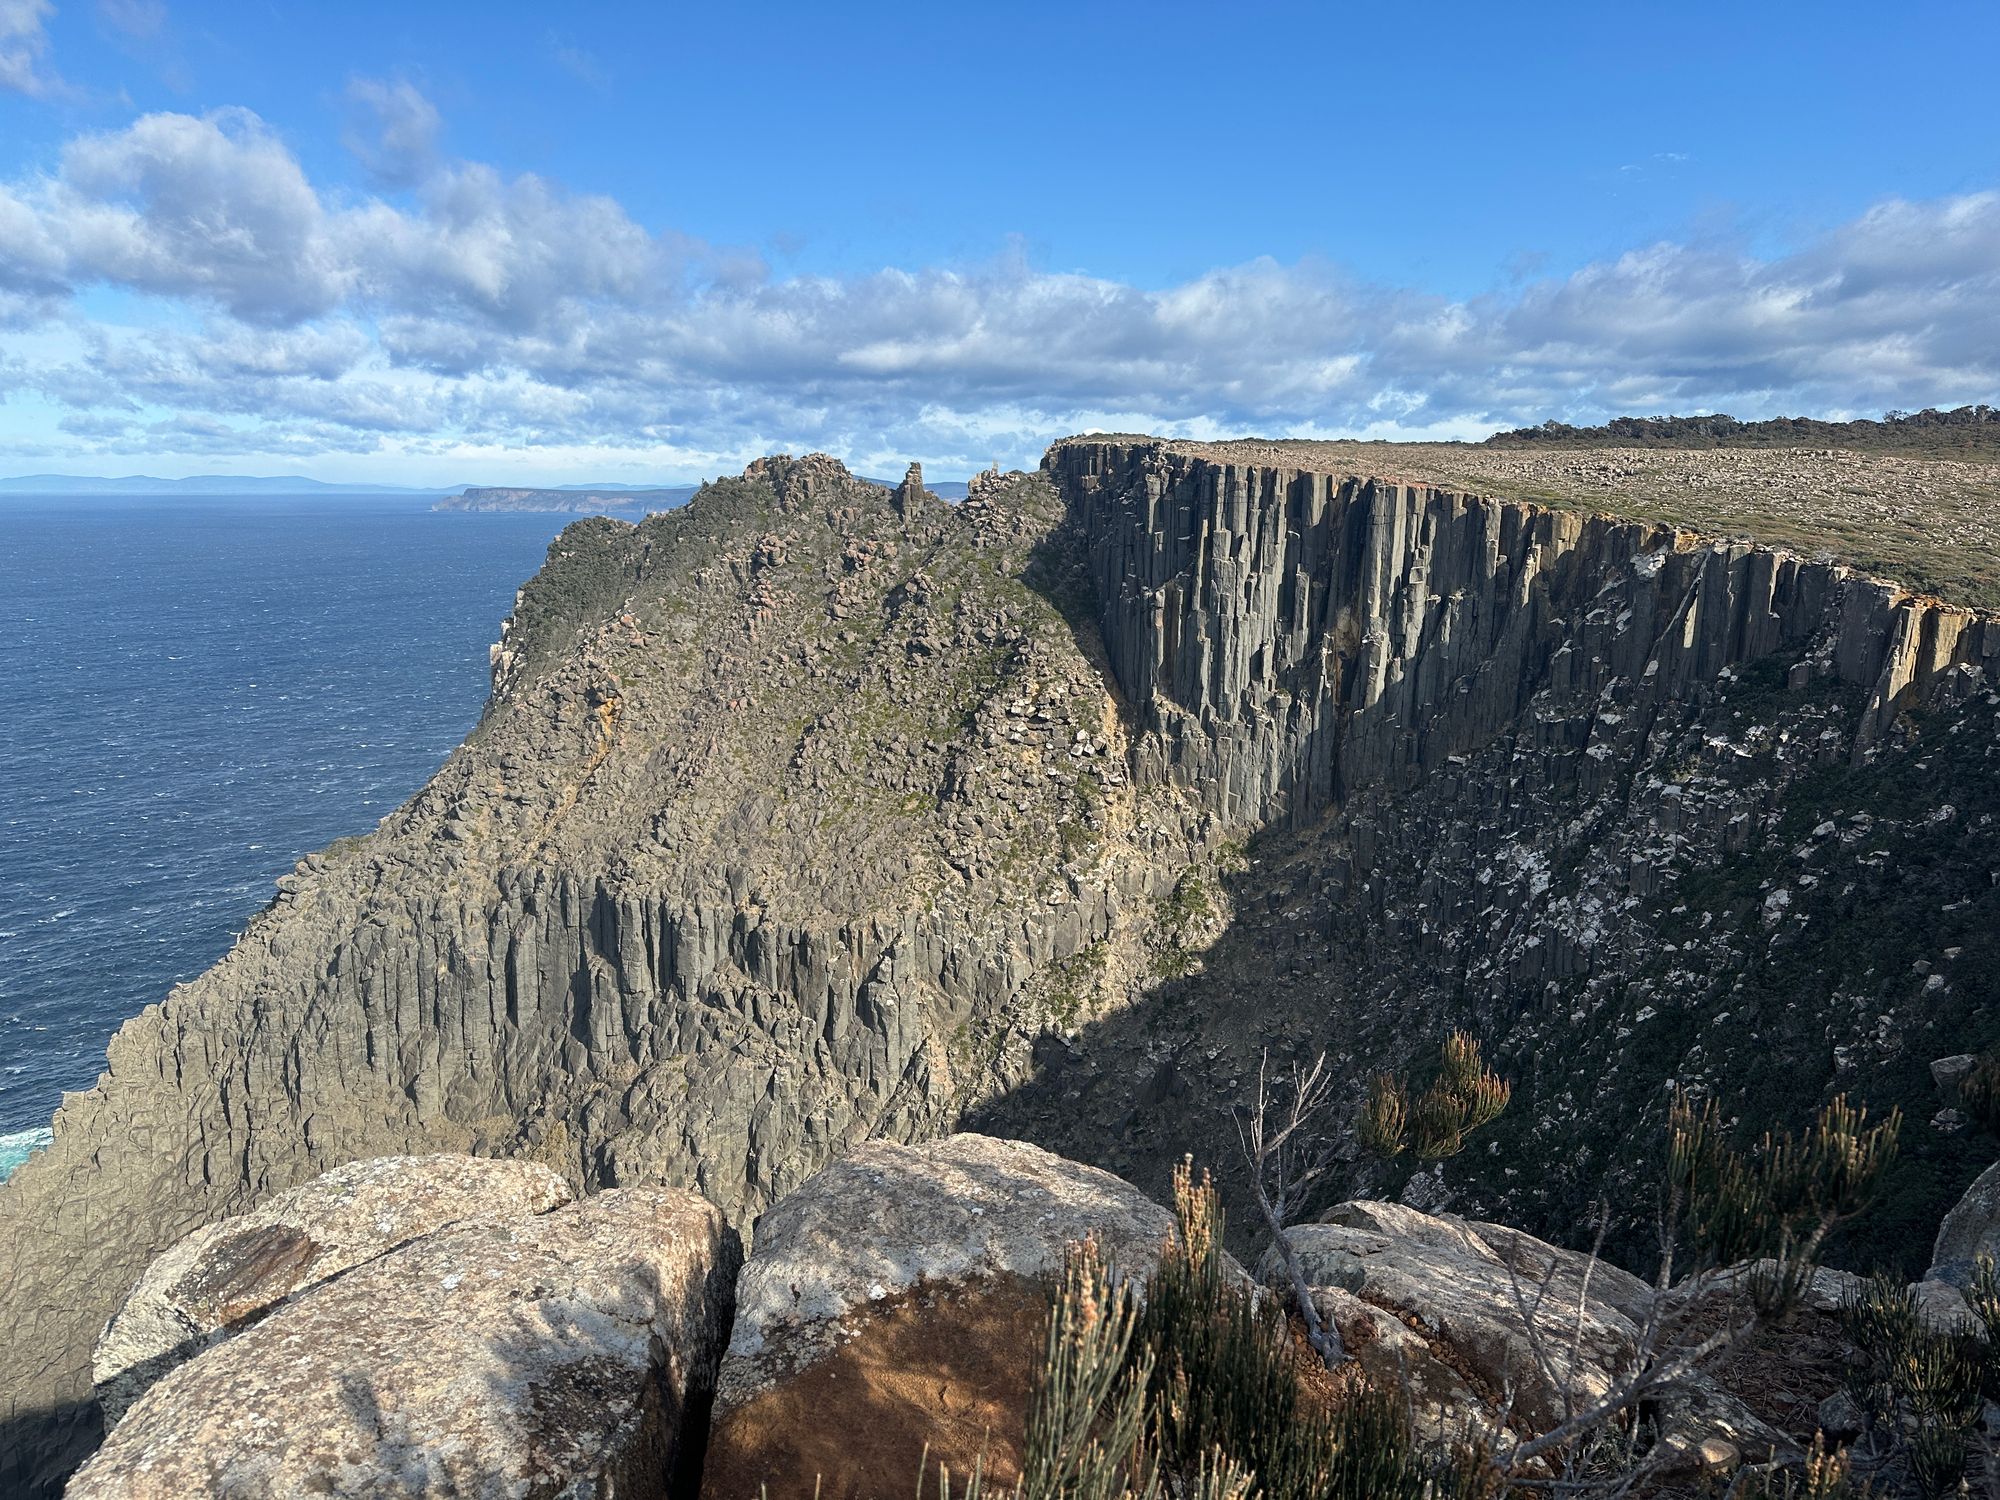
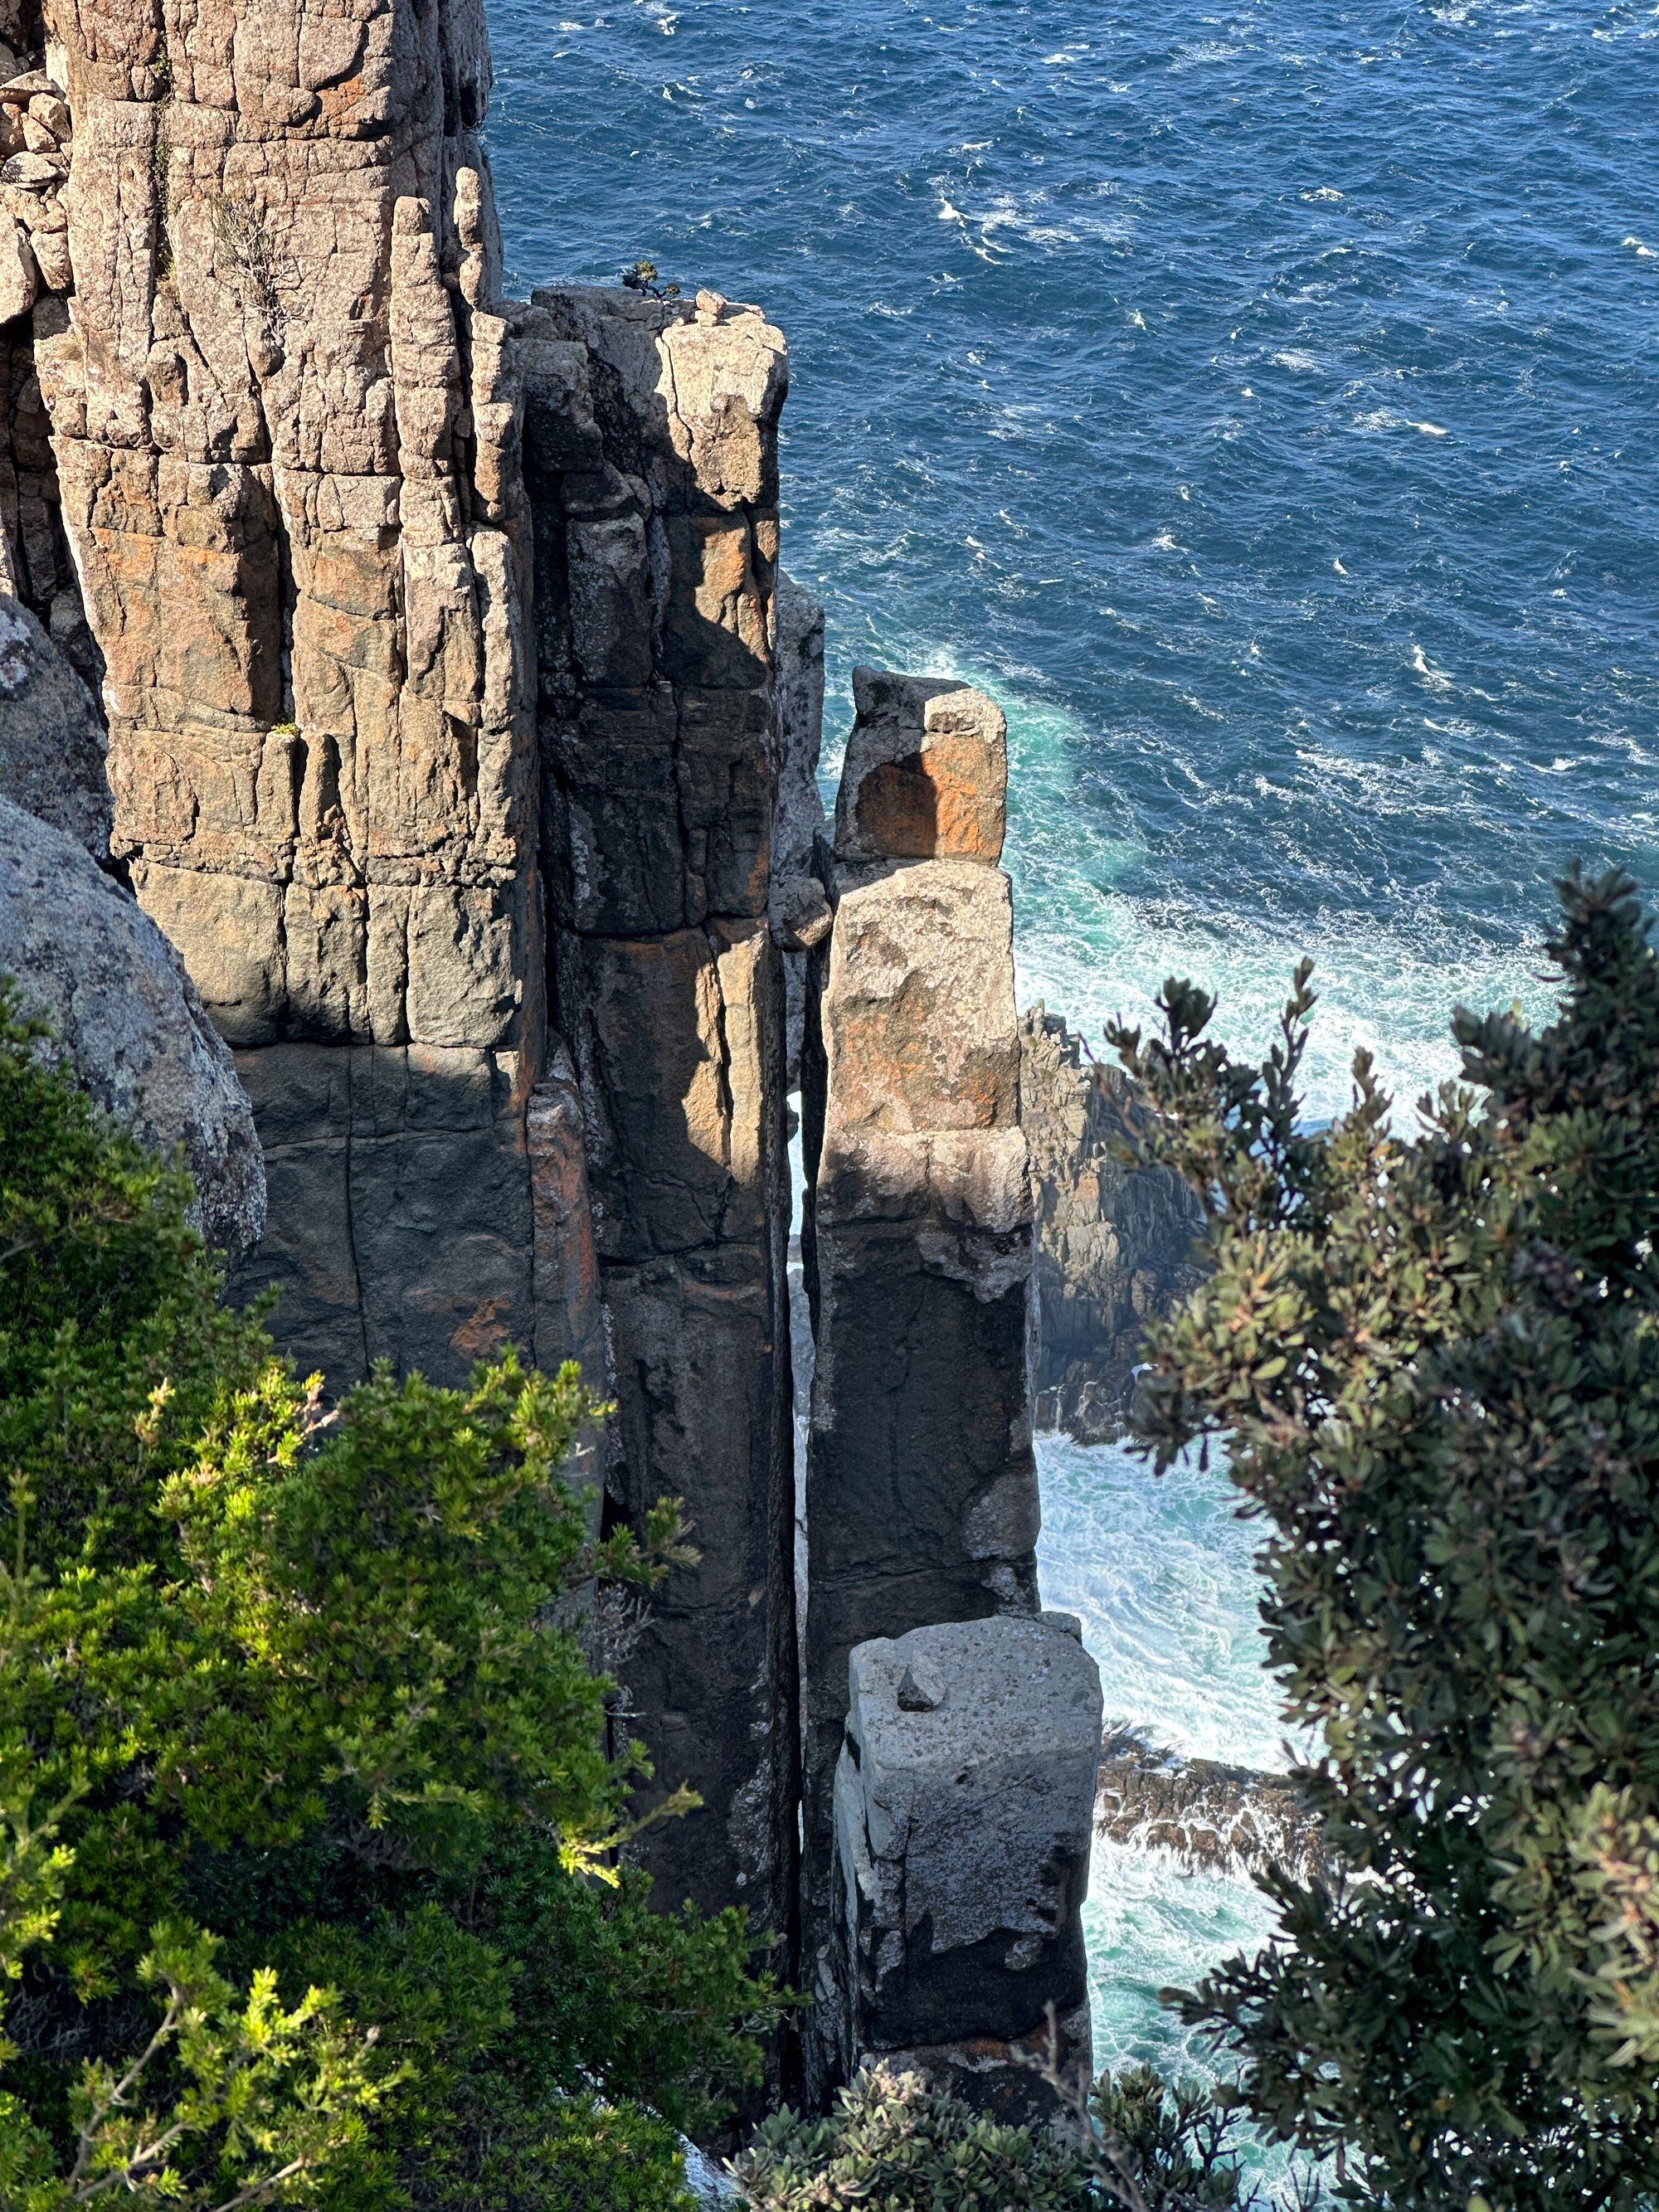
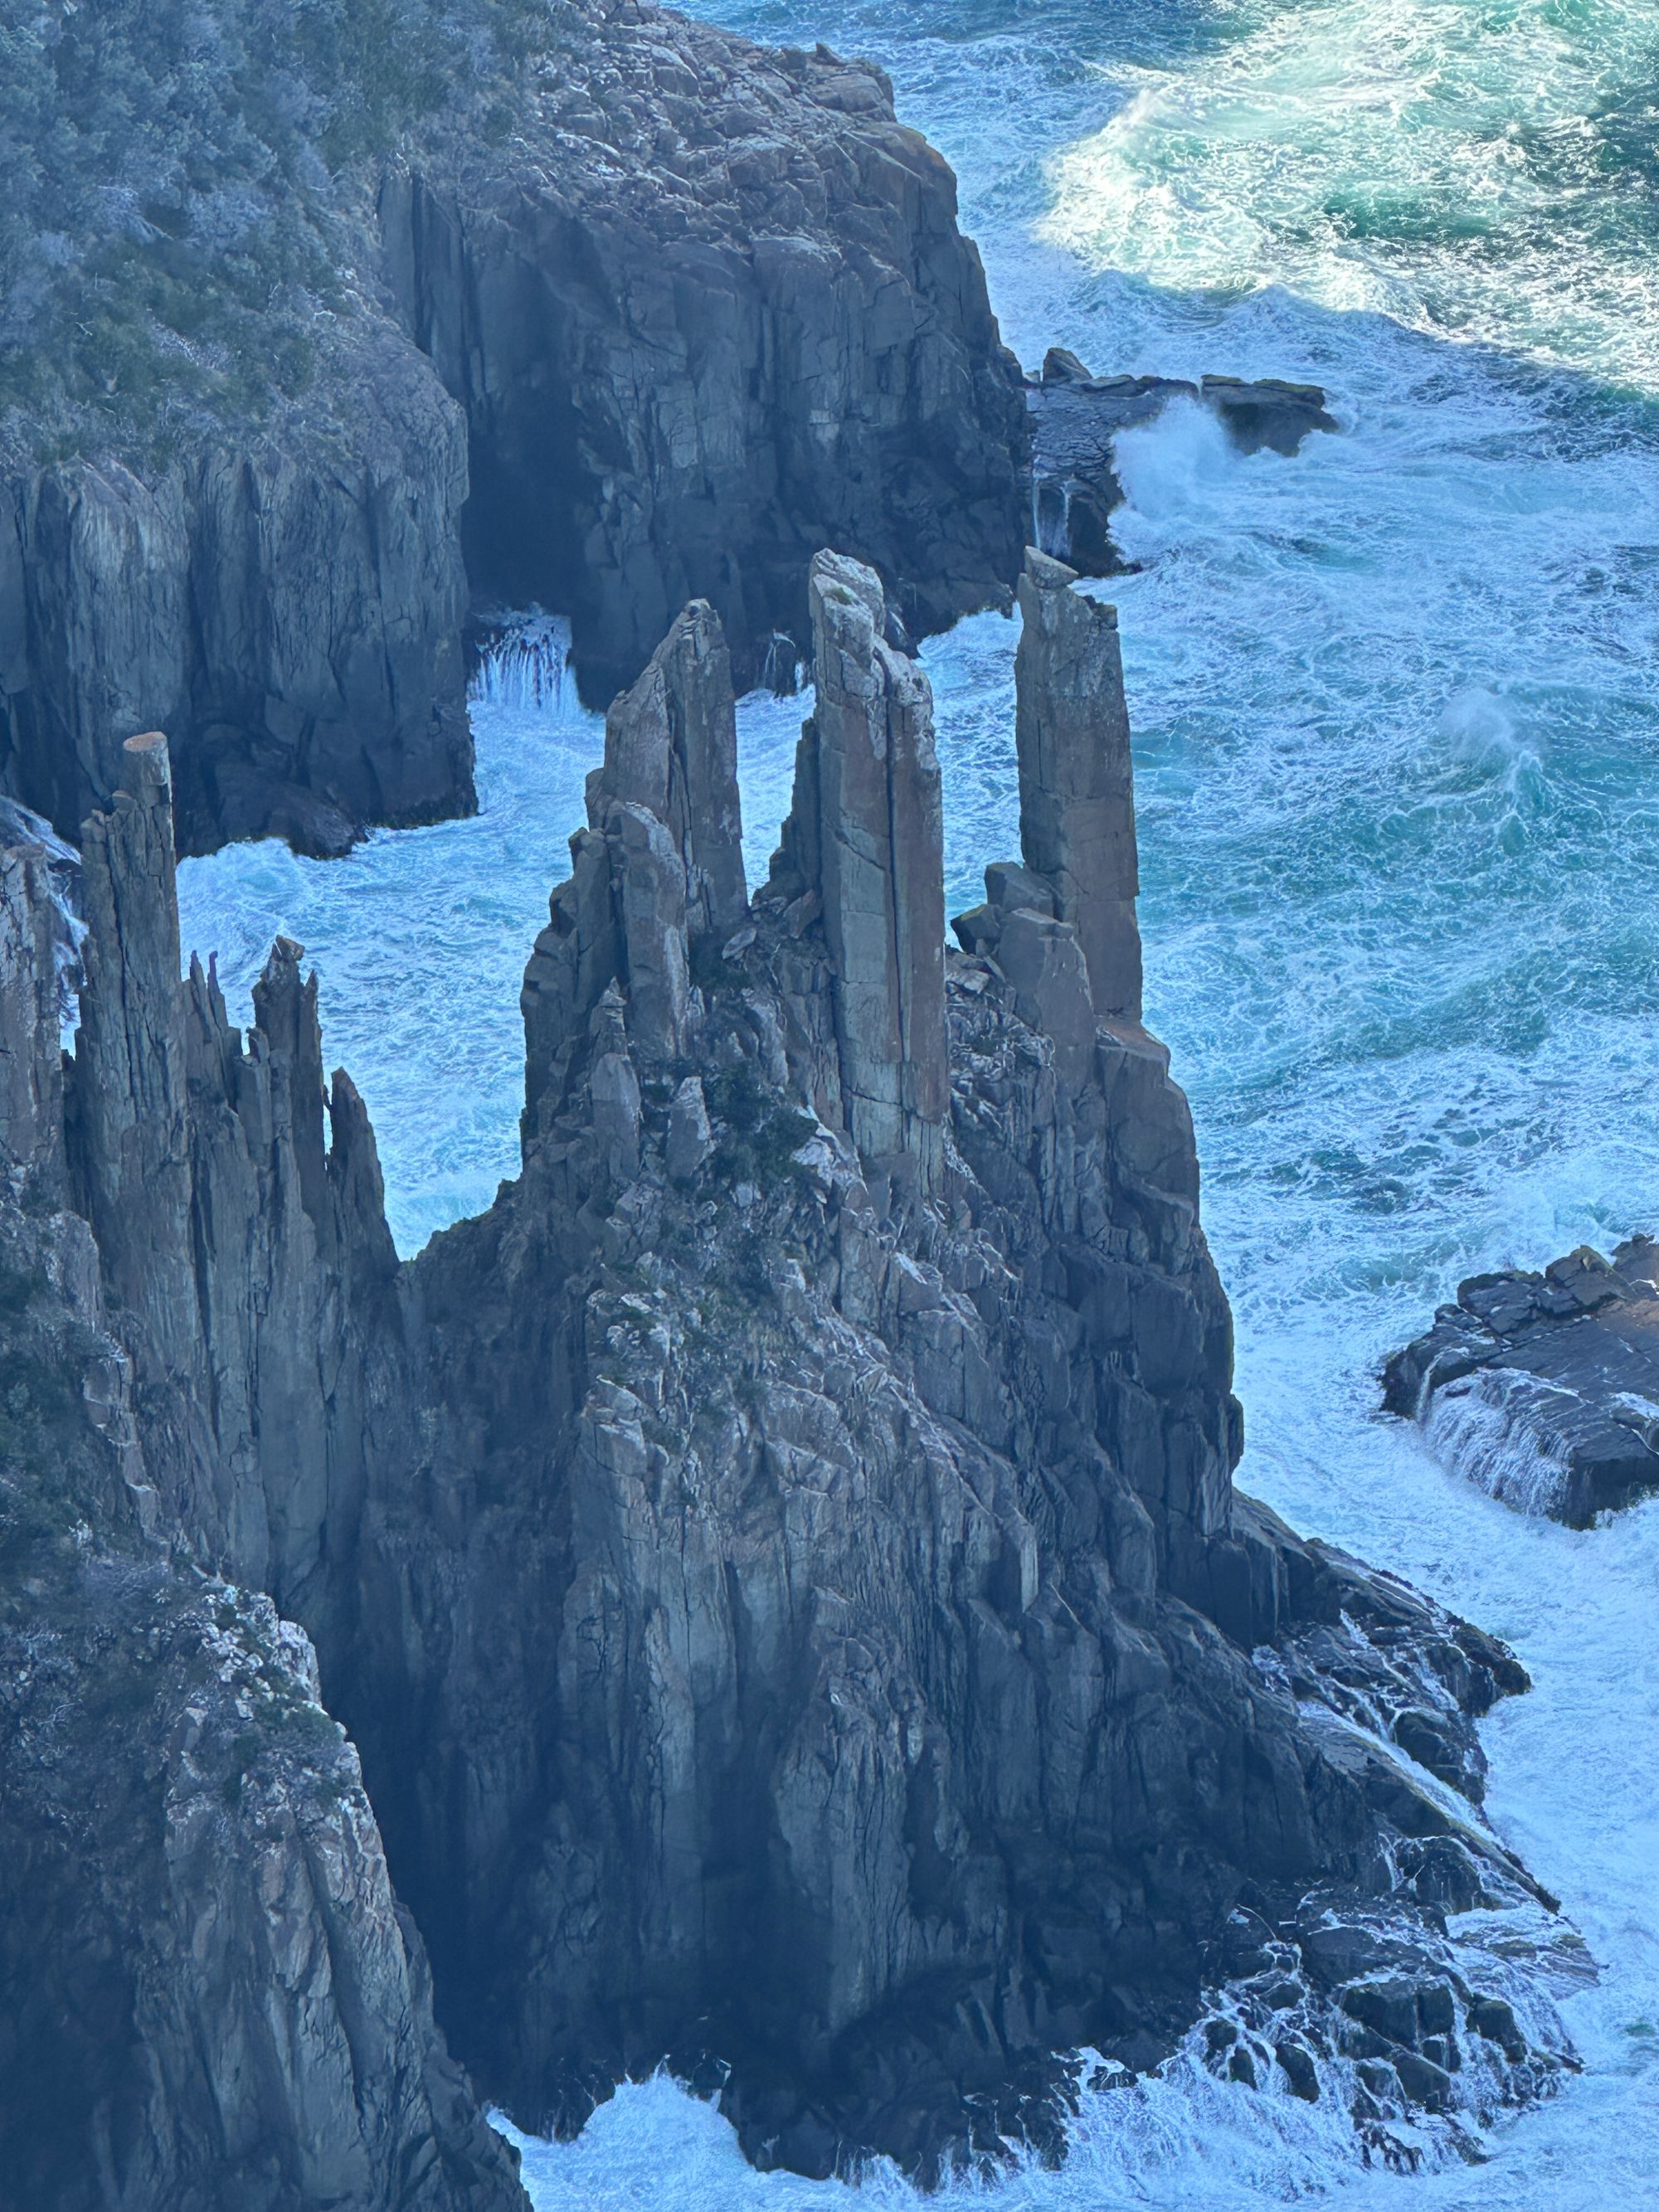
Continuing on along the trail, I stop at another lookout and I see the Trident. This is a rock formation with three individual spires and looks like a Trident. Shortly after this, there’s a turn-off for The Blade. The Blade is the most exposed part of the entire trail but doesn’t require any major scrambling. By this time the wind had picked up quite substantially and those 80 km gusts on the very exposed Blade were interesting. At the top of The Blade, you can sort of crawl through some boulders and poke your head out. I did this very briefly, but the wind made it somewhat dangerous. Nobody crawled onto the last boulder.
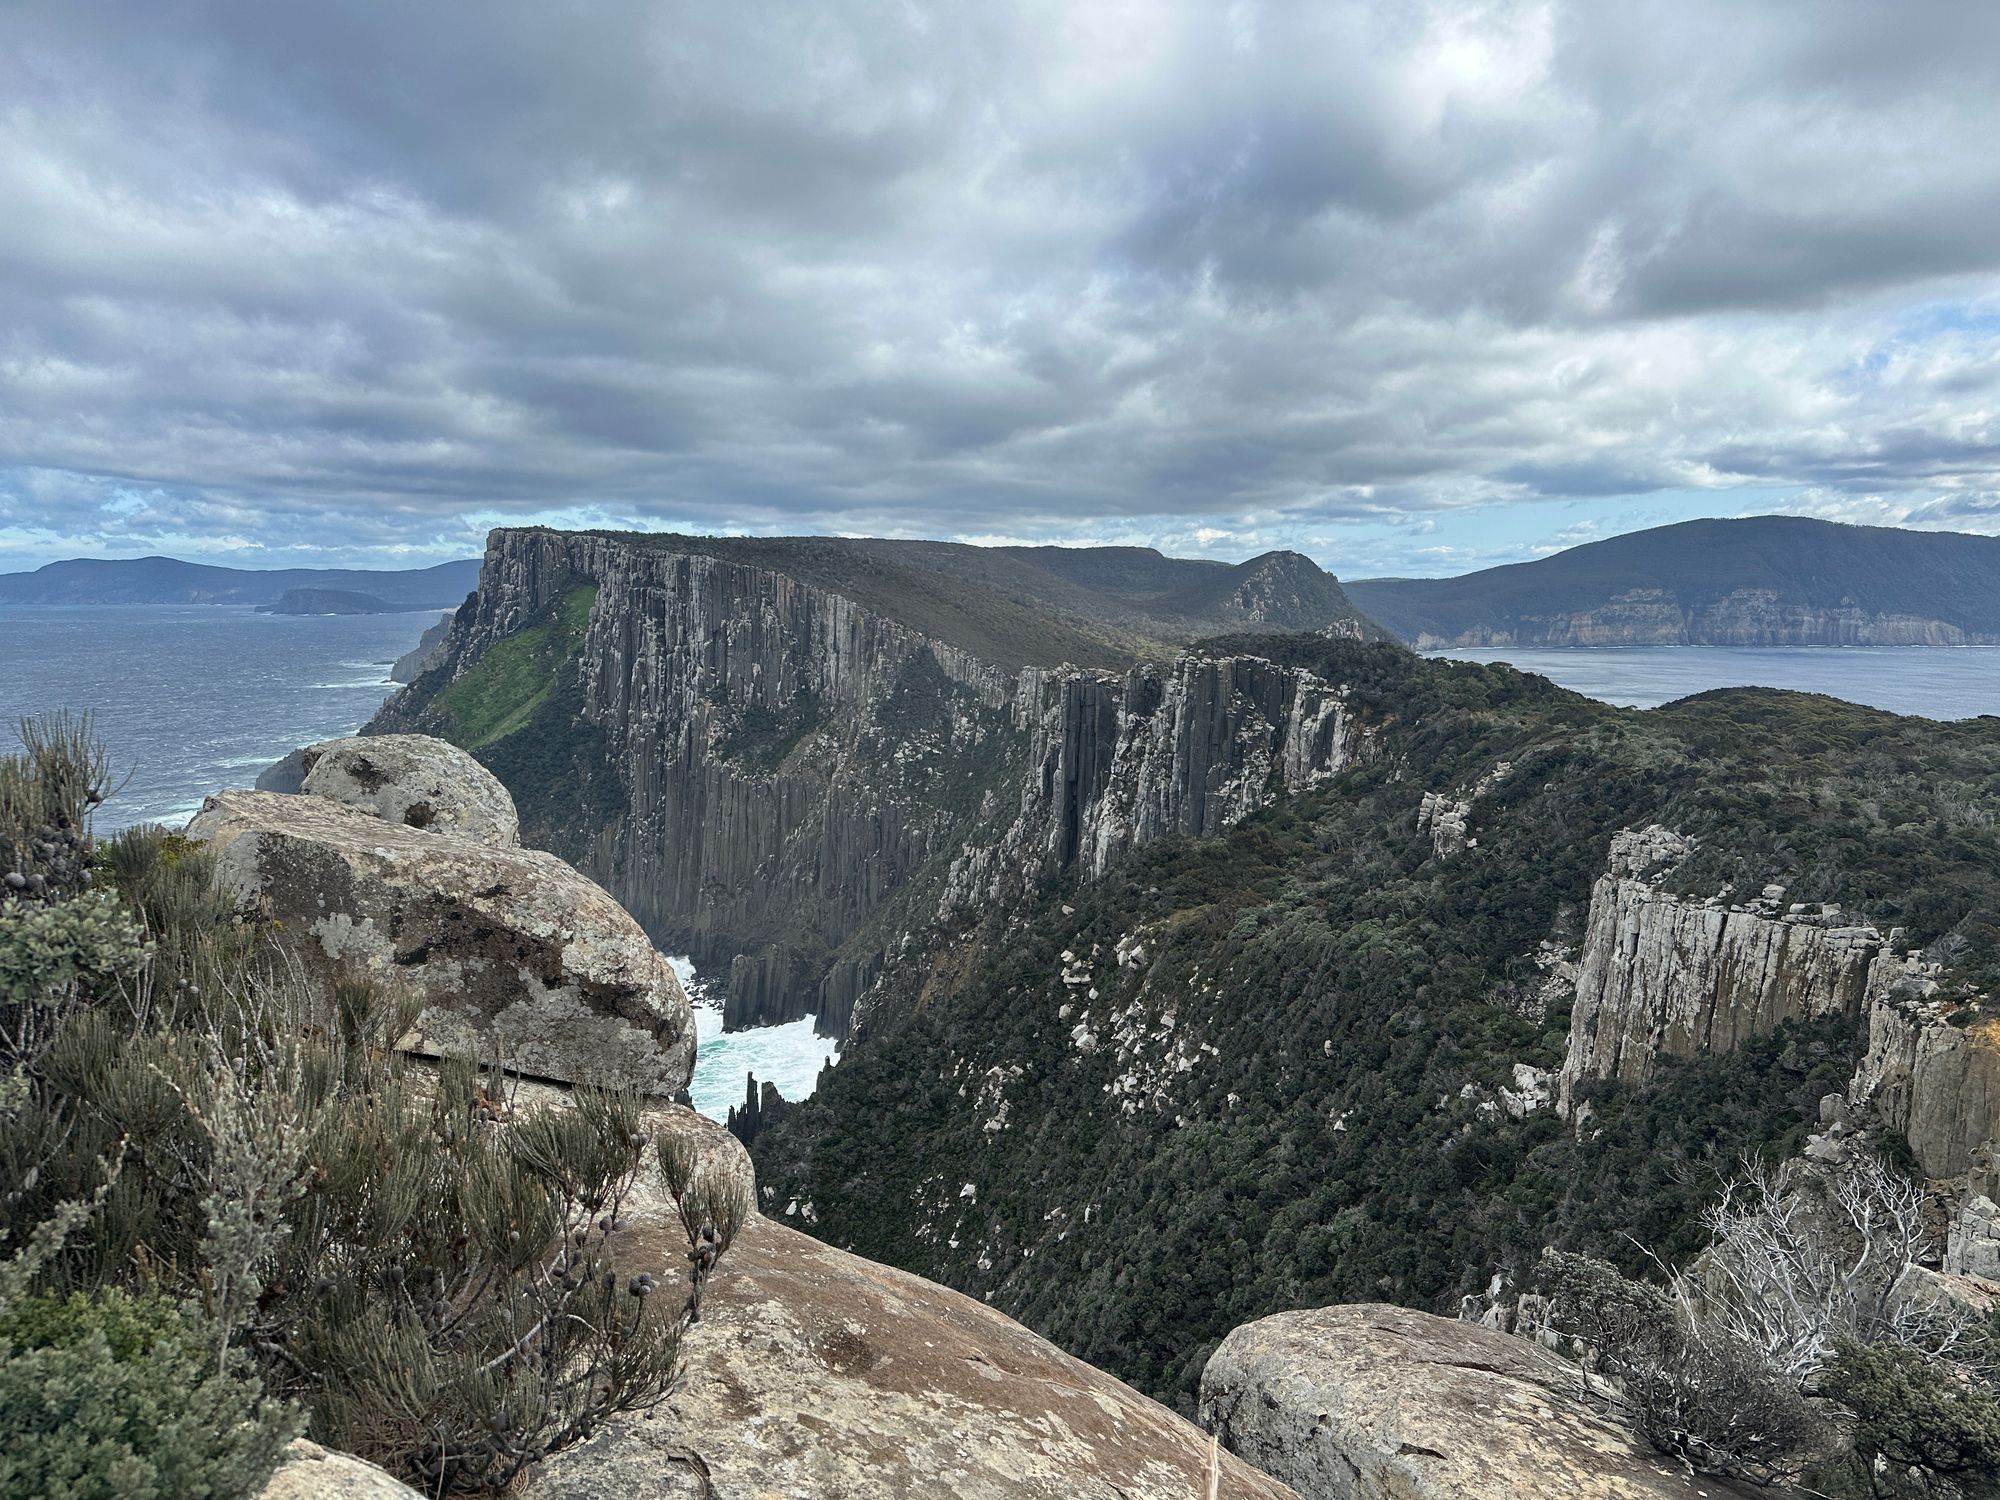
After visiting The Blade, I quickly walked up to Cape Pillar (second cape) by this stage it was too windy to enjoy the views. I think I only spent two minutes up there. After this, I started the long return walk to my bag with the wind picking up more. You could hear the gust coming as it made the foliage bend and flap in the distance. When the gusts got to me, I just had to stop and hold my position. It reminded me of one time on top of Mount Kosciuszko where you could really lean into the wind, and it would support your body weight.
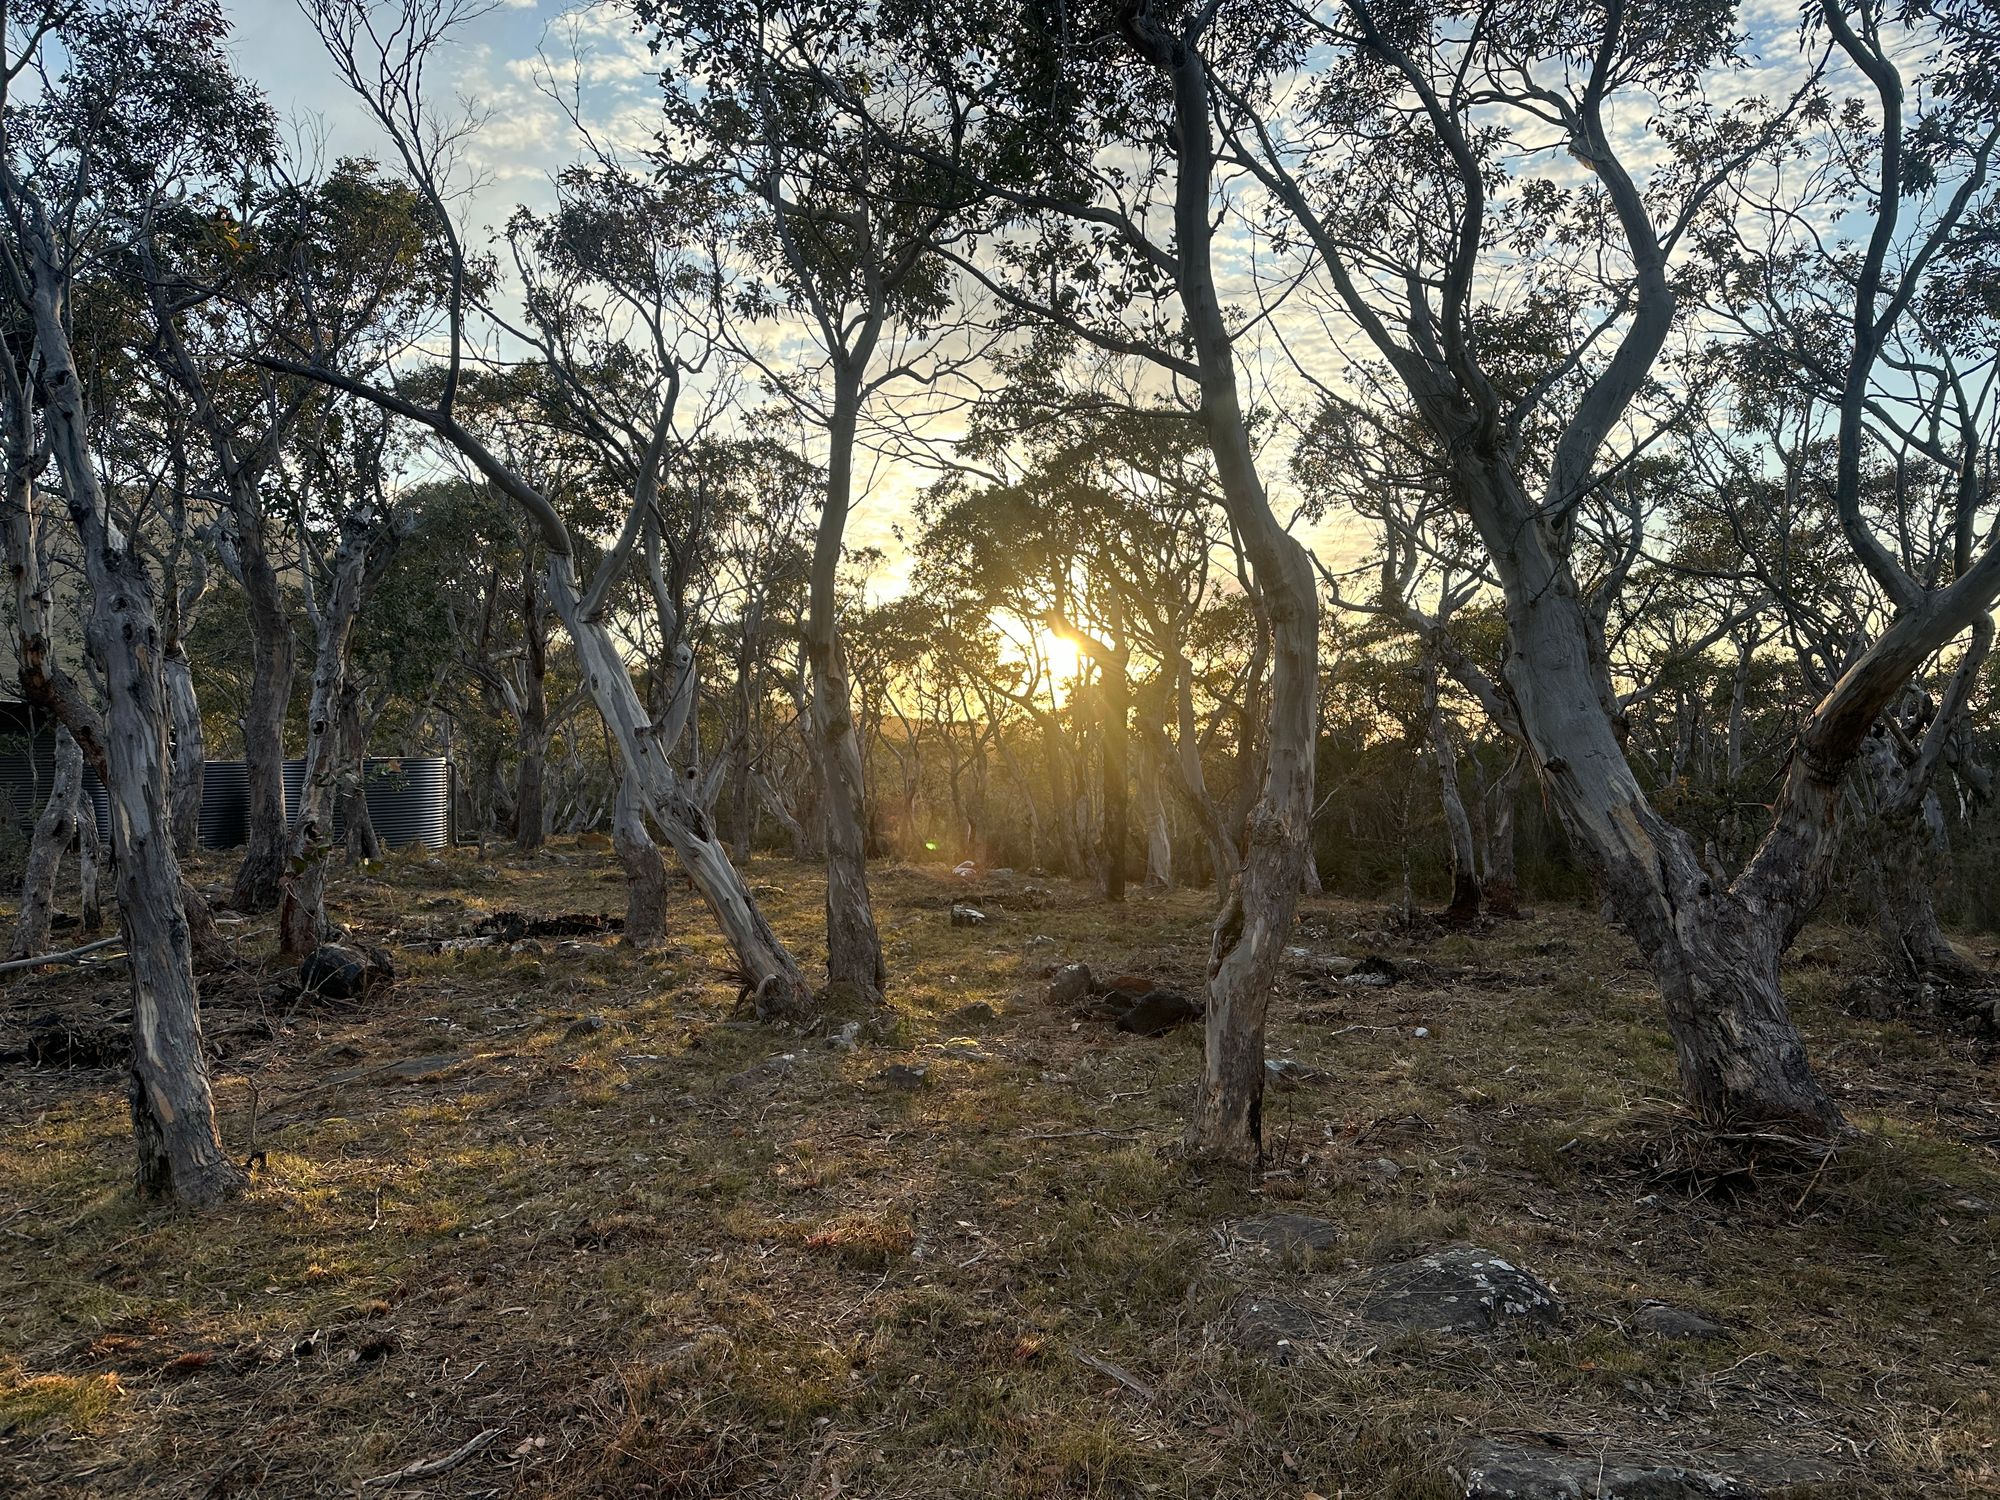
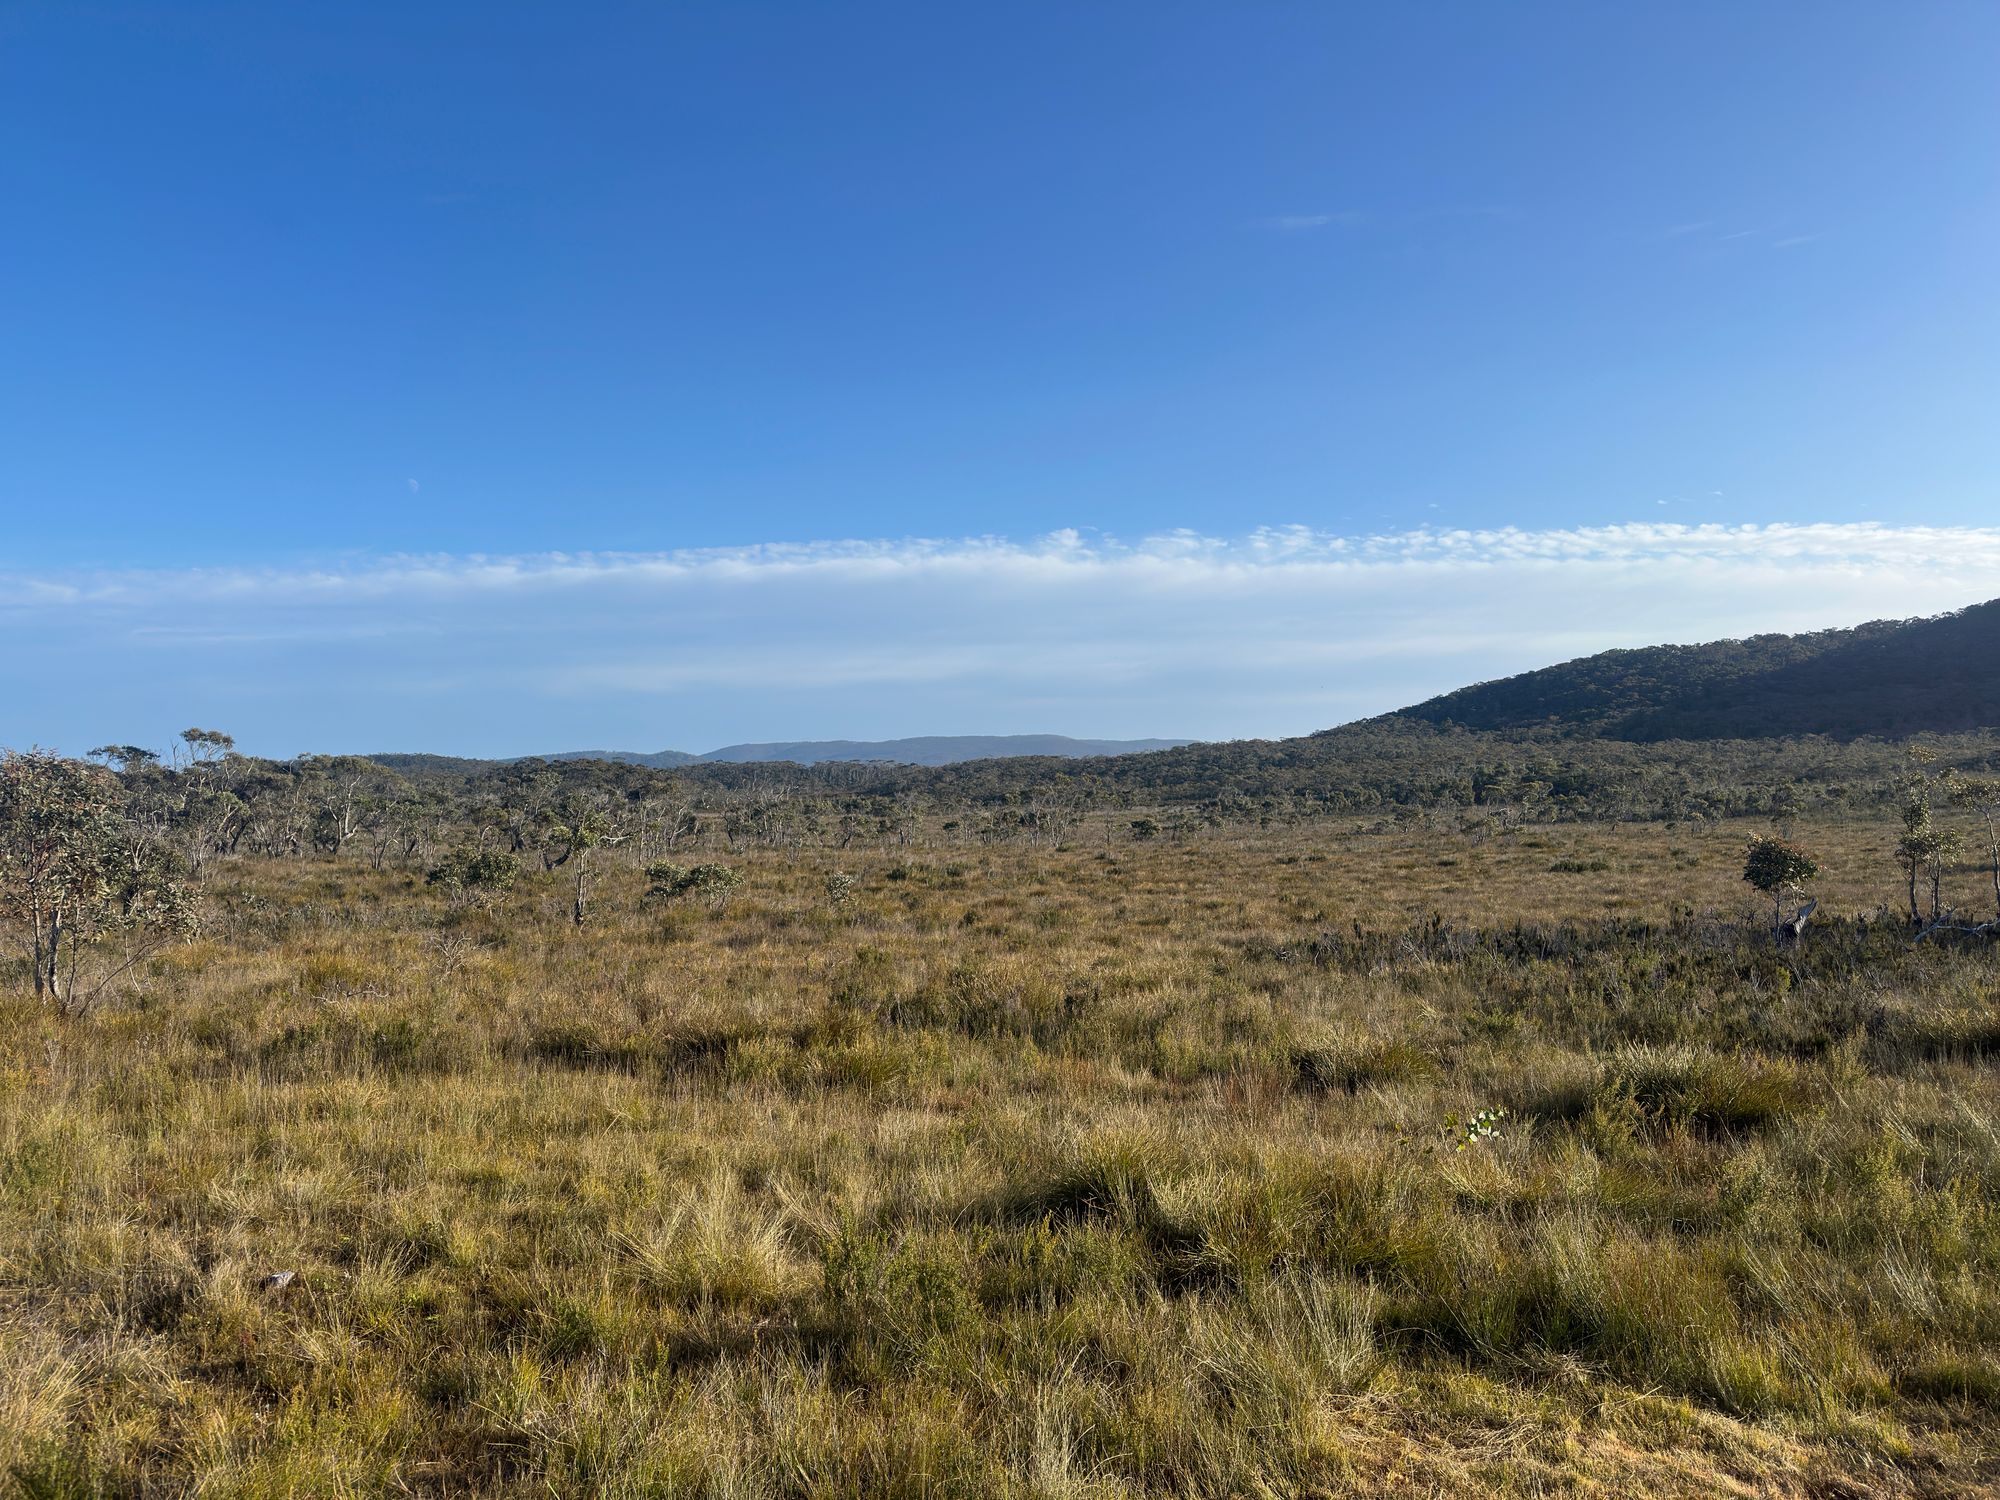
I get back to the bag hut, pick up my bag and start heading for Retakunna hut, the last hut for the walk. When I get to Retakunna I’m pleased to see wild Tasmanian grasslands surround the hut. The wind had started to die down. It was quite peaceful and a great respite from the wind. The rest of the day is uneventful.
Day 4 - Up, over, out and back
Retakunna to Port Arthur - via Cape Hauy and Fortescue Bay,
14 km
This was my earliest start for the entire walk at 7:30 am. The start of this walk requires you to summit Mount Fortescue (483m) and slowly make your way to the last cape.
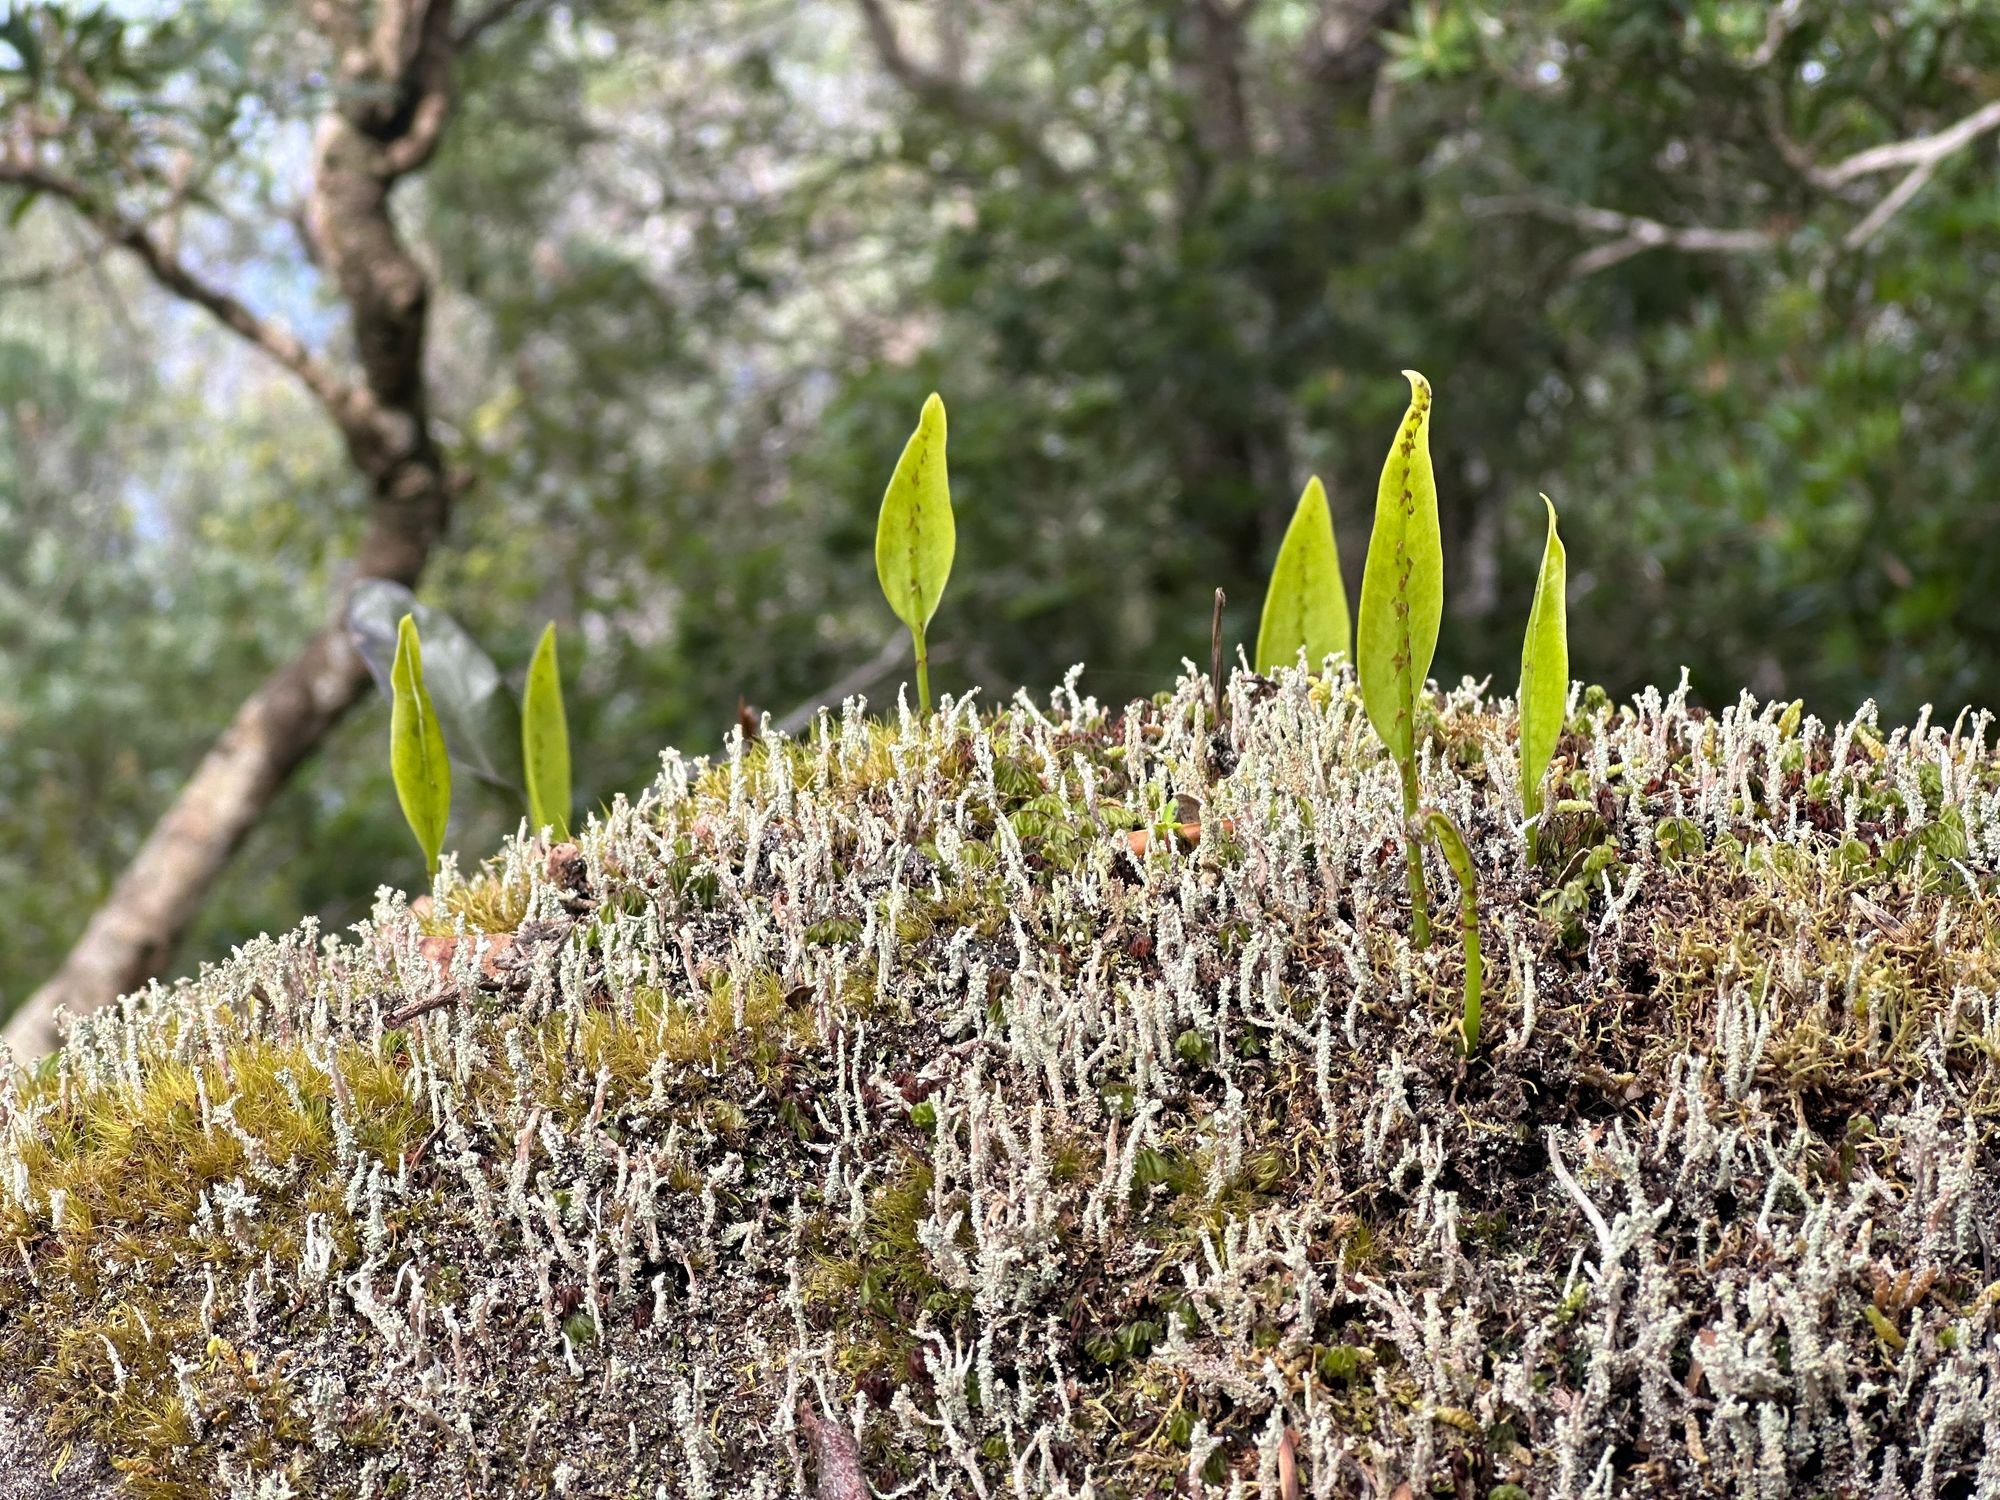
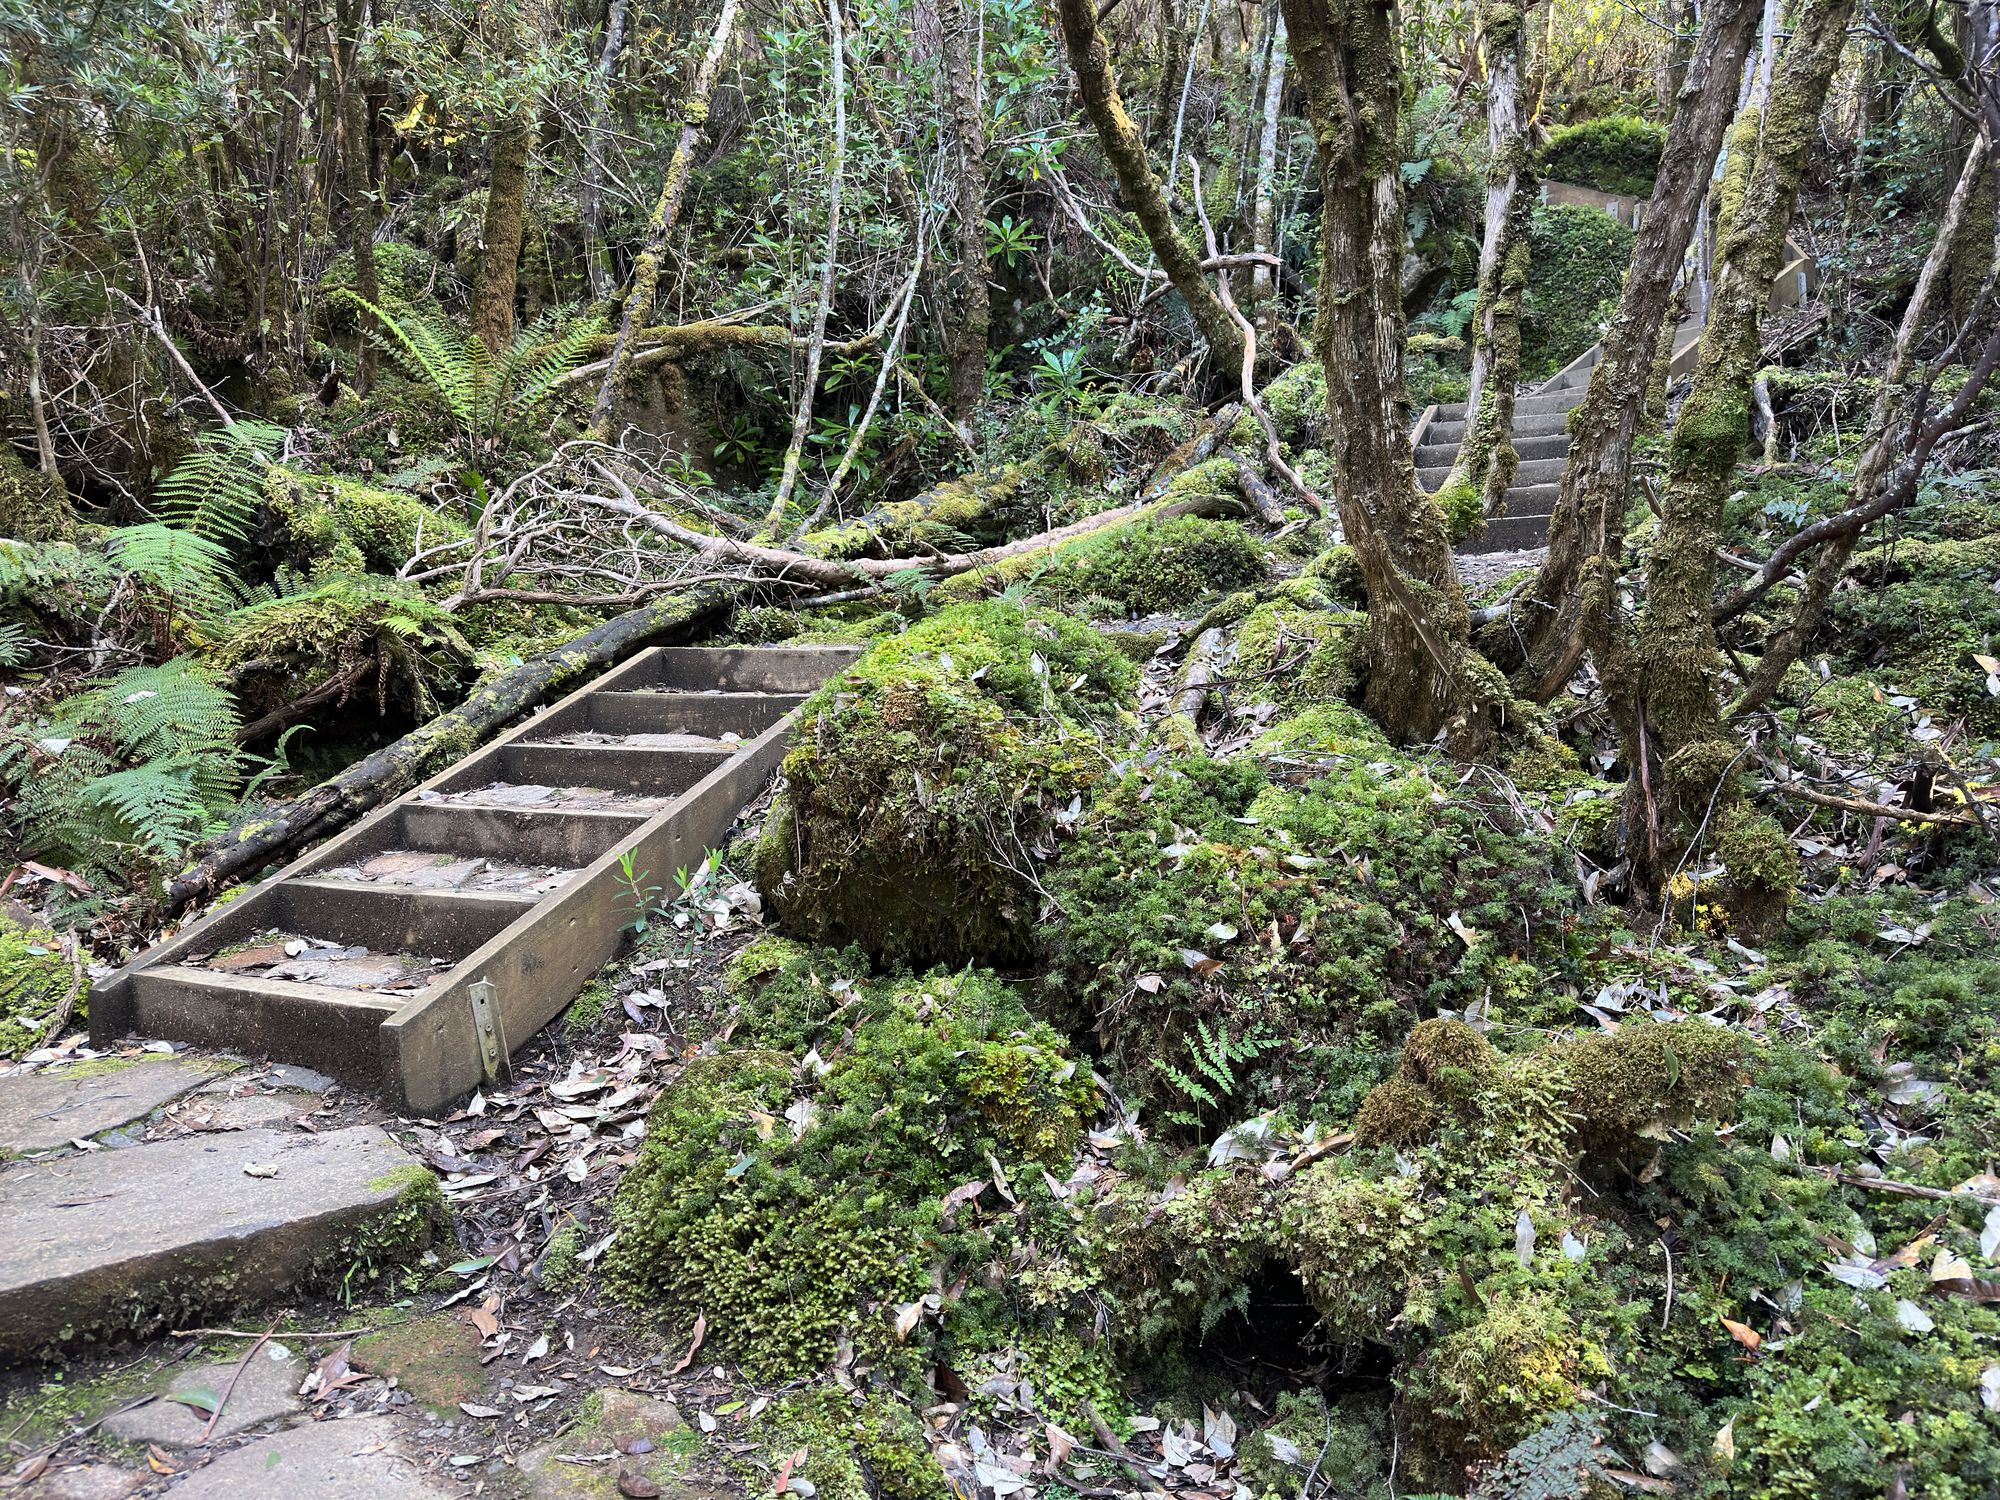
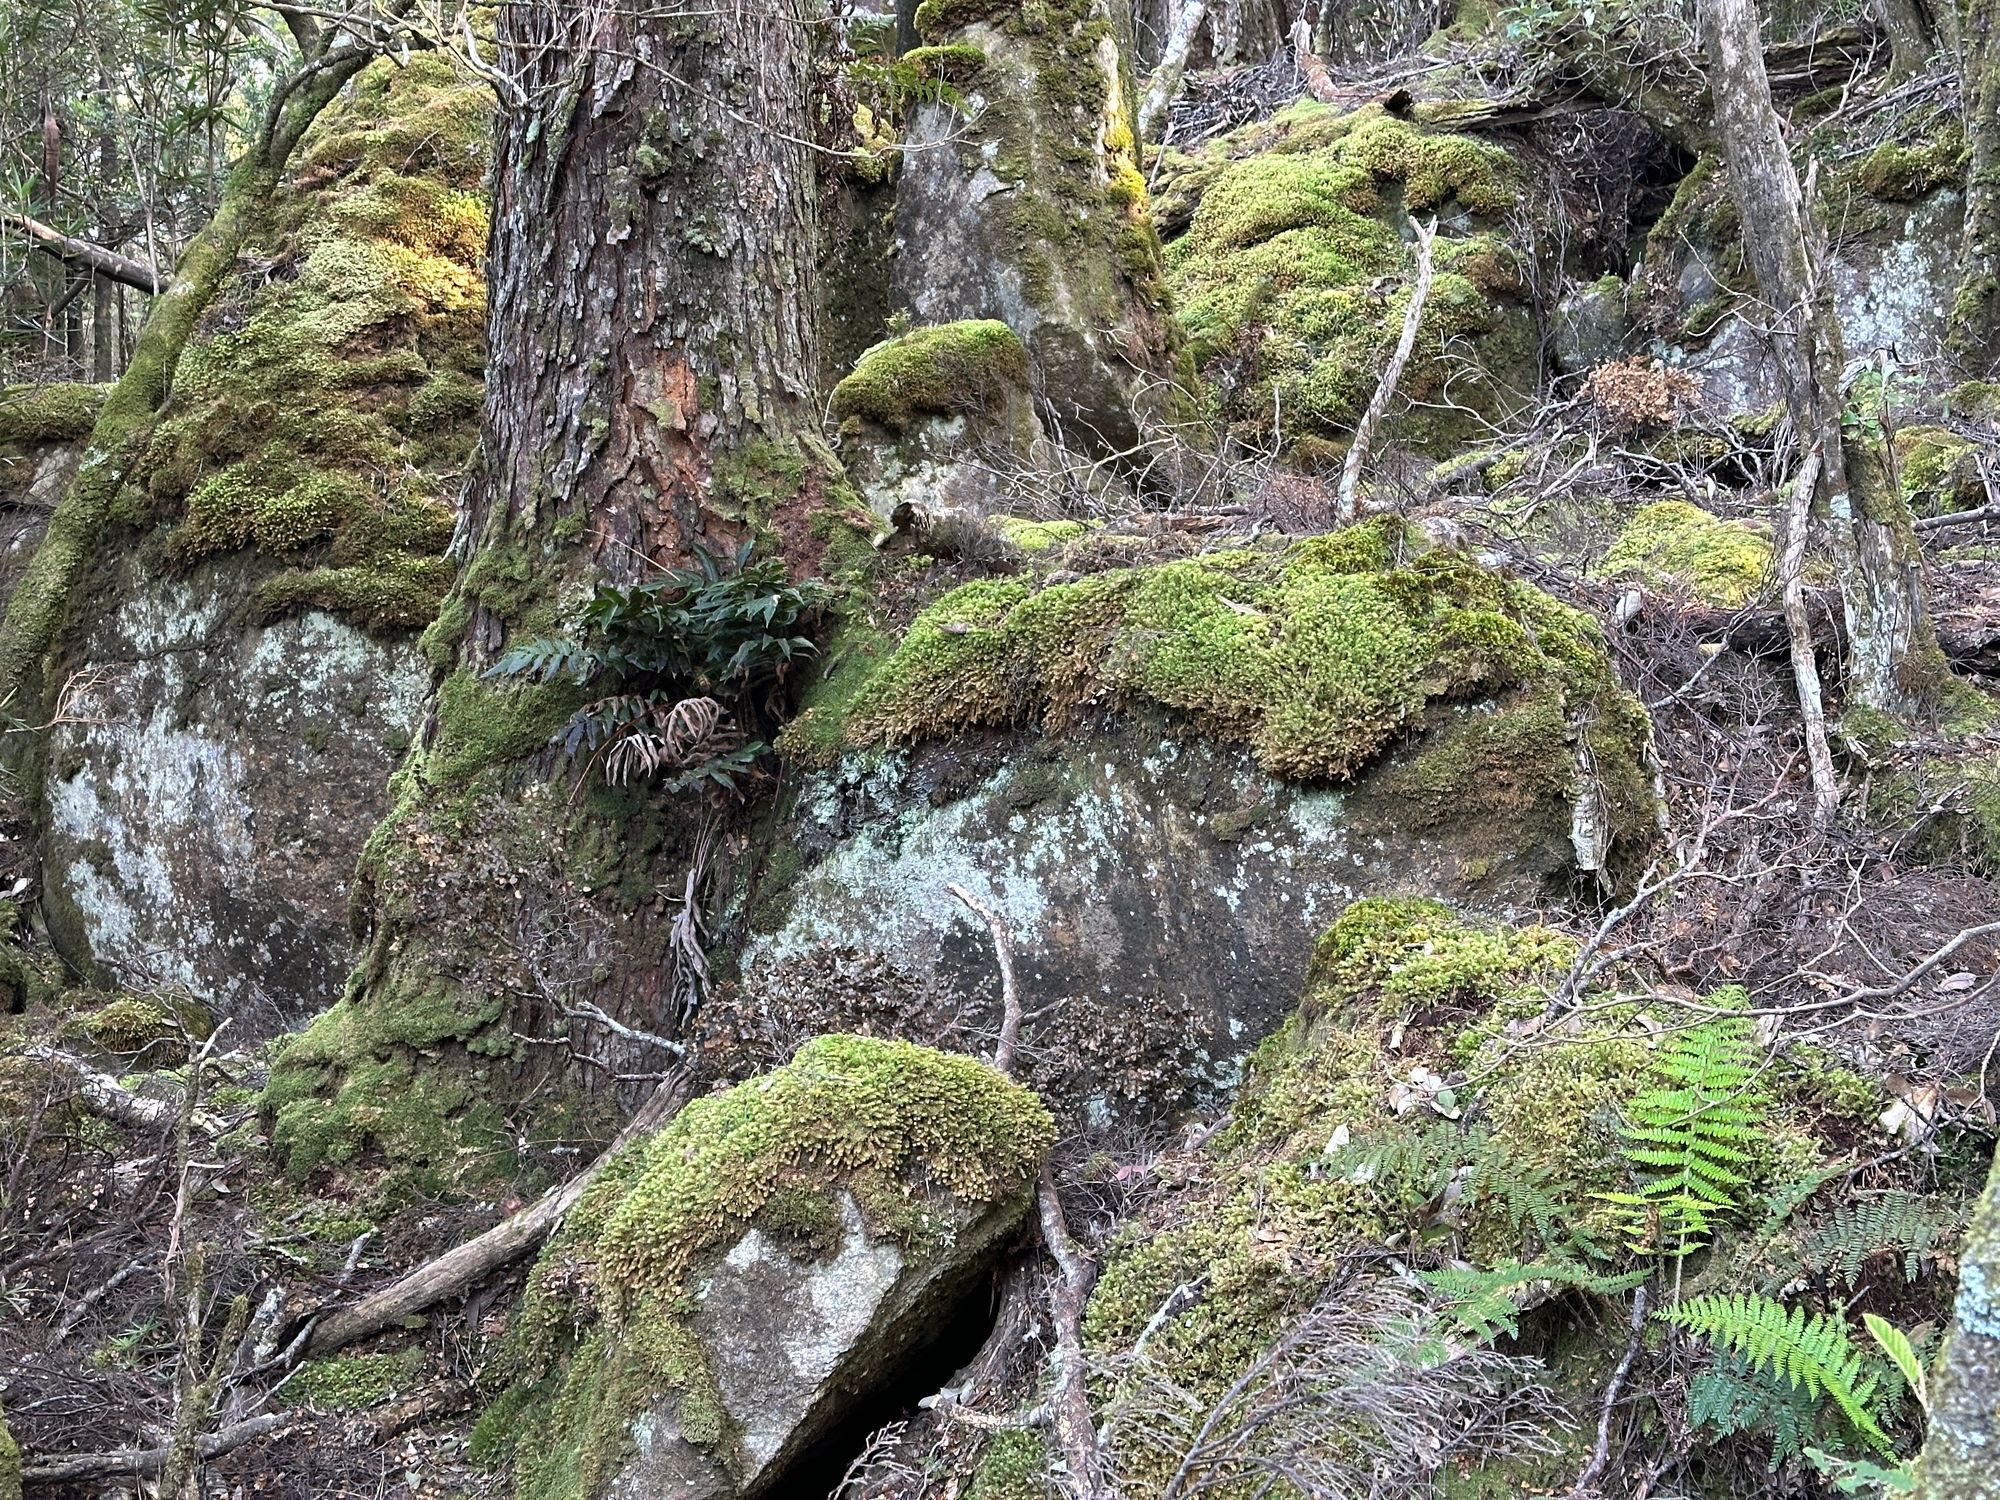
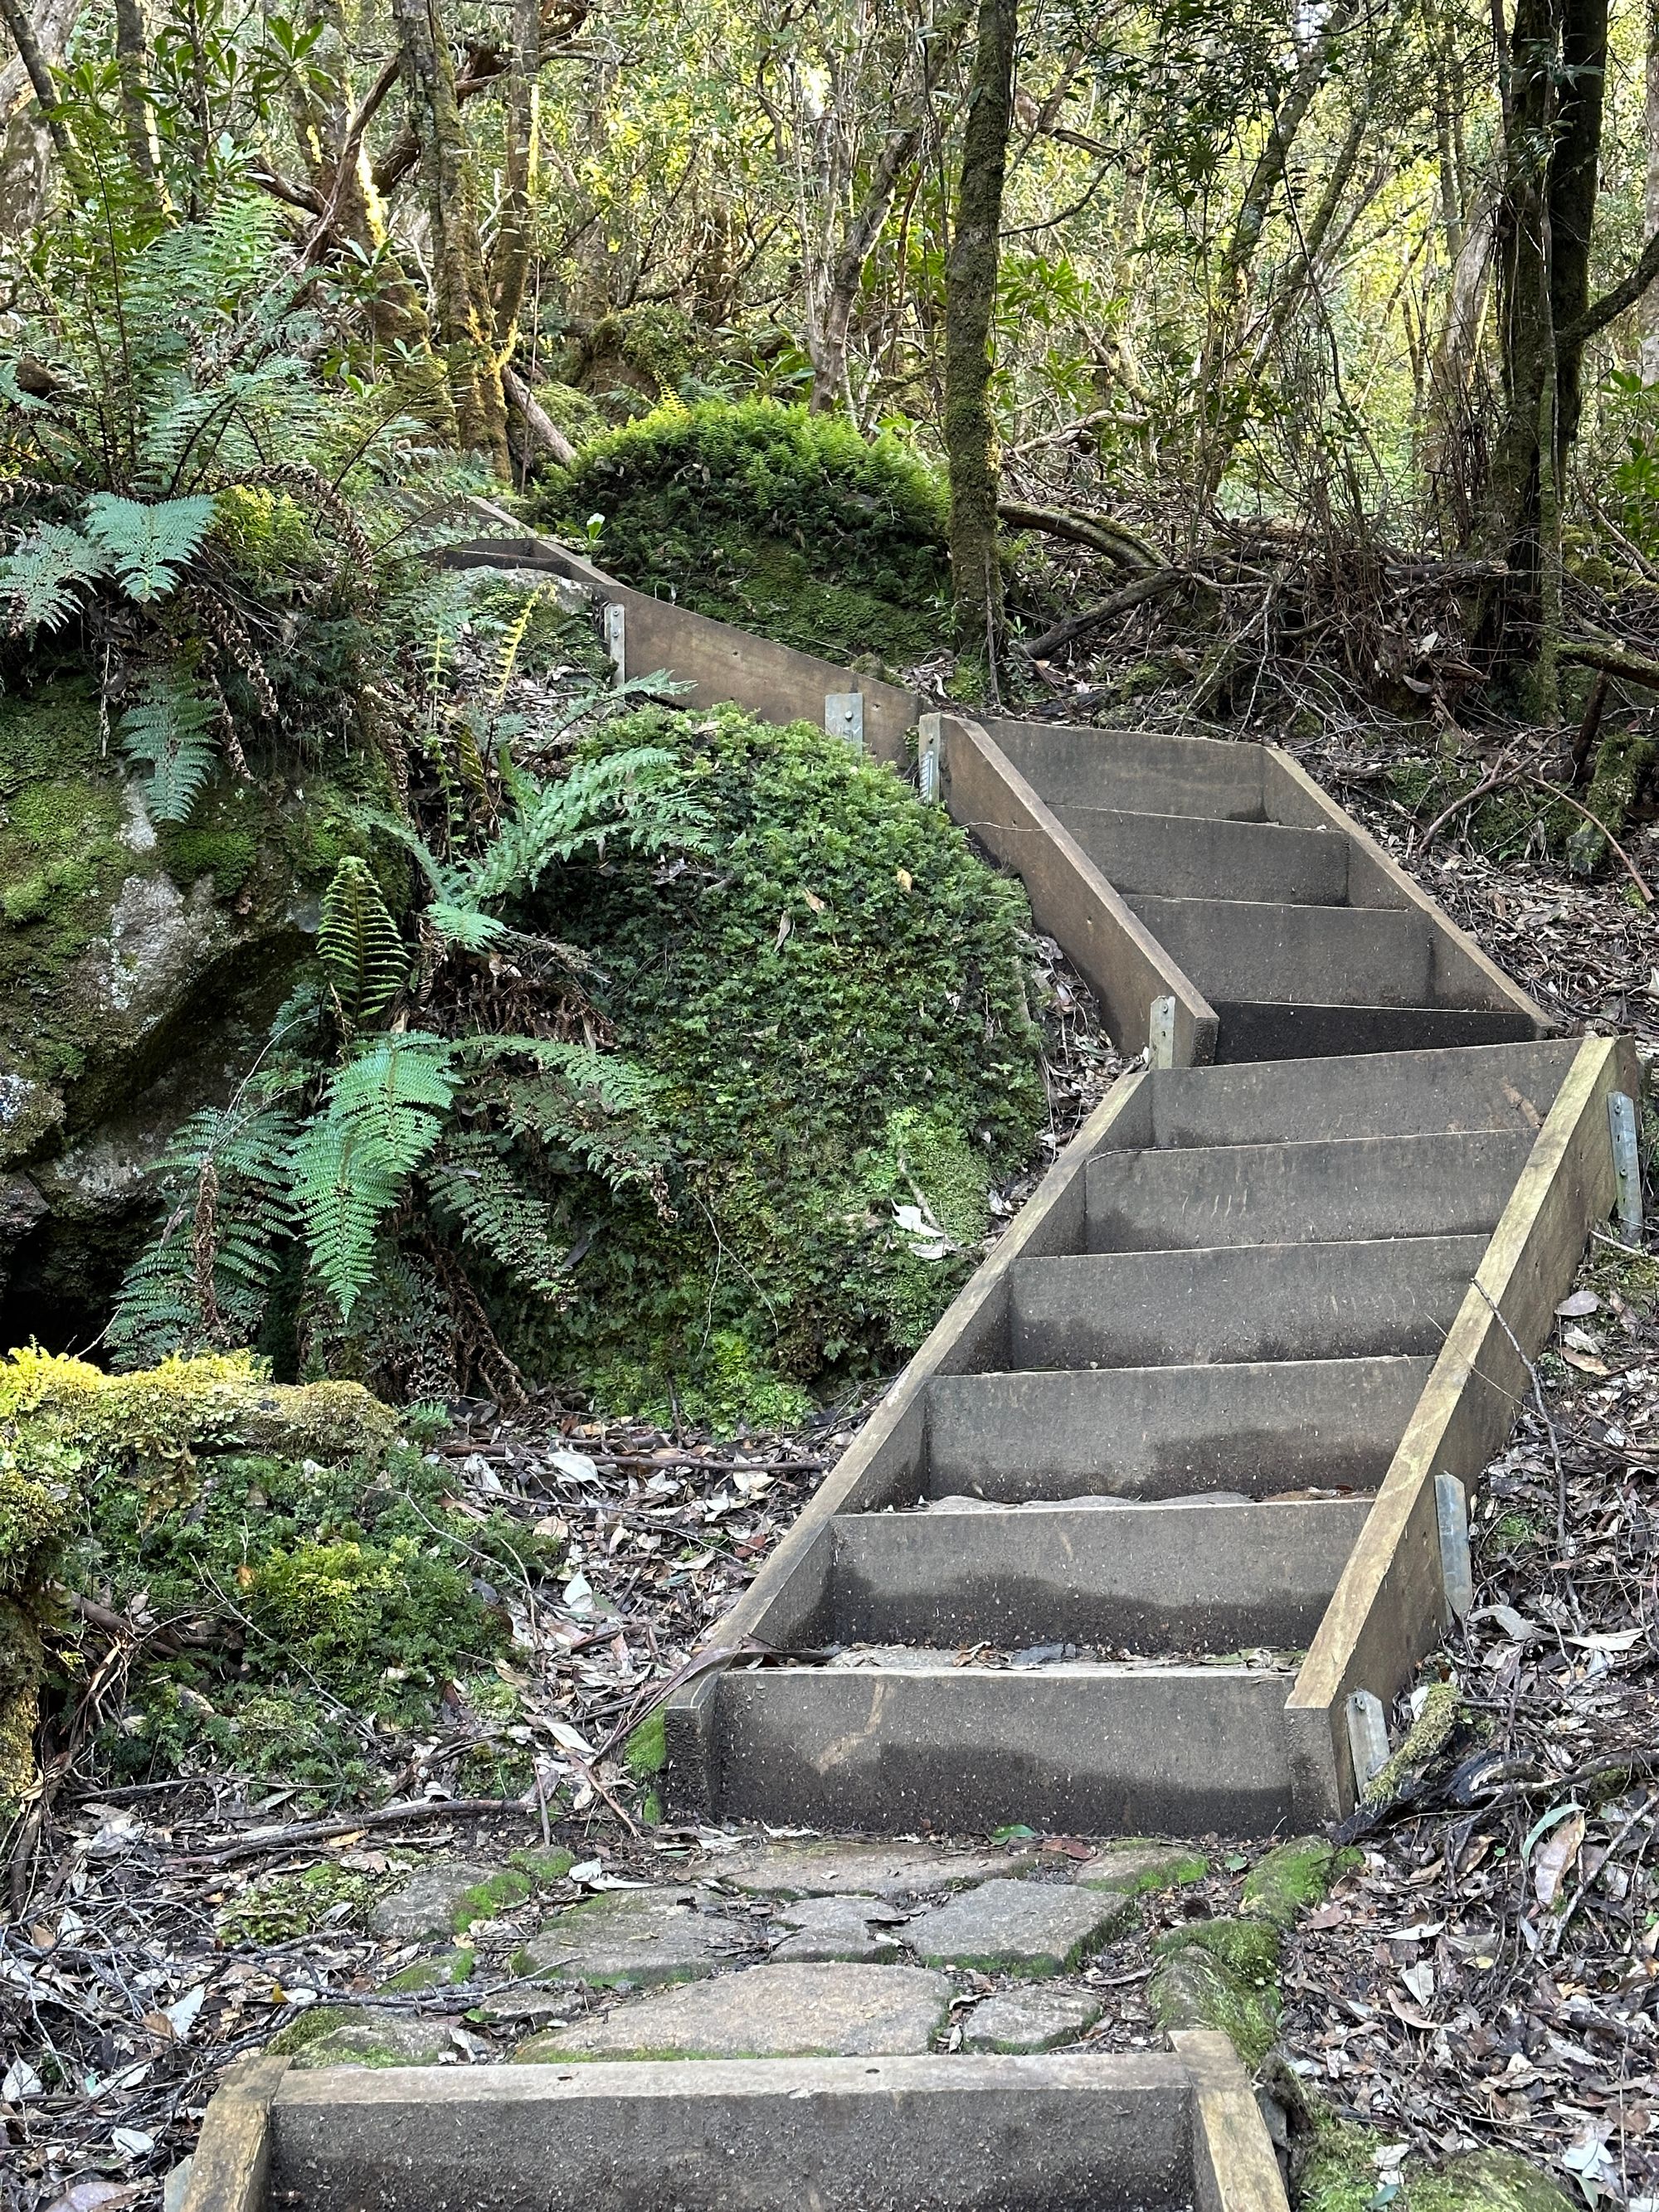
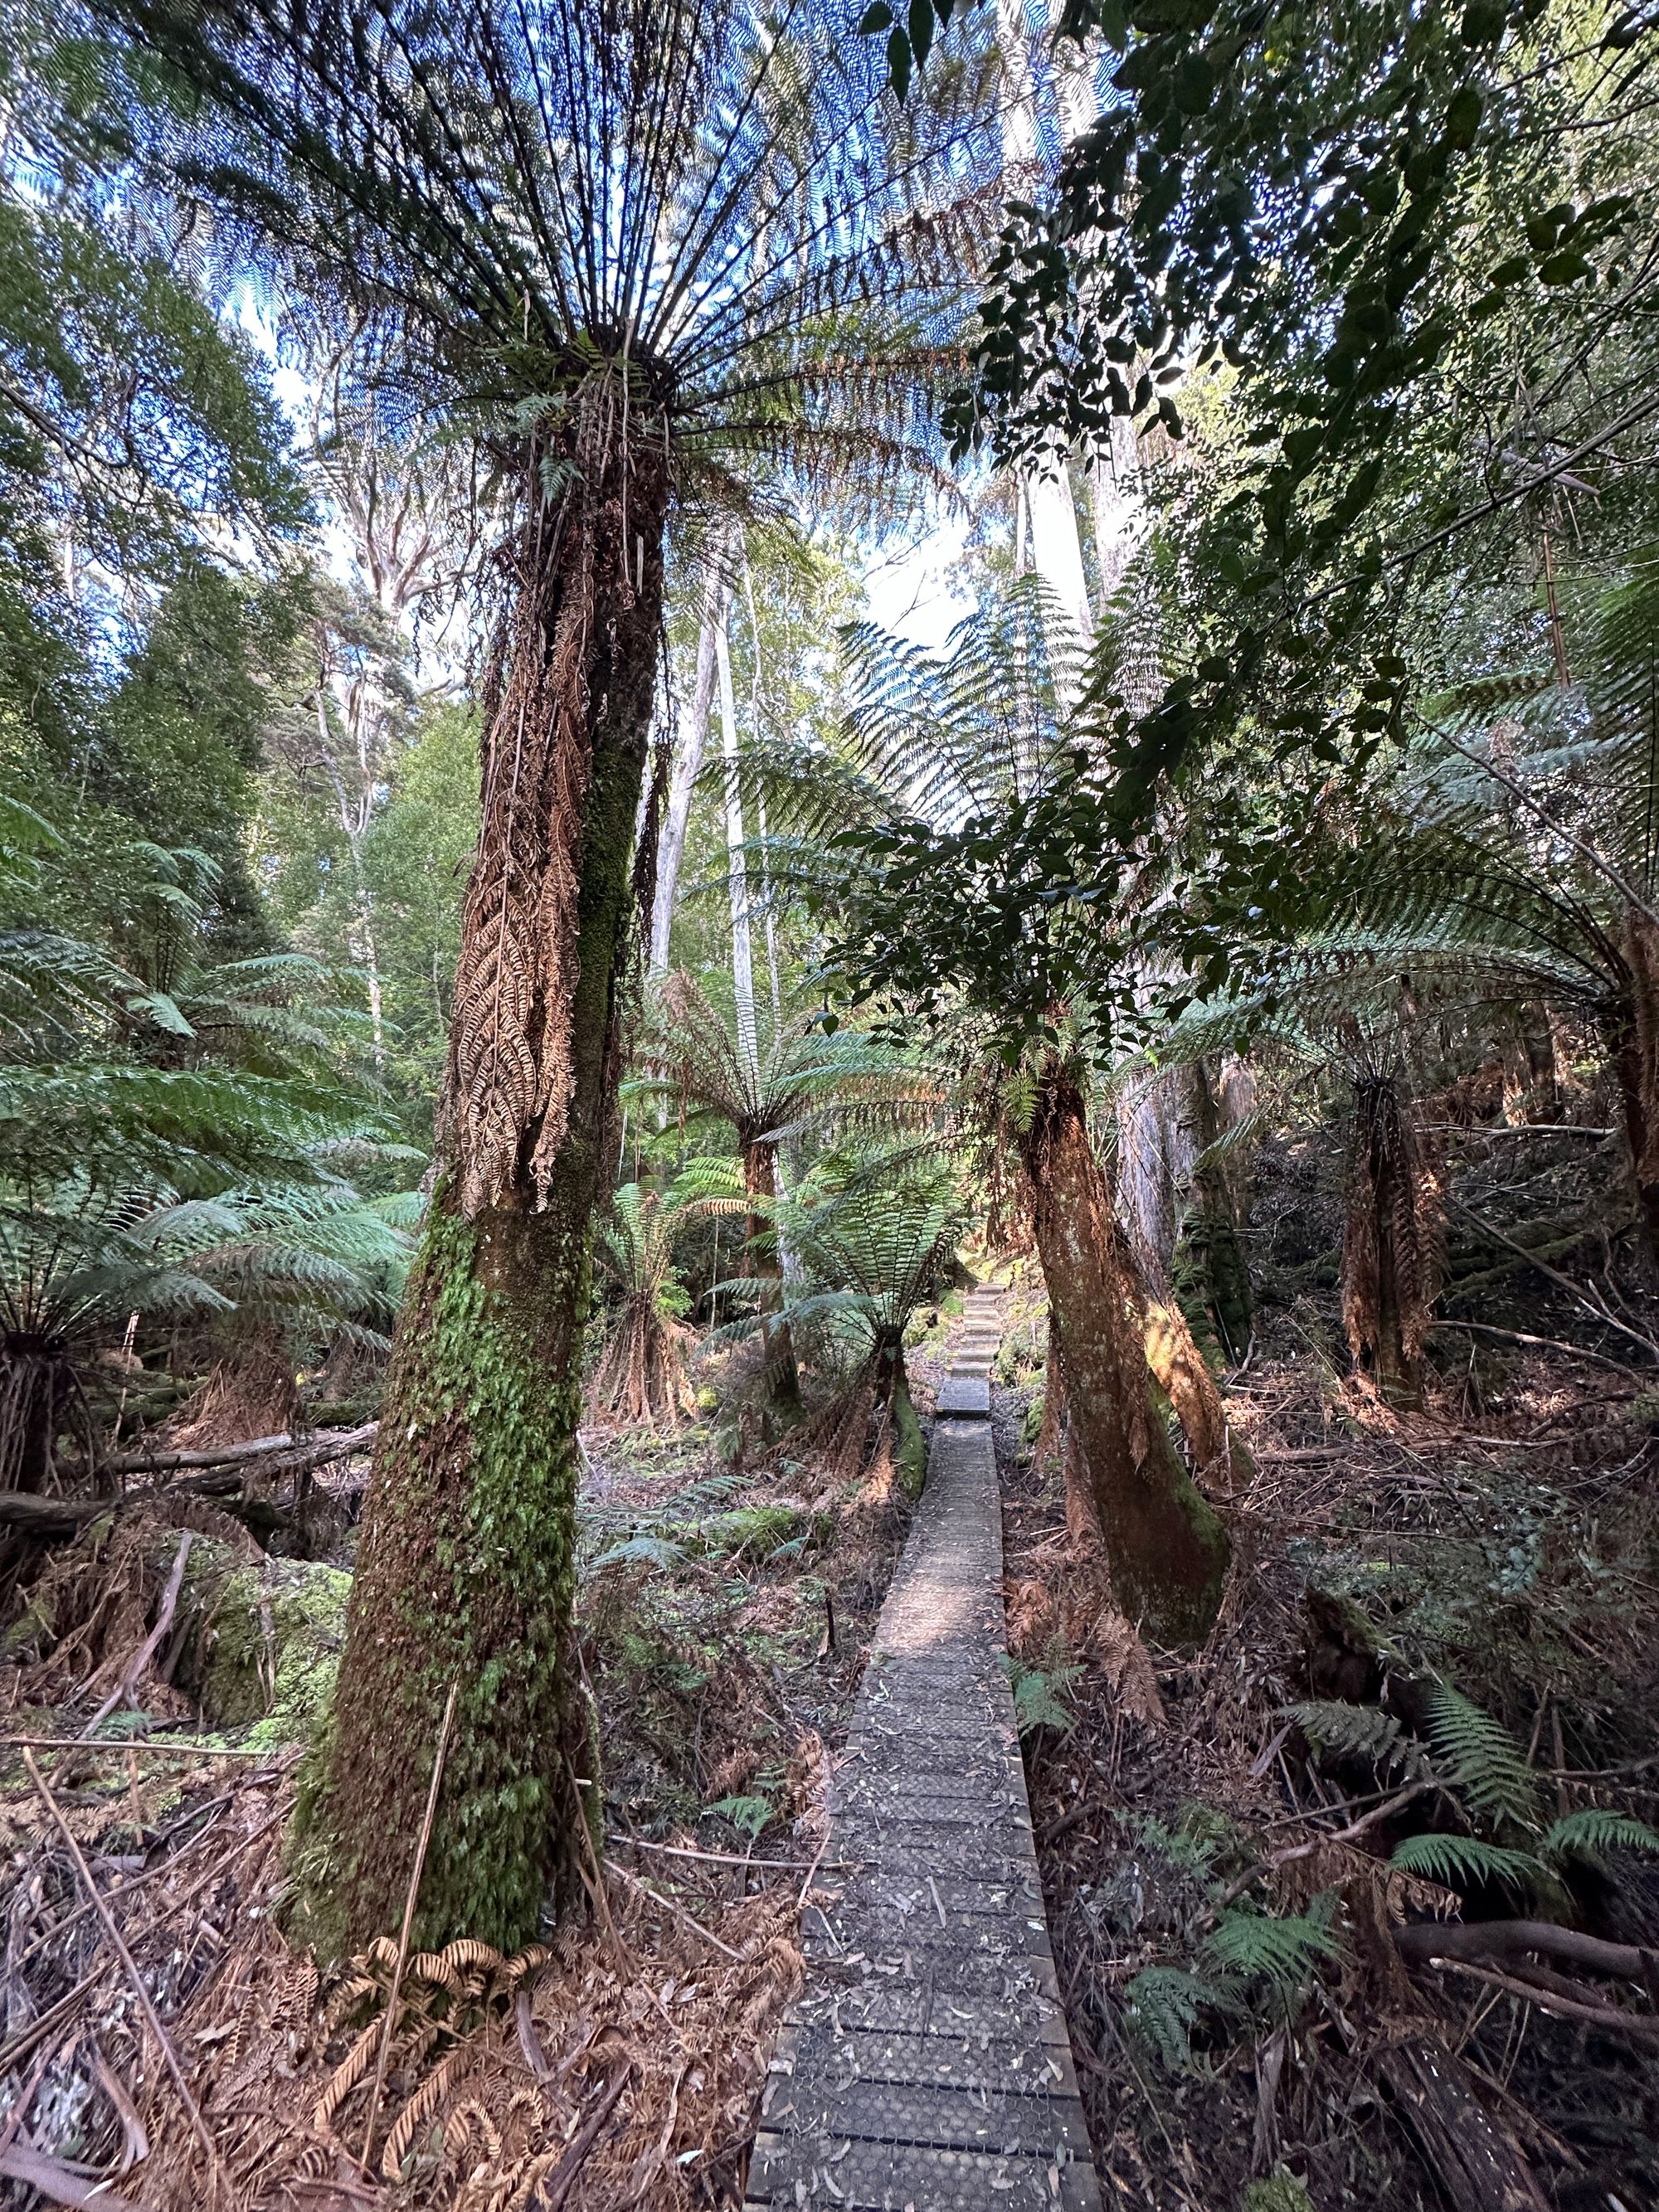
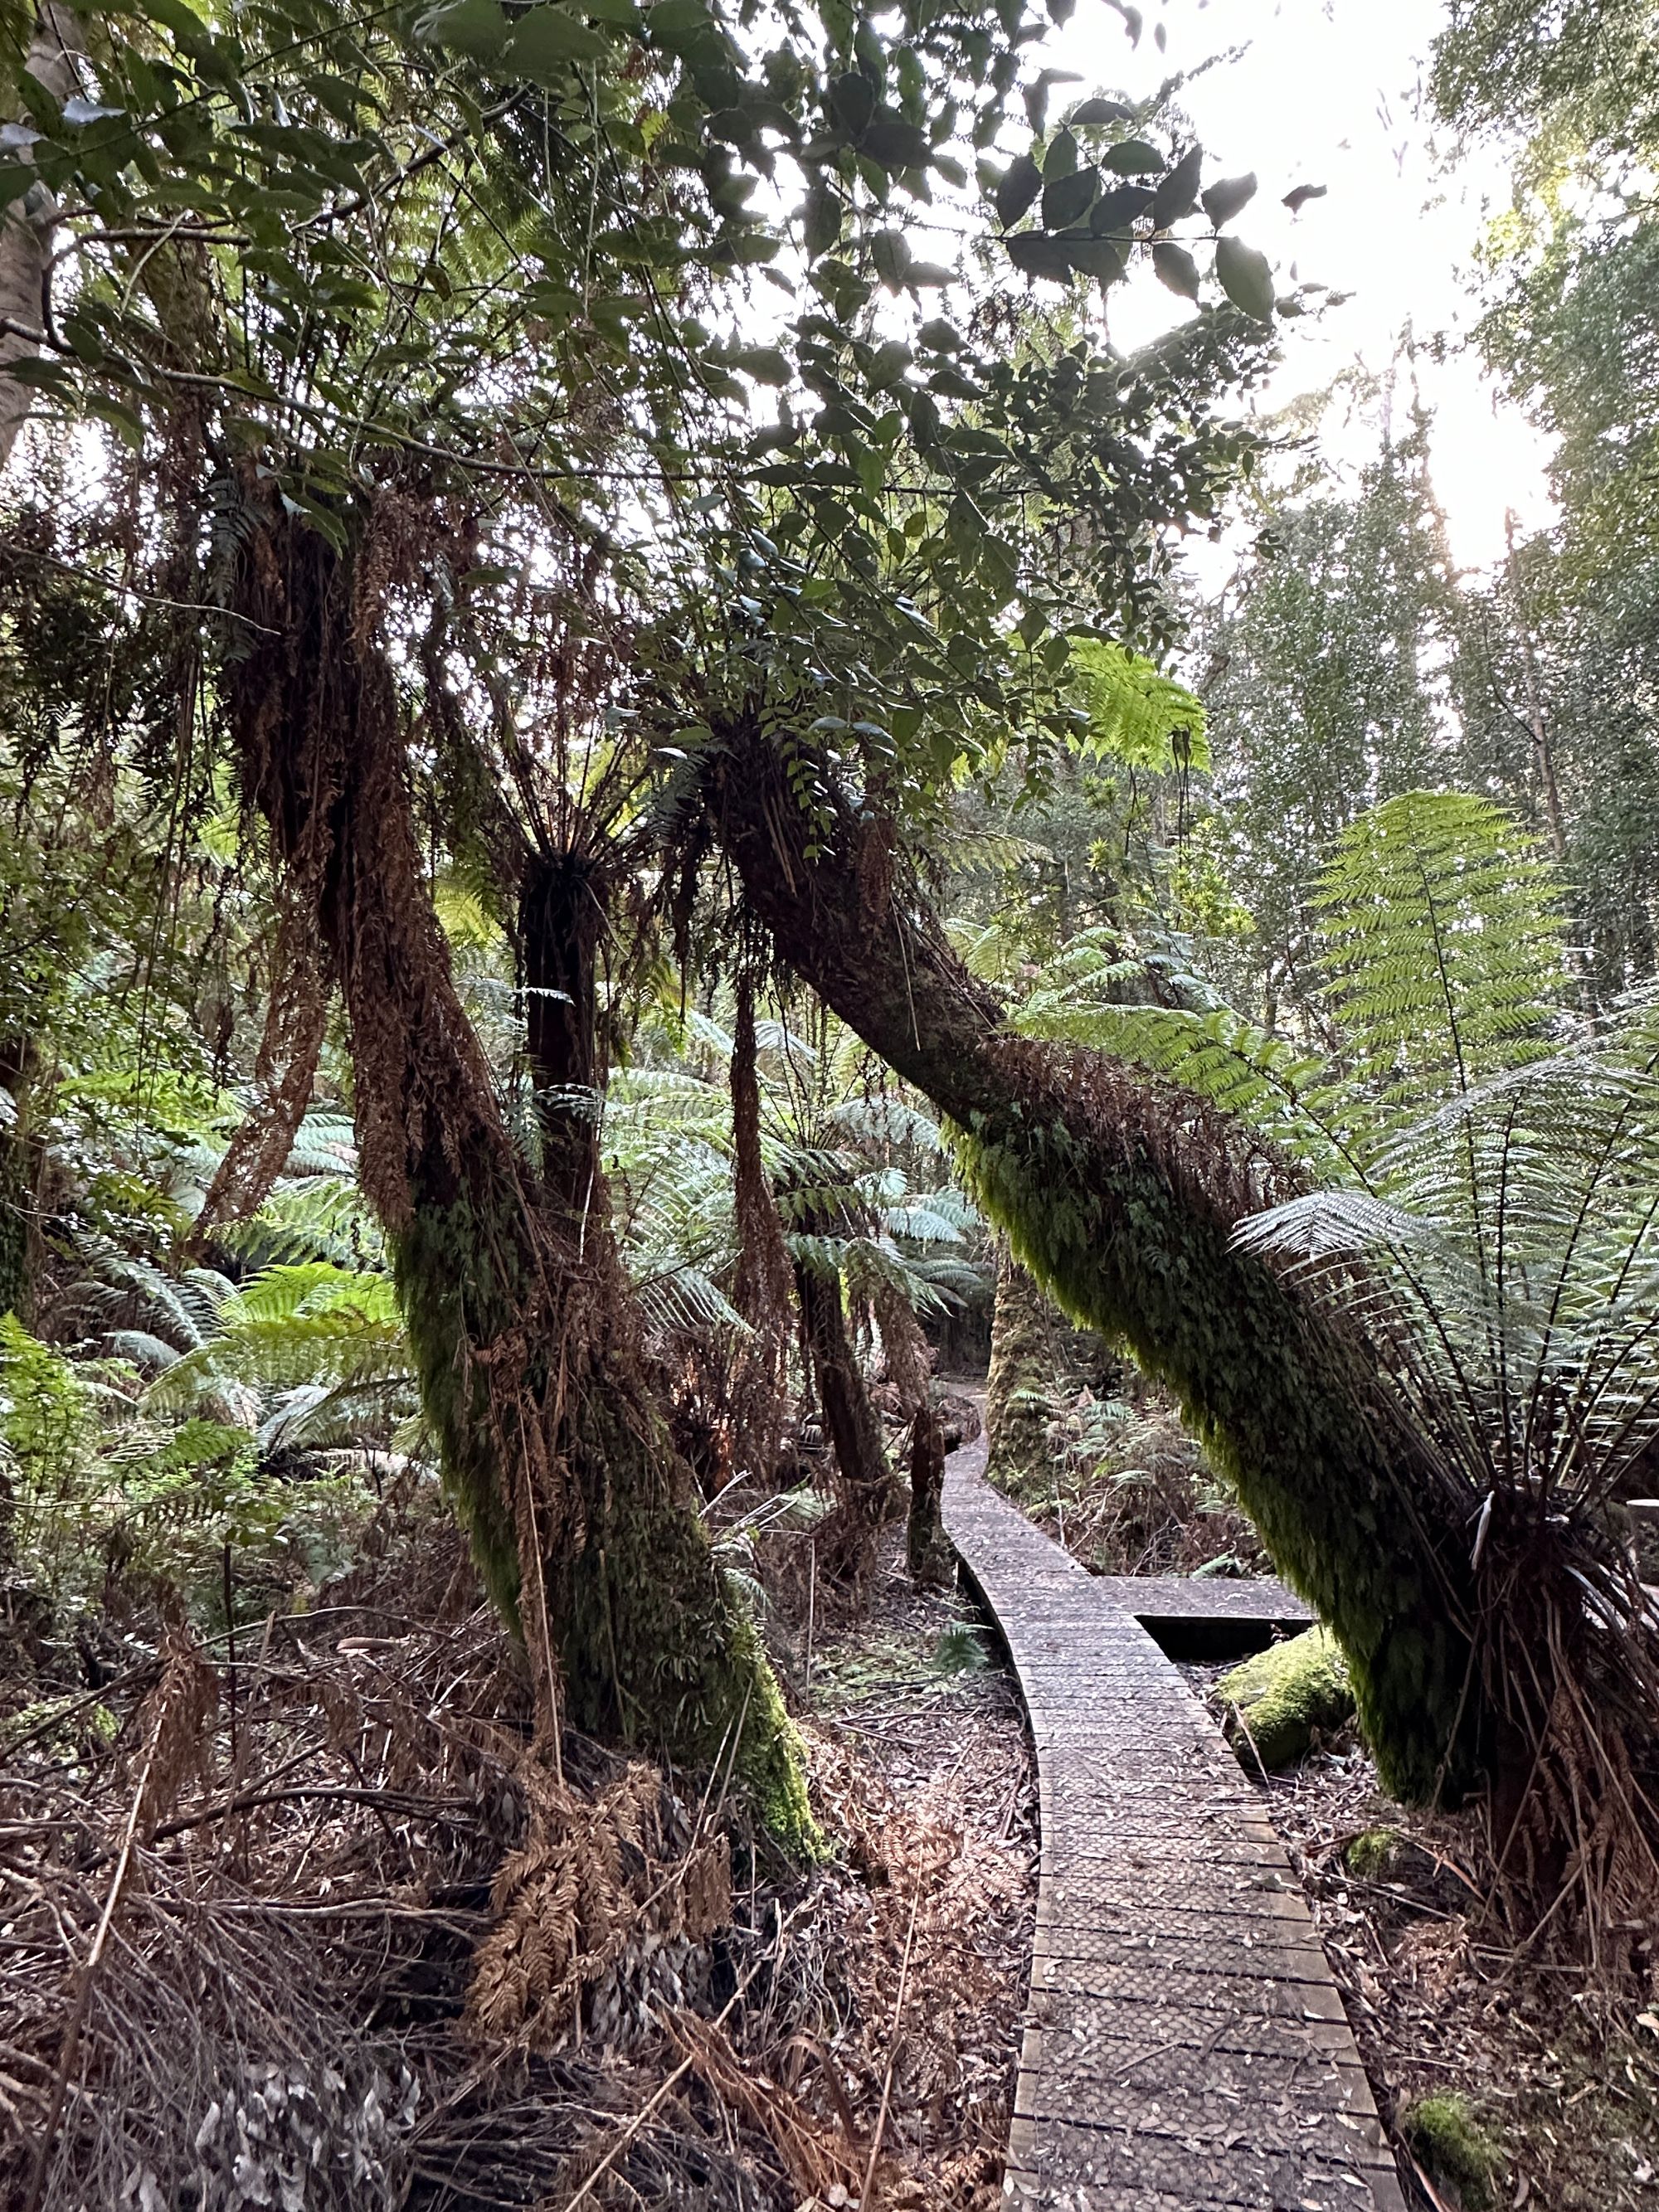
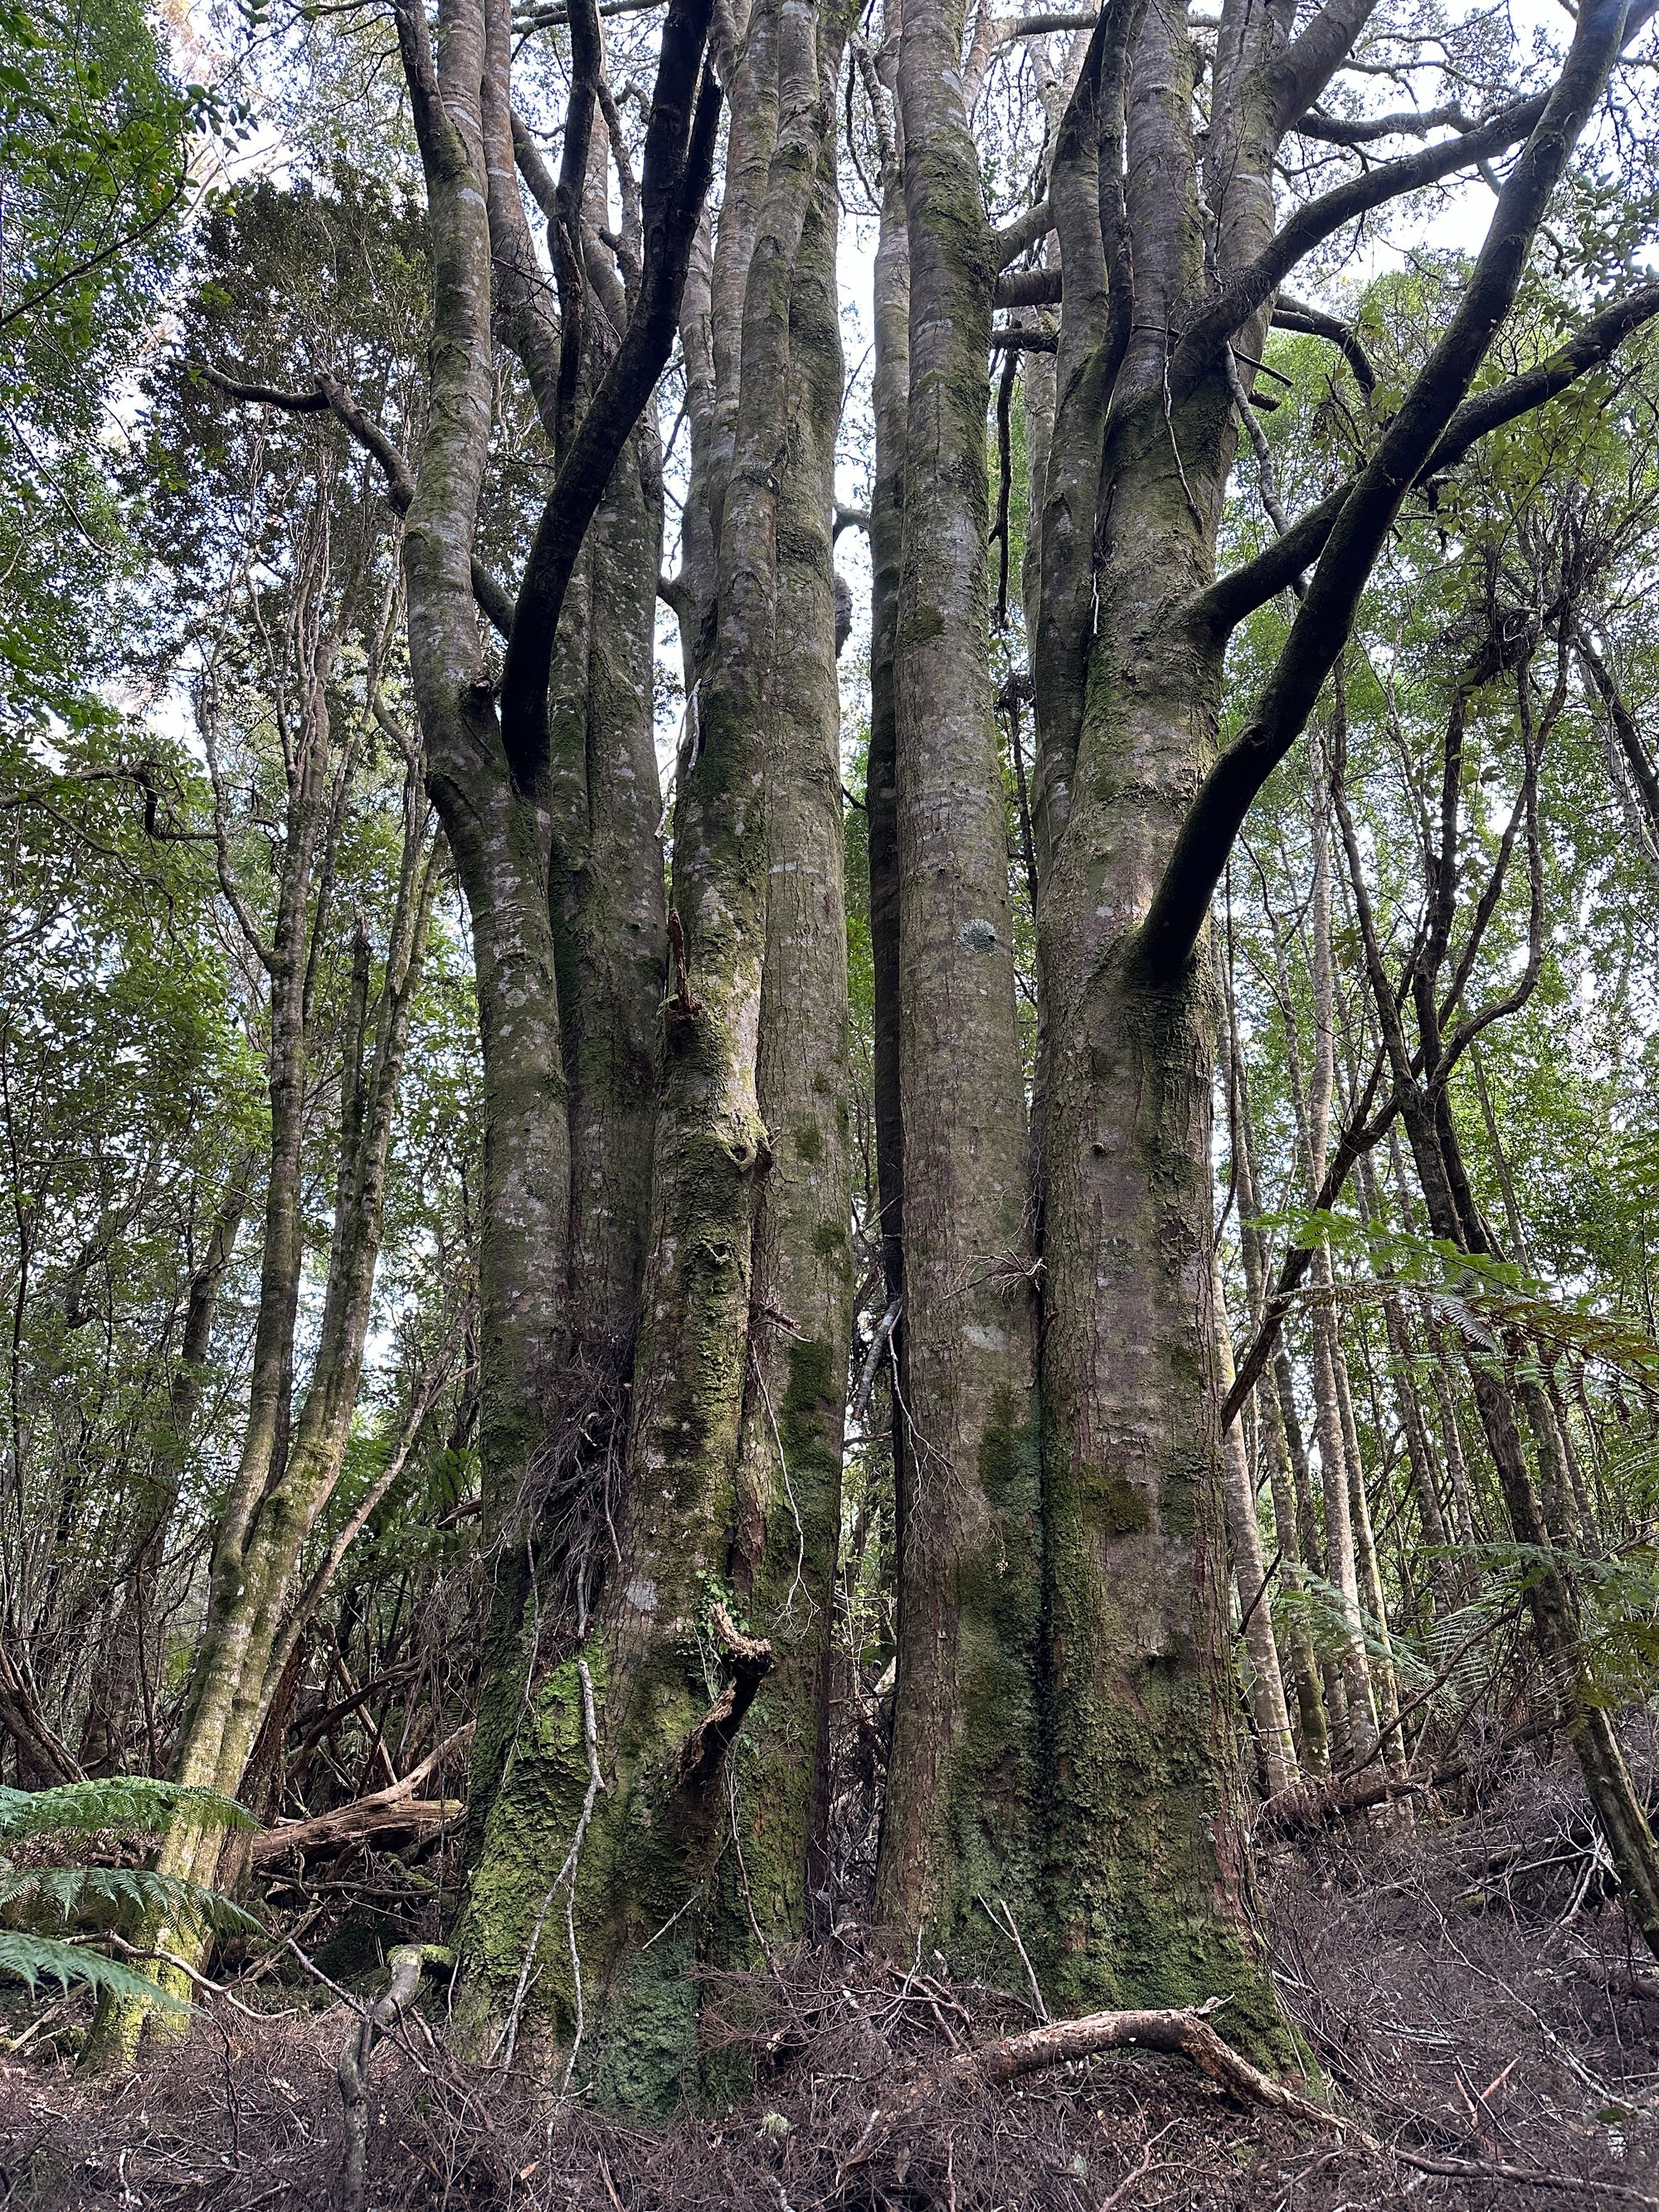
Walking up Mount Fortescue requires you to weave through a rainforest on the side of the mountain. I’m doing this extremely early in the morning and the entire rainforest is quiet and still. It’s quite magical. There are lots of moss-covered rocks and logs.
After you reach the Summit, you start to descend the other side of the mountain, you encounter these giant tall ferns completely contrasting the rainforest on the other side of the mountain.
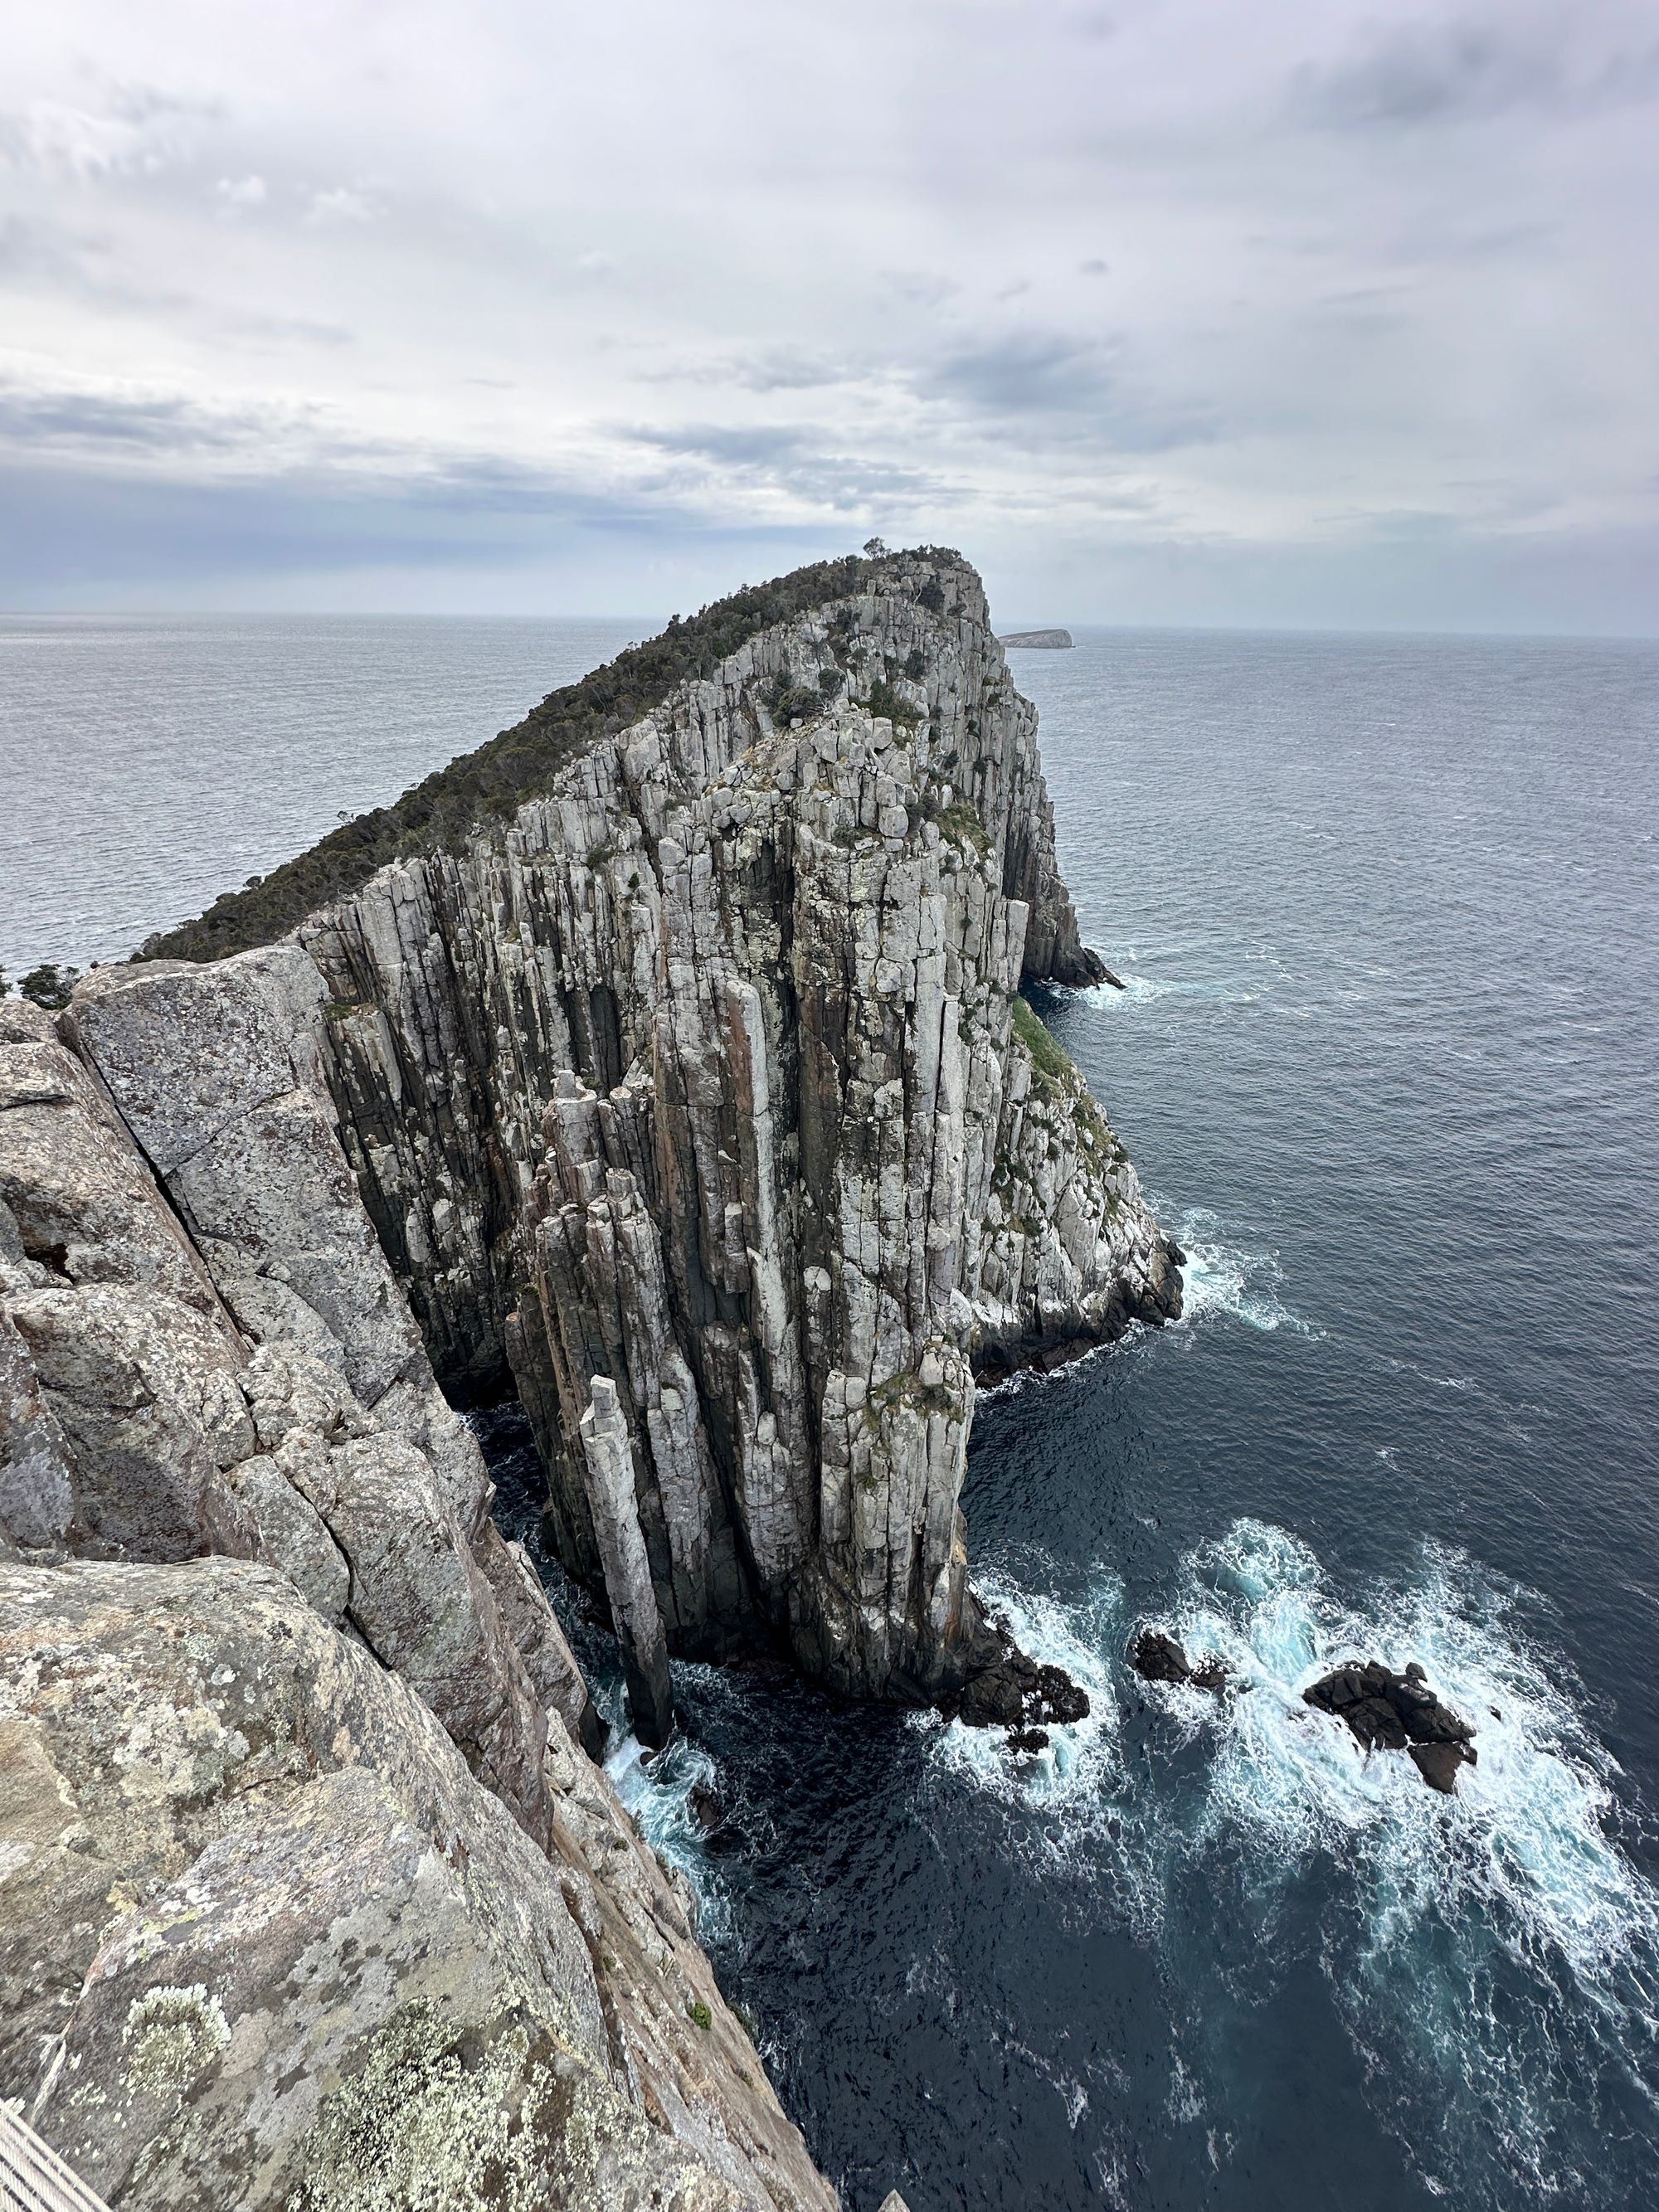
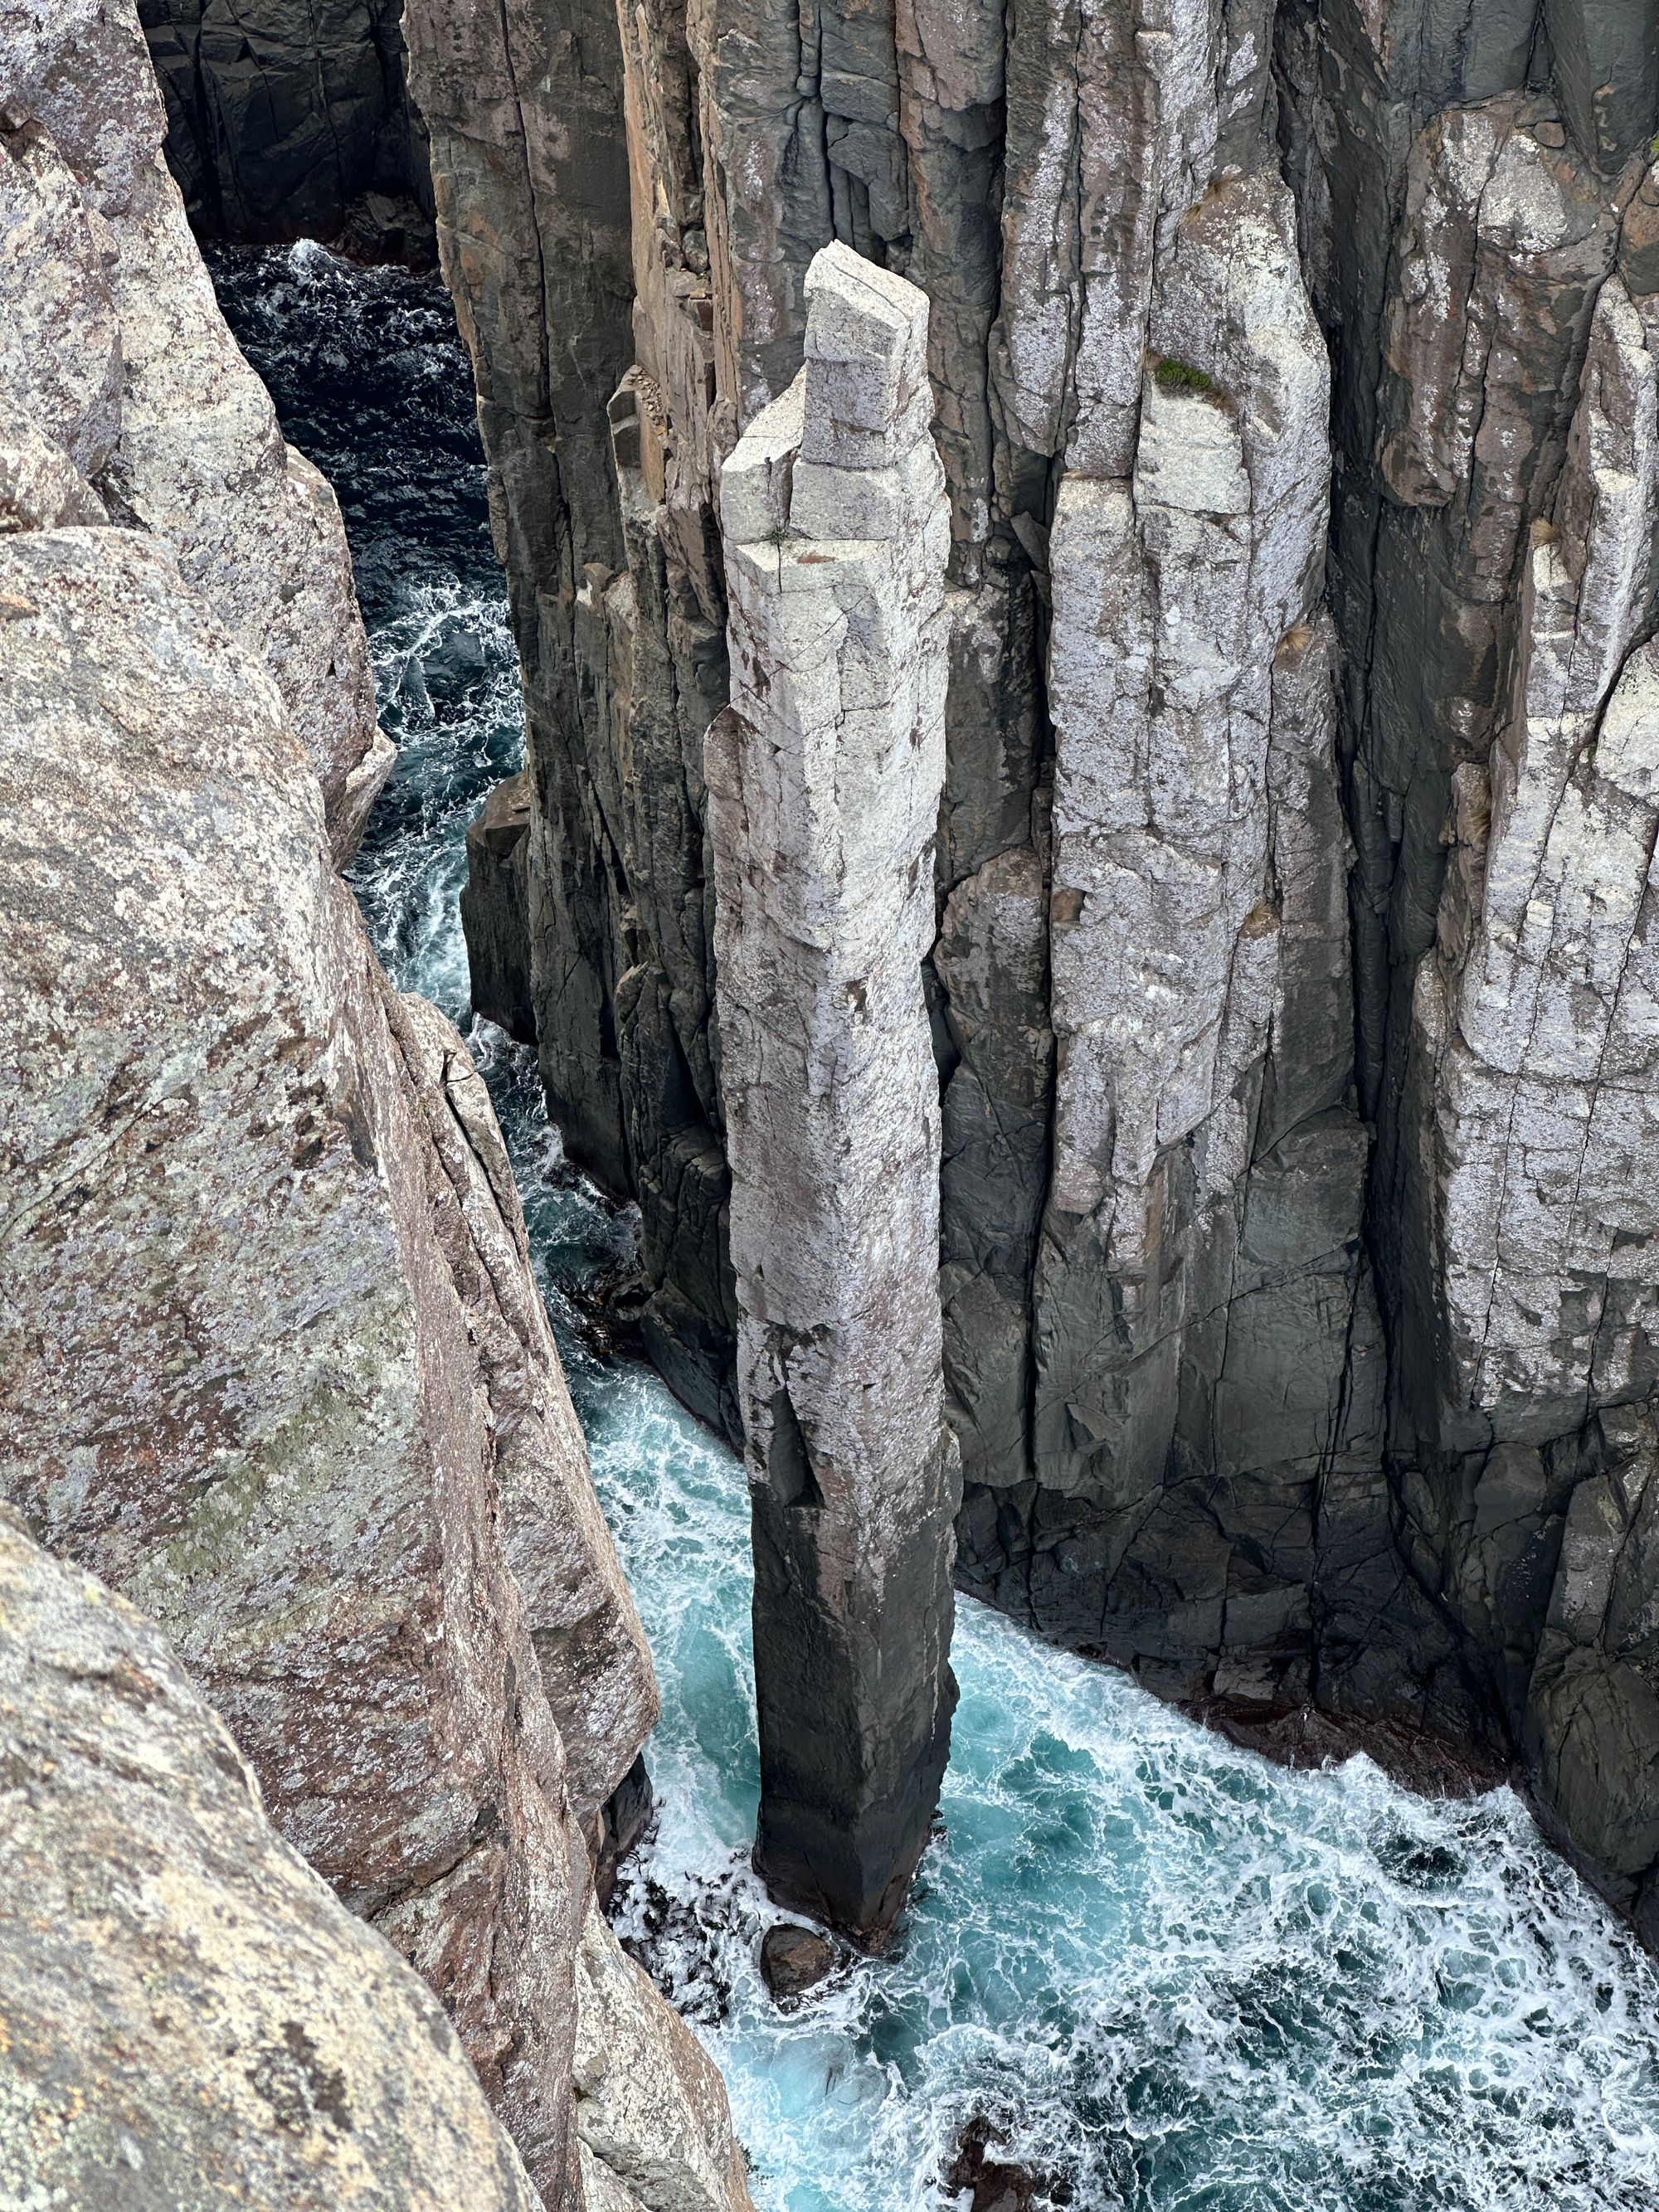
After a while, the bush changes back to heath. I finally get to the last intersection where we dump our packs temporarily and head for Cape Hauy, the last cape. After not too long, I reach Cape Hauy. The views from this cape are quite spectacular with a lot of unique rock formations like The Candlestick and Totem Pole. I stay here for a little while before finishing the entire walk with the last leg to Fortescue Bay, where a bus takes us back to our cars.
With the walk done, we say our goodbyes and off we go. I quite enjoyed this walk. This was a new way of multi-day walking for me. The lodges were great and not needing to carry cooking gear was a bonus.
A note about the 'three' capes. The walk includes two of the three capes. Some fit walkers do the first cape, Cape Raoul before the boat ride on Day One.